Overview
After completing Shipping & Packaging, the user will next be brought to the Labels/brandit checkout section. Labels is broken into 3 sections so the user can
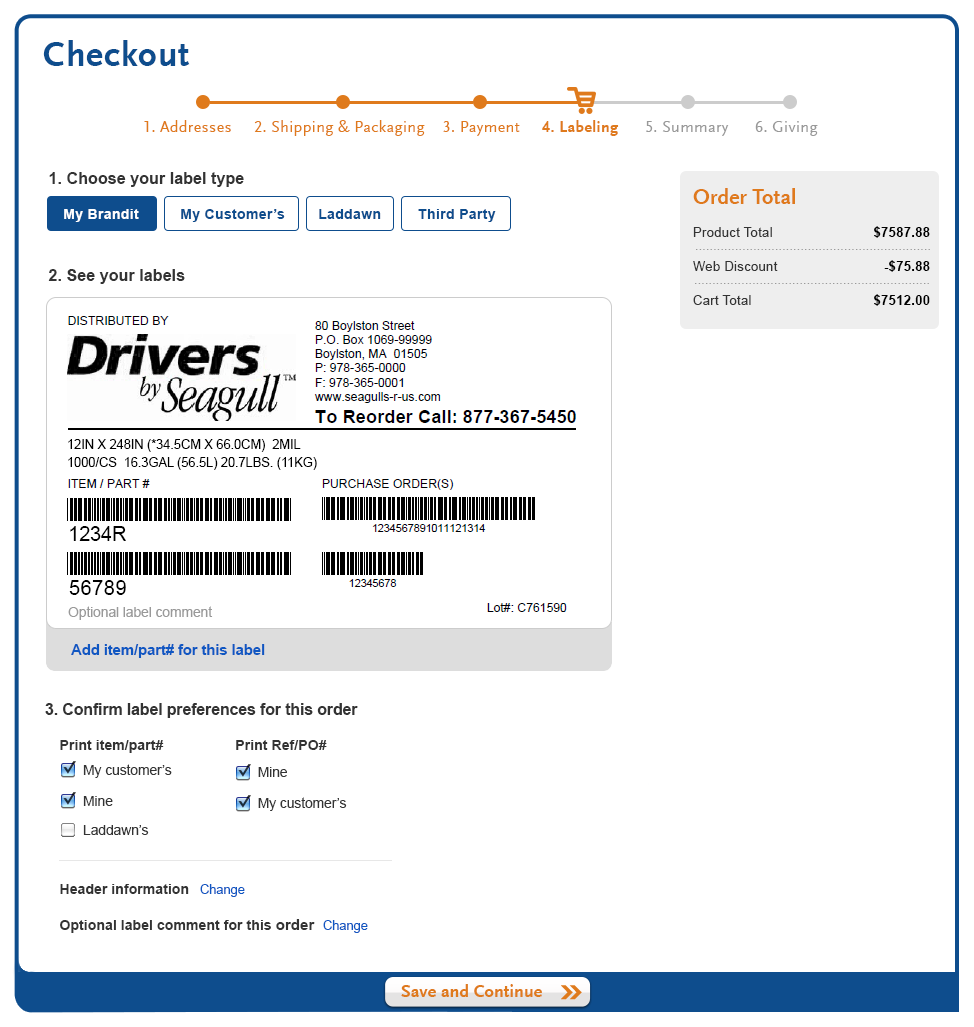
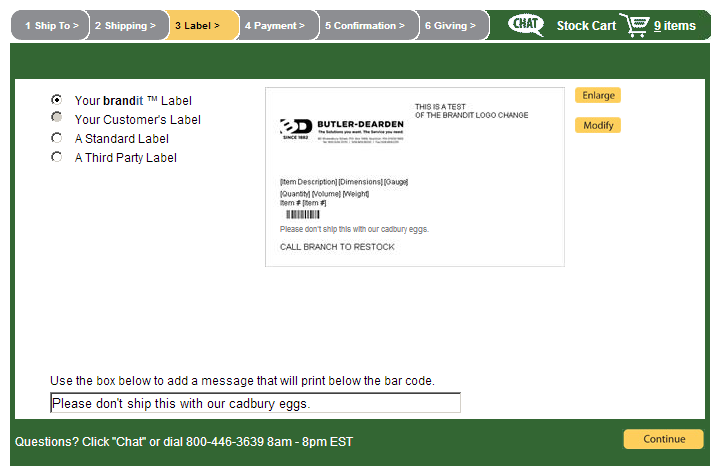
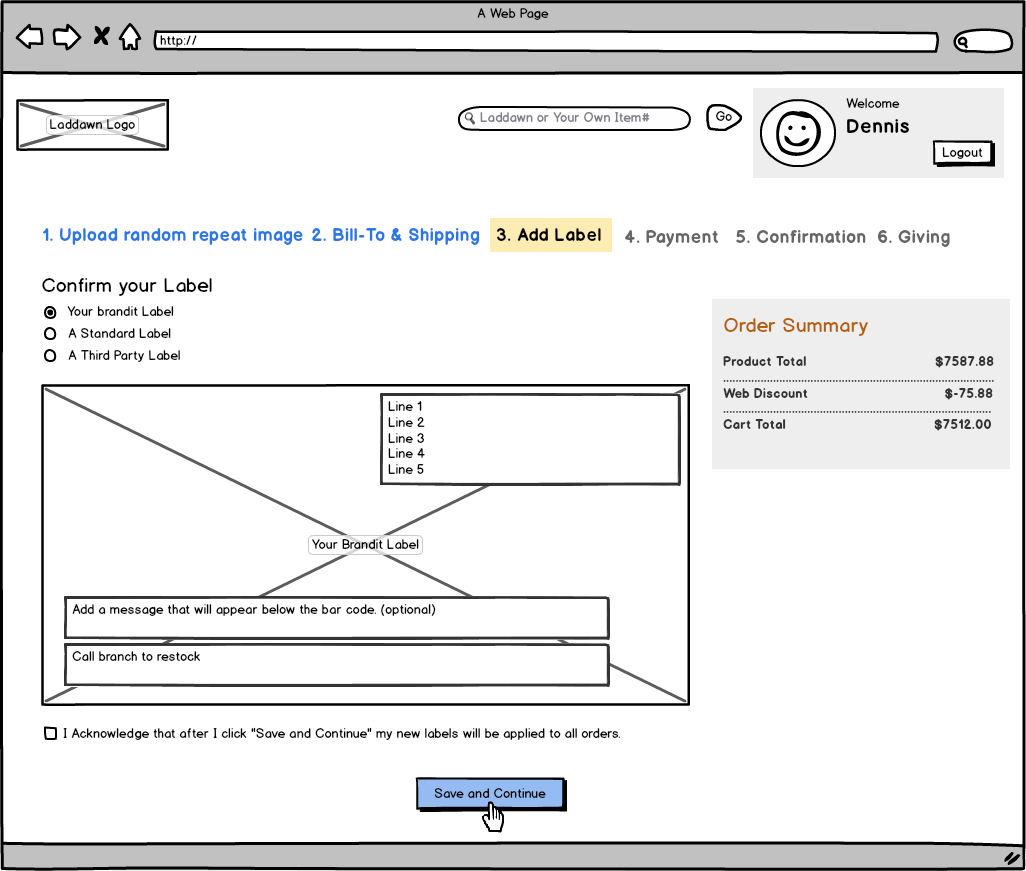
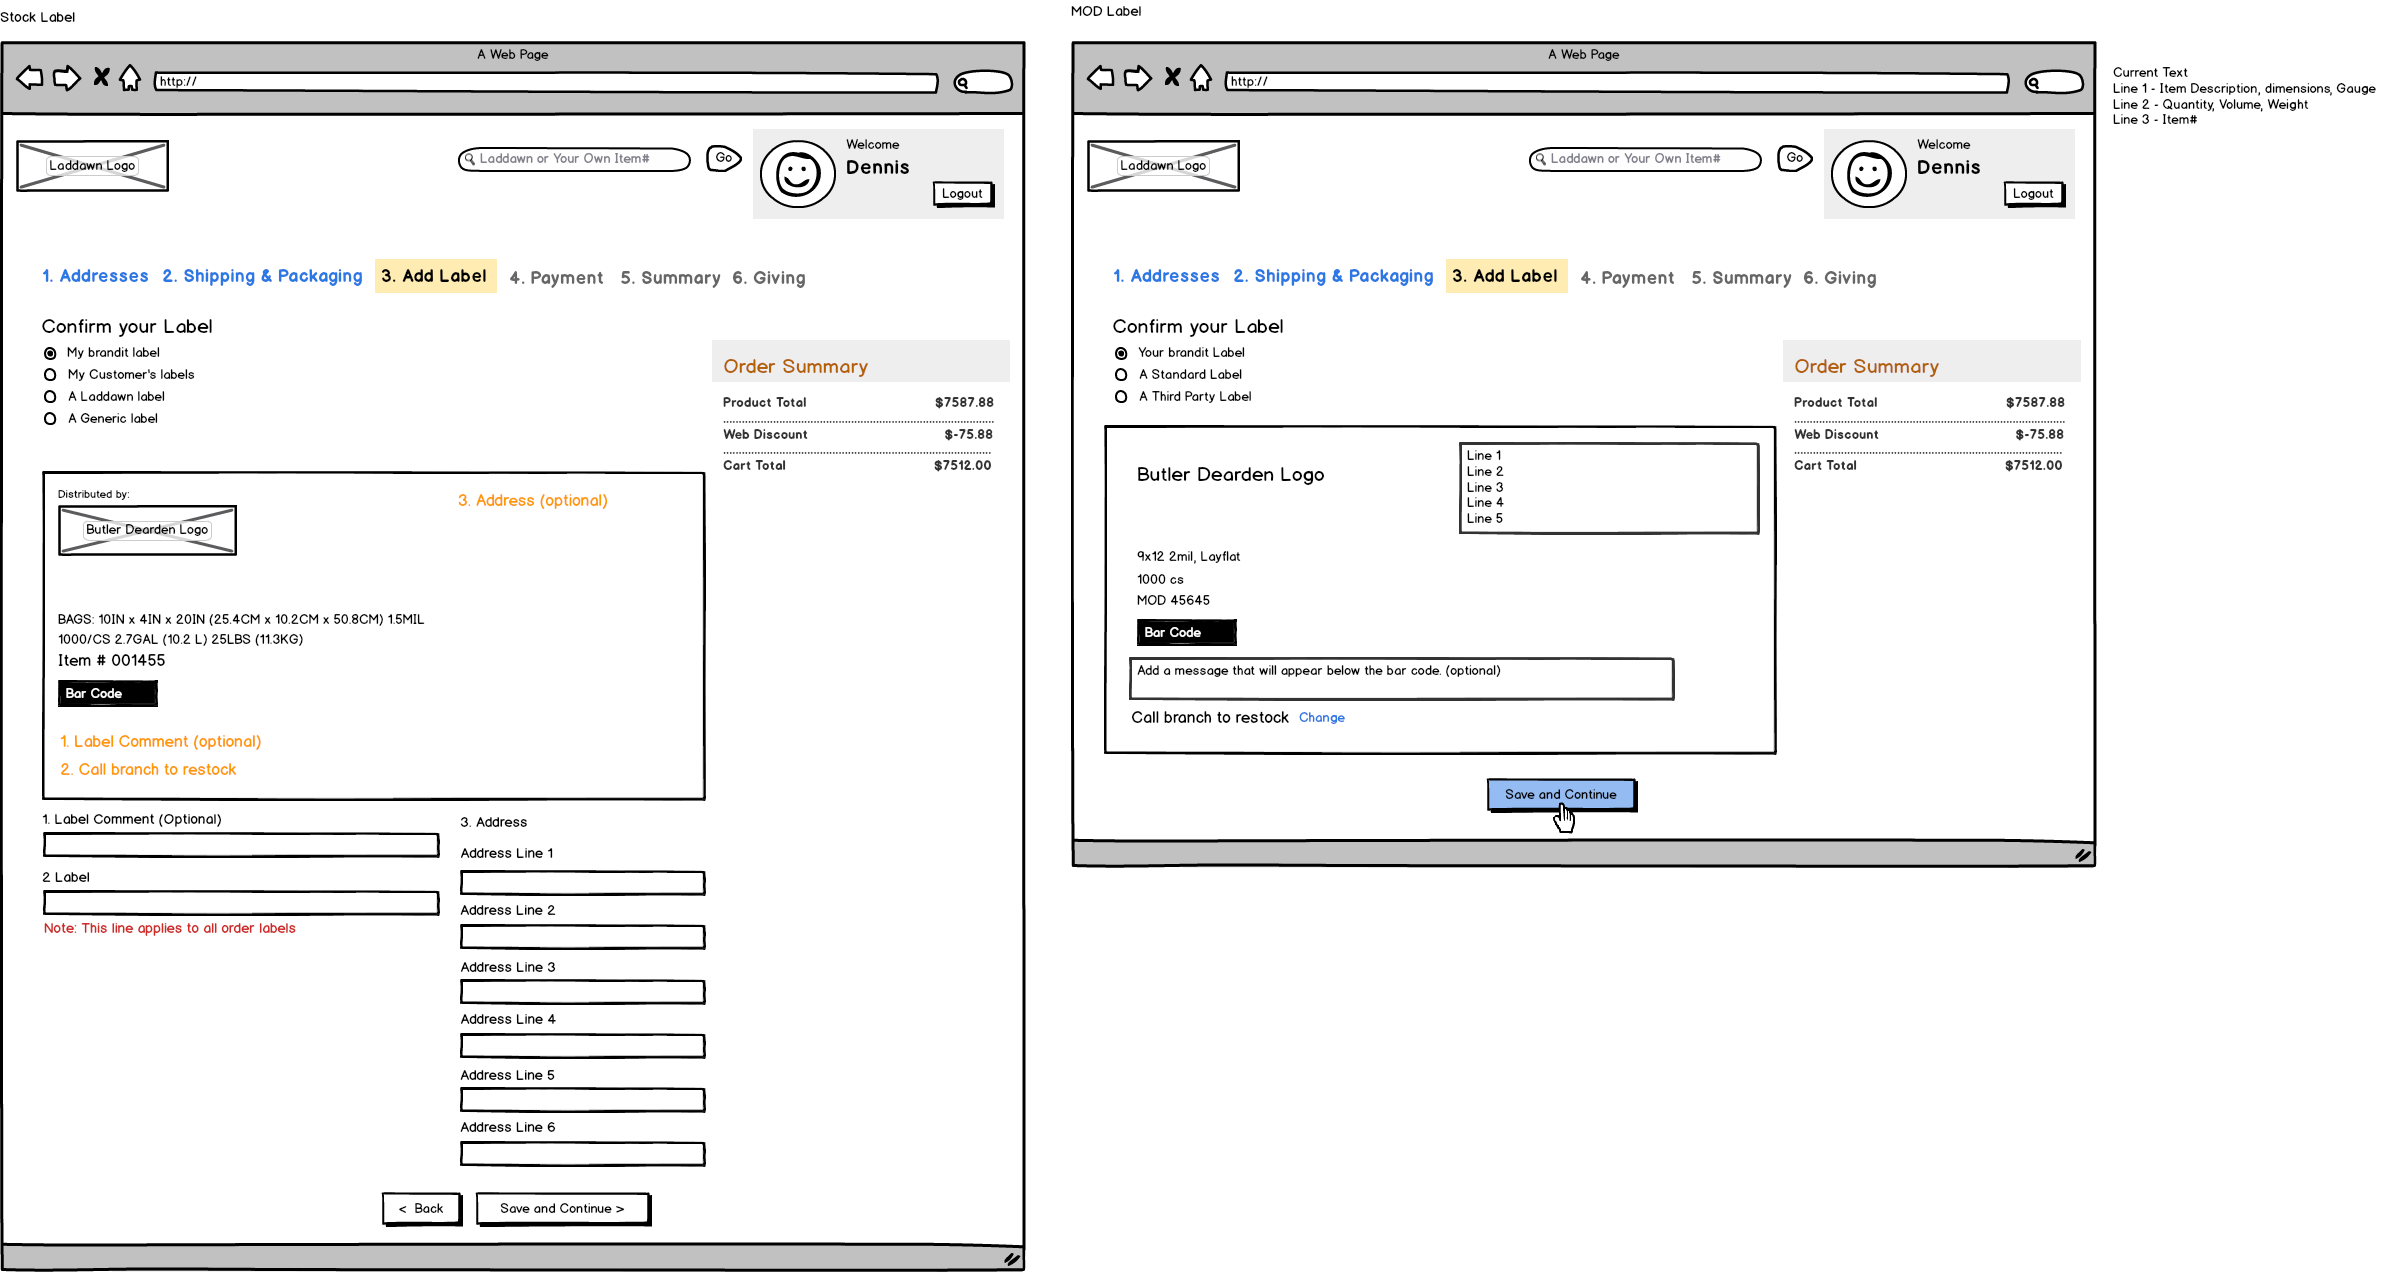
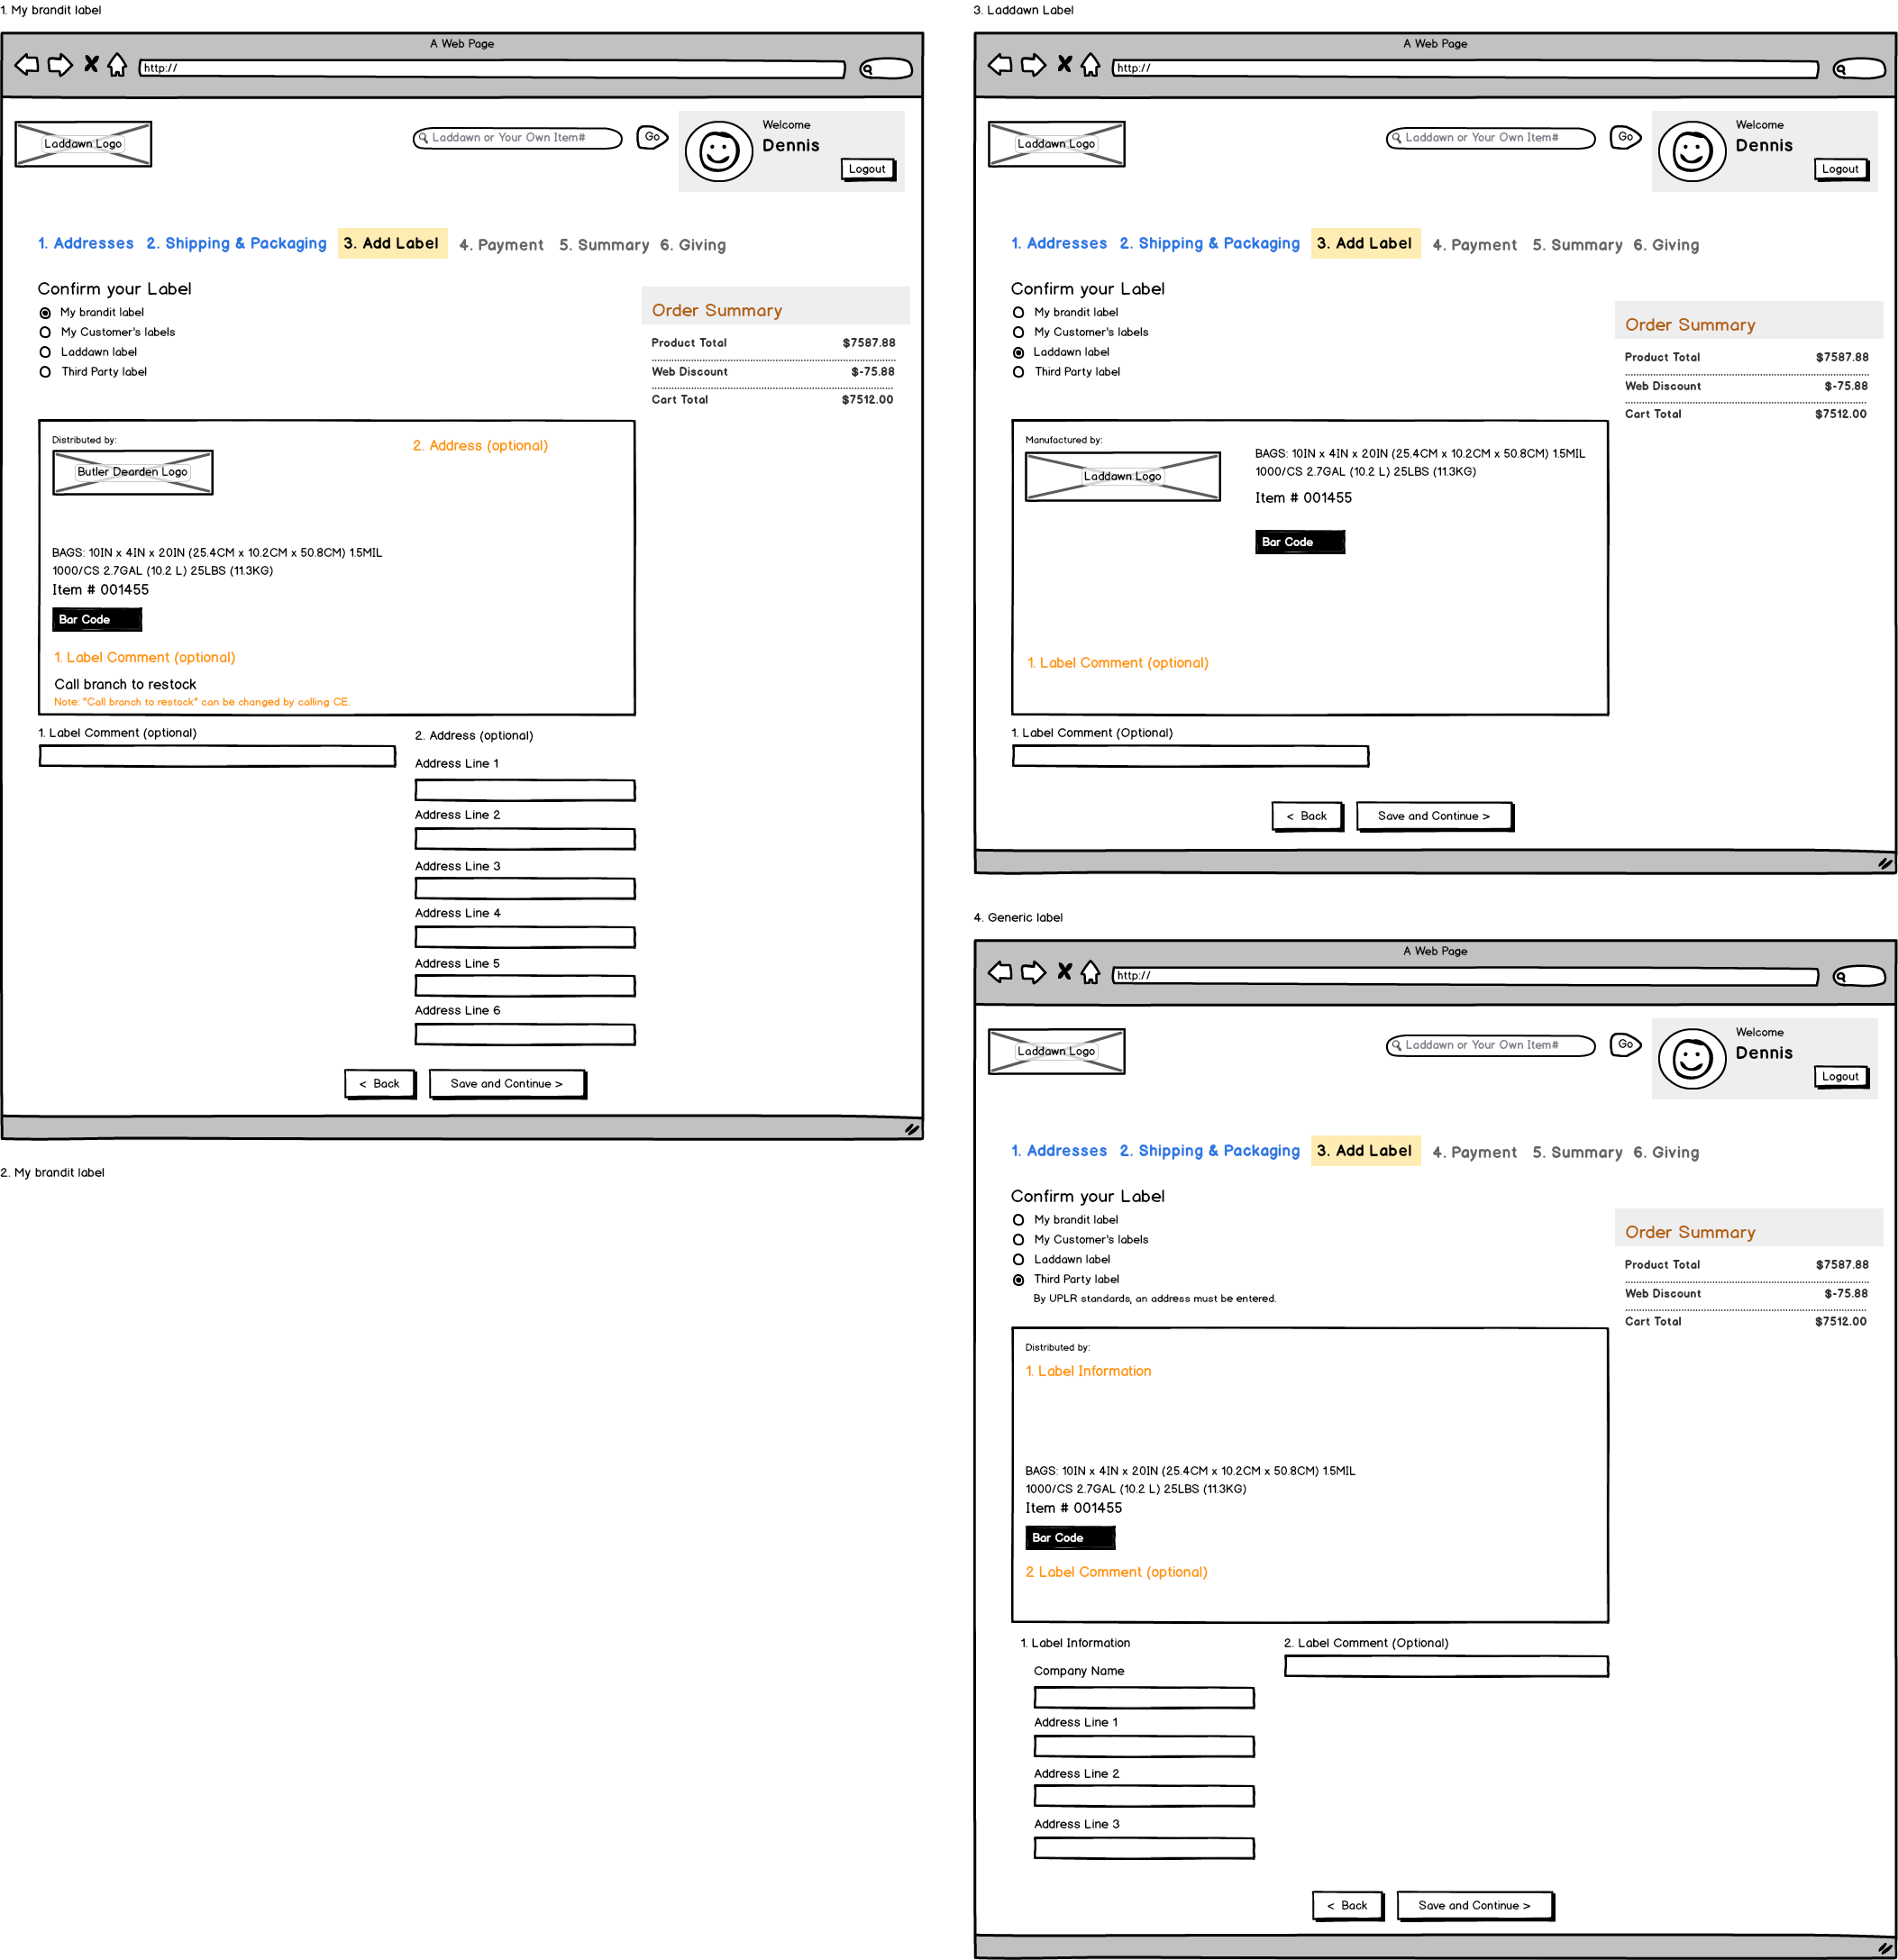
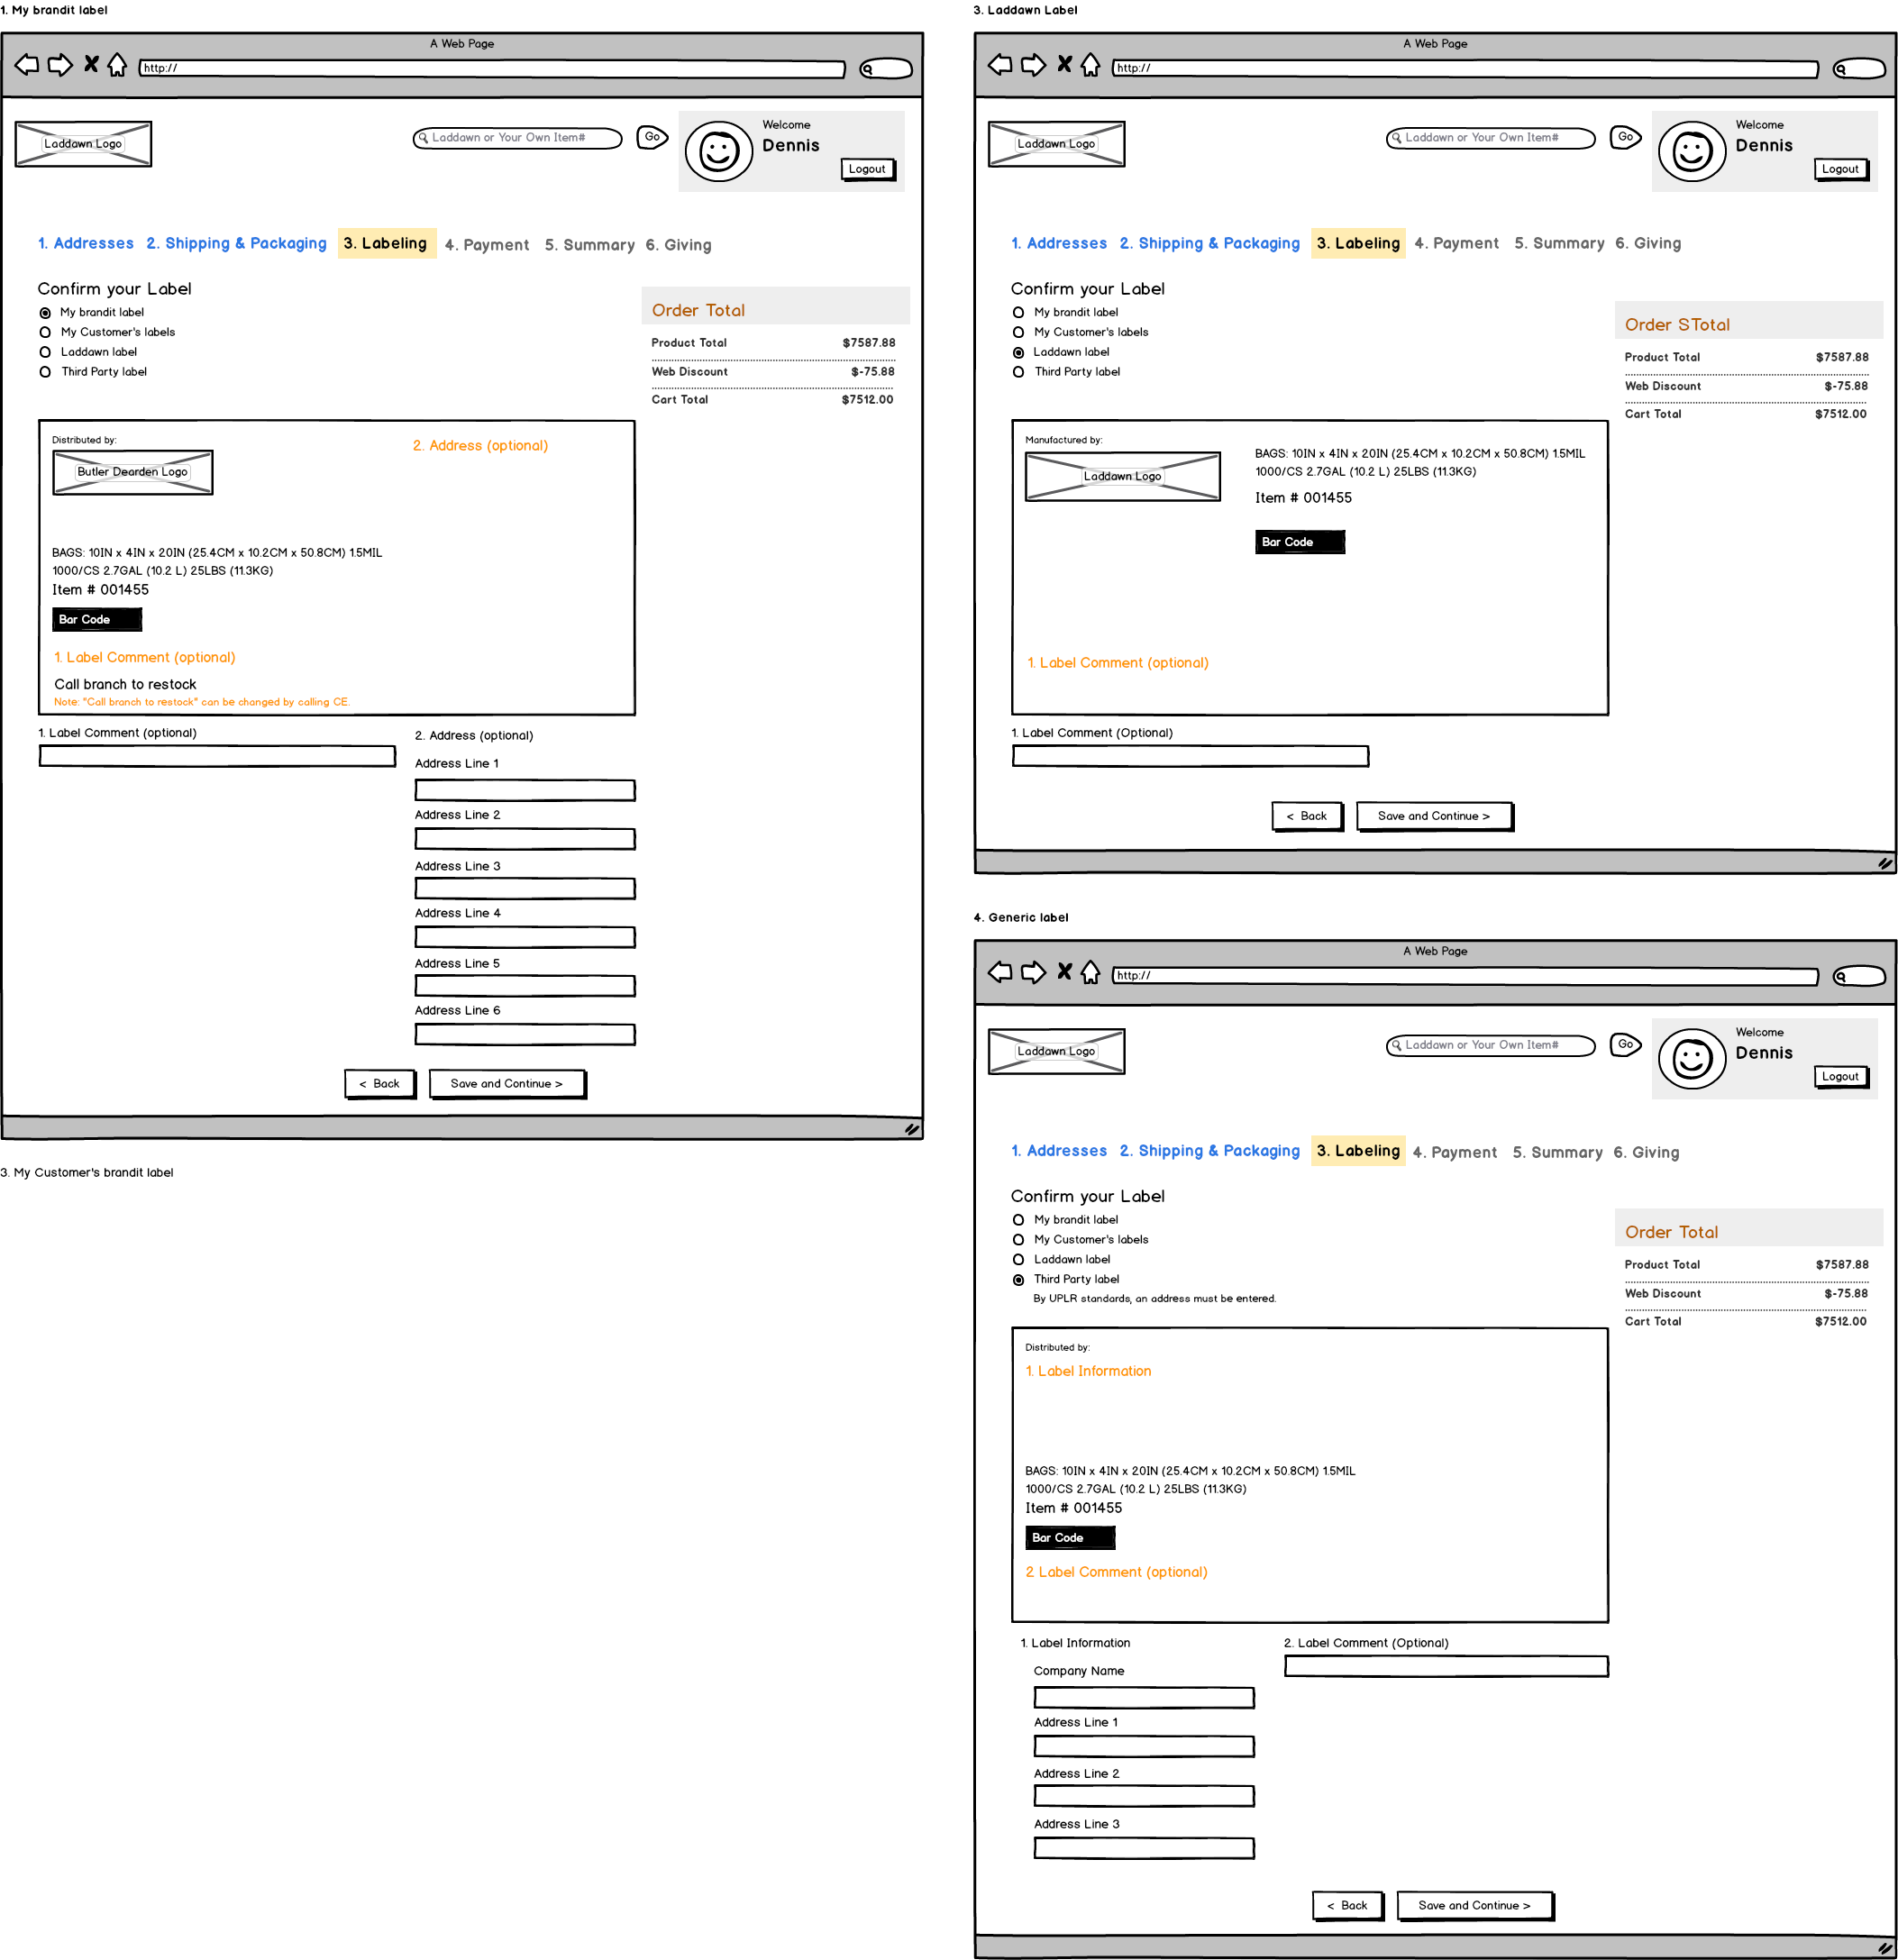
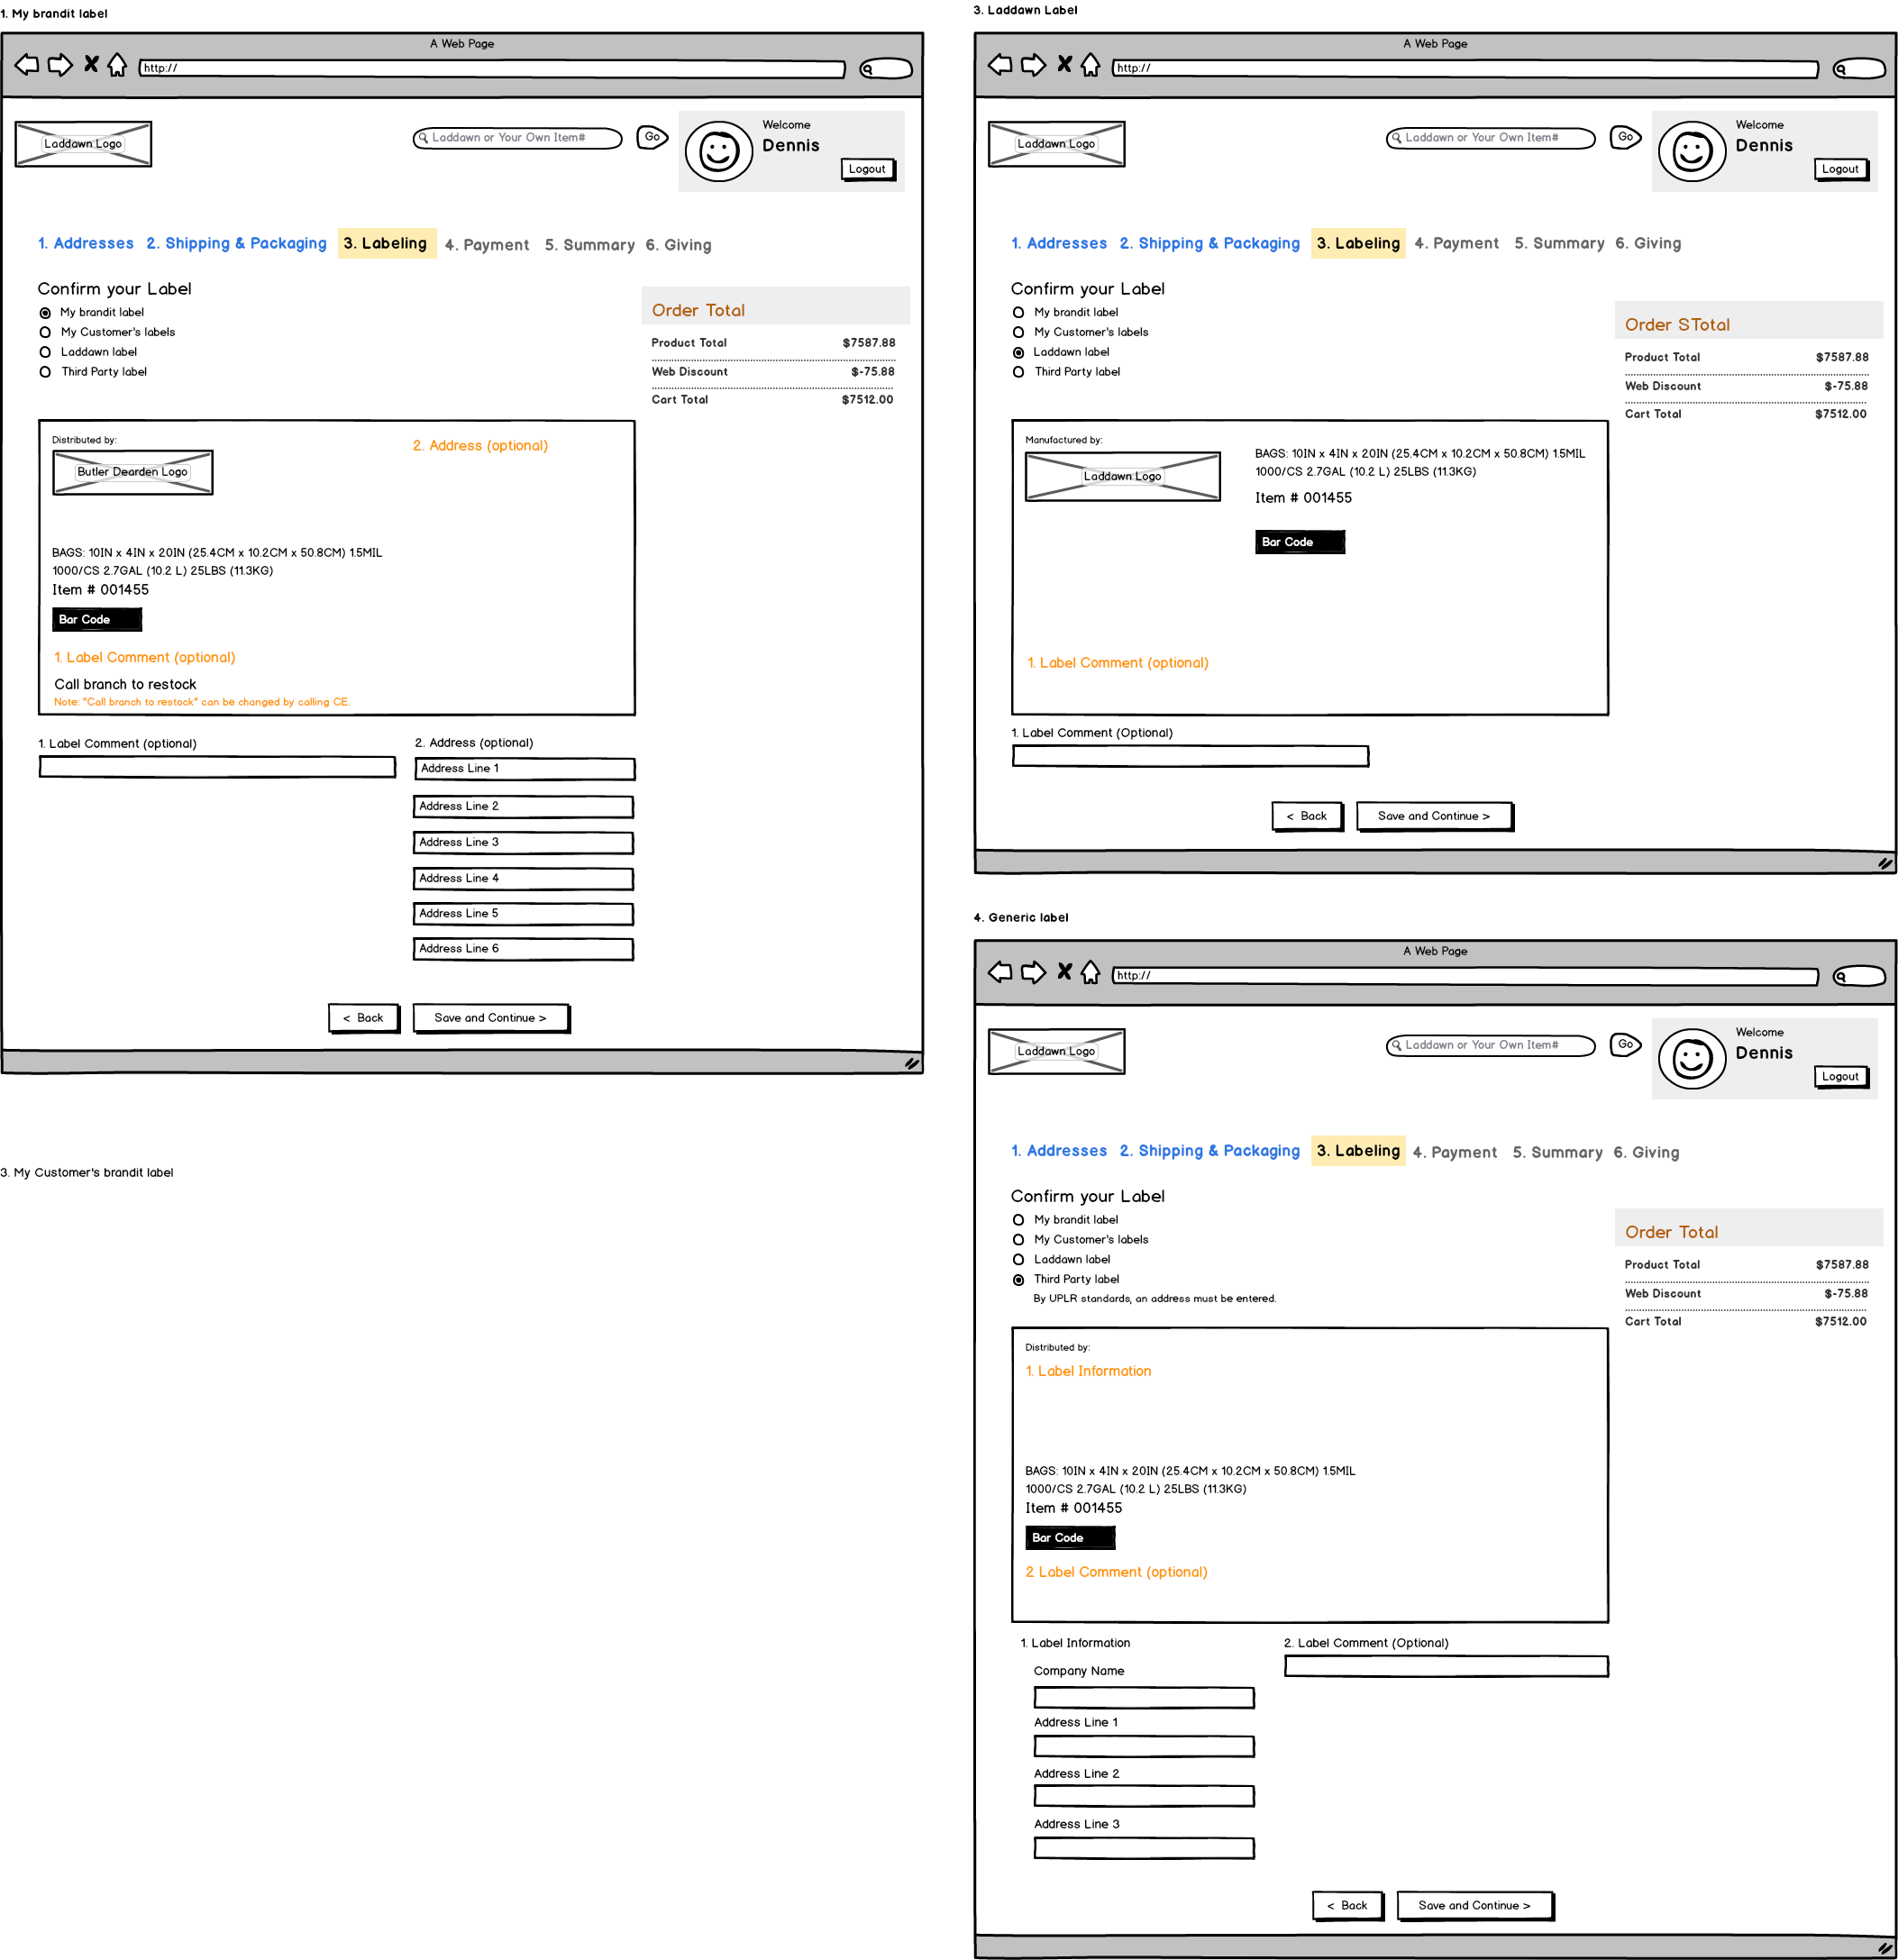
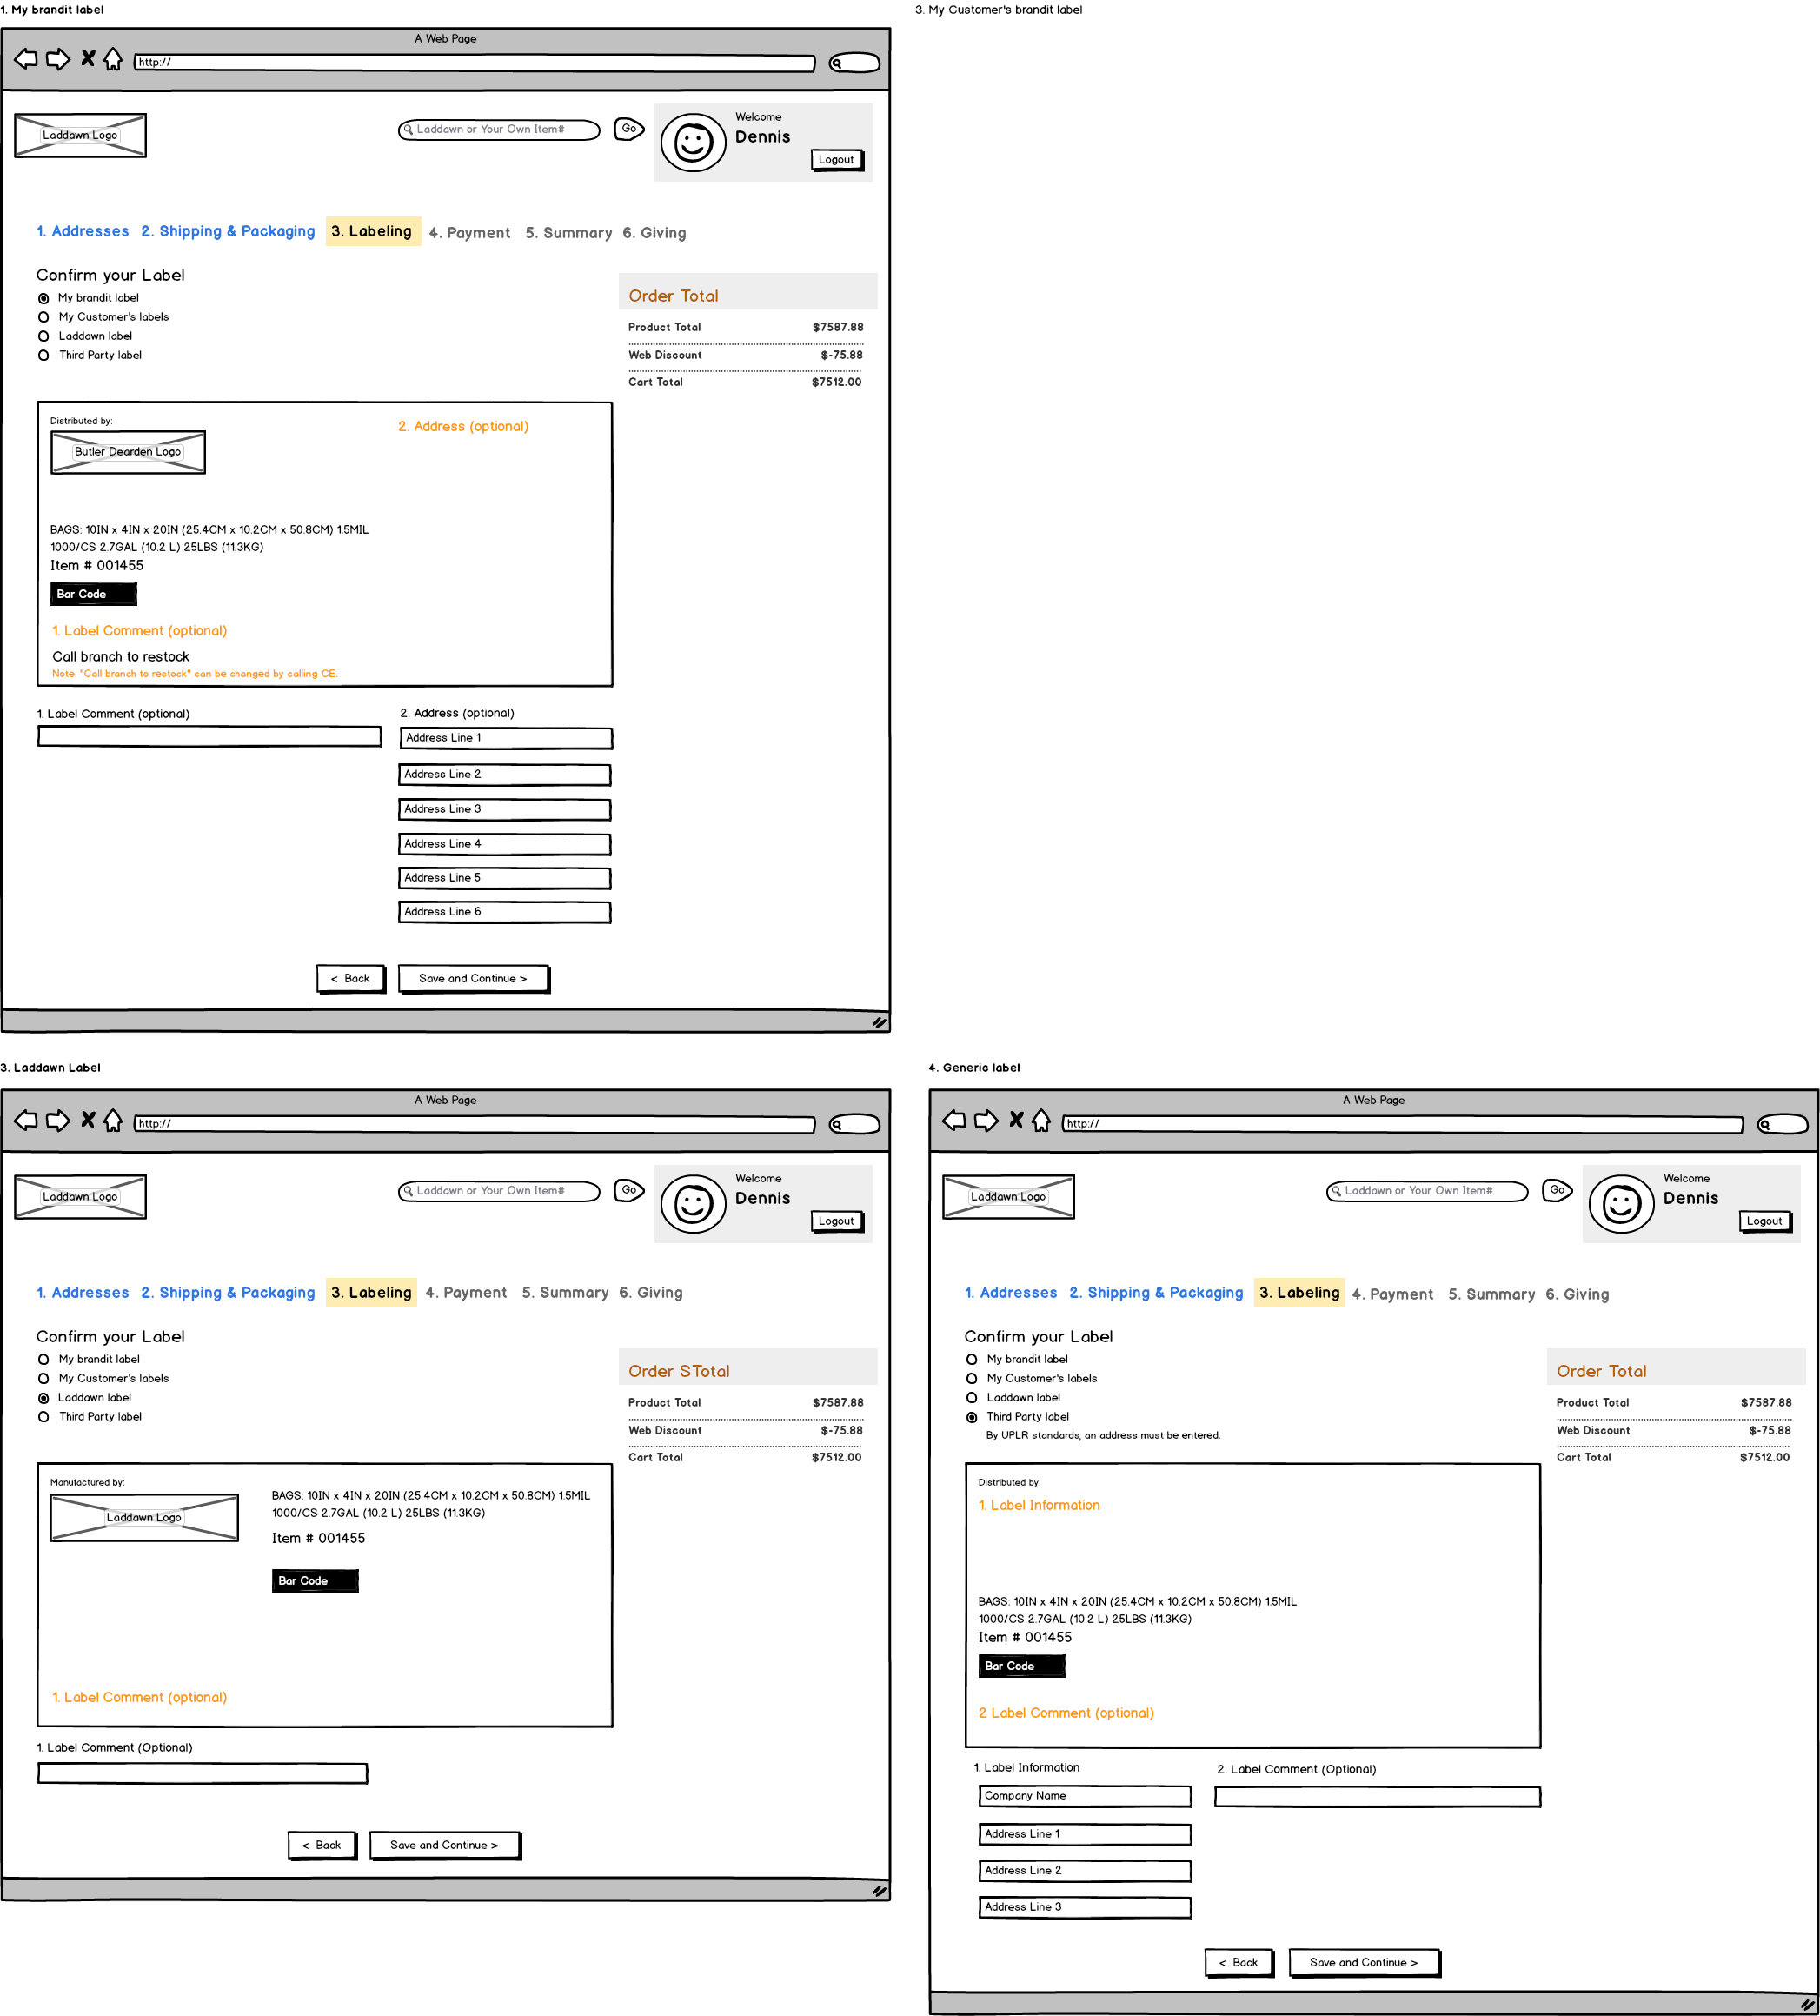
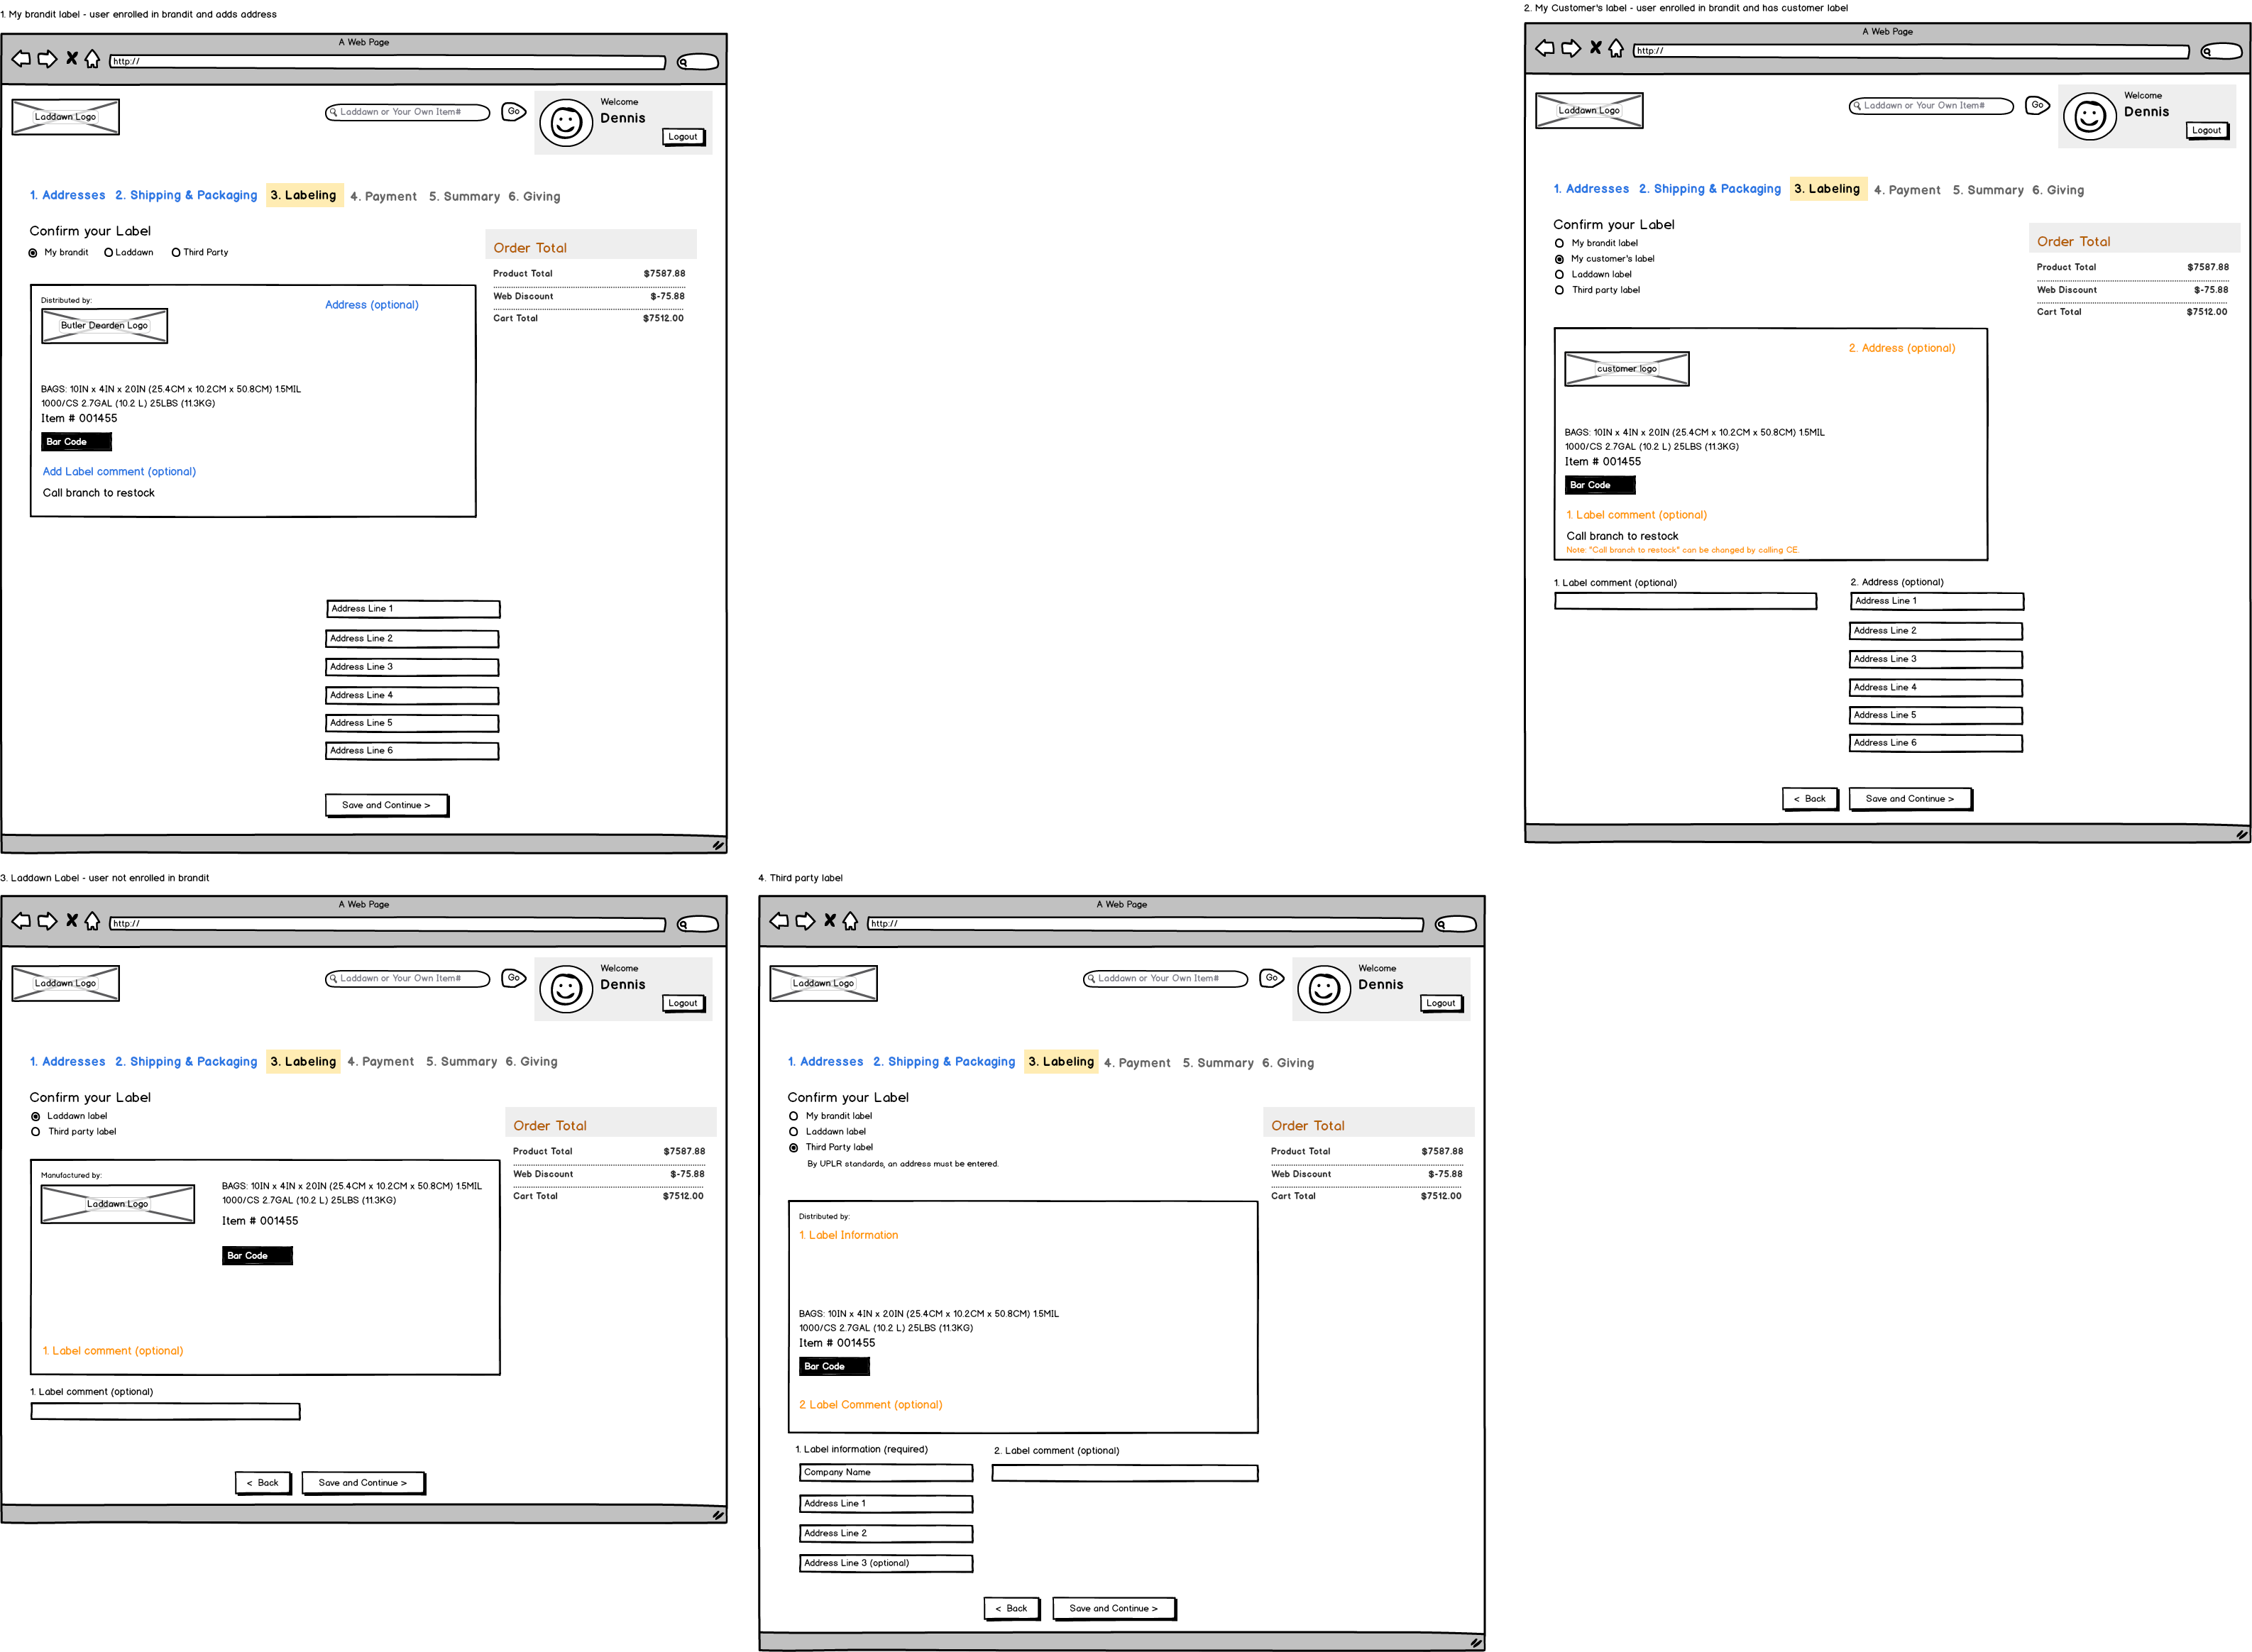
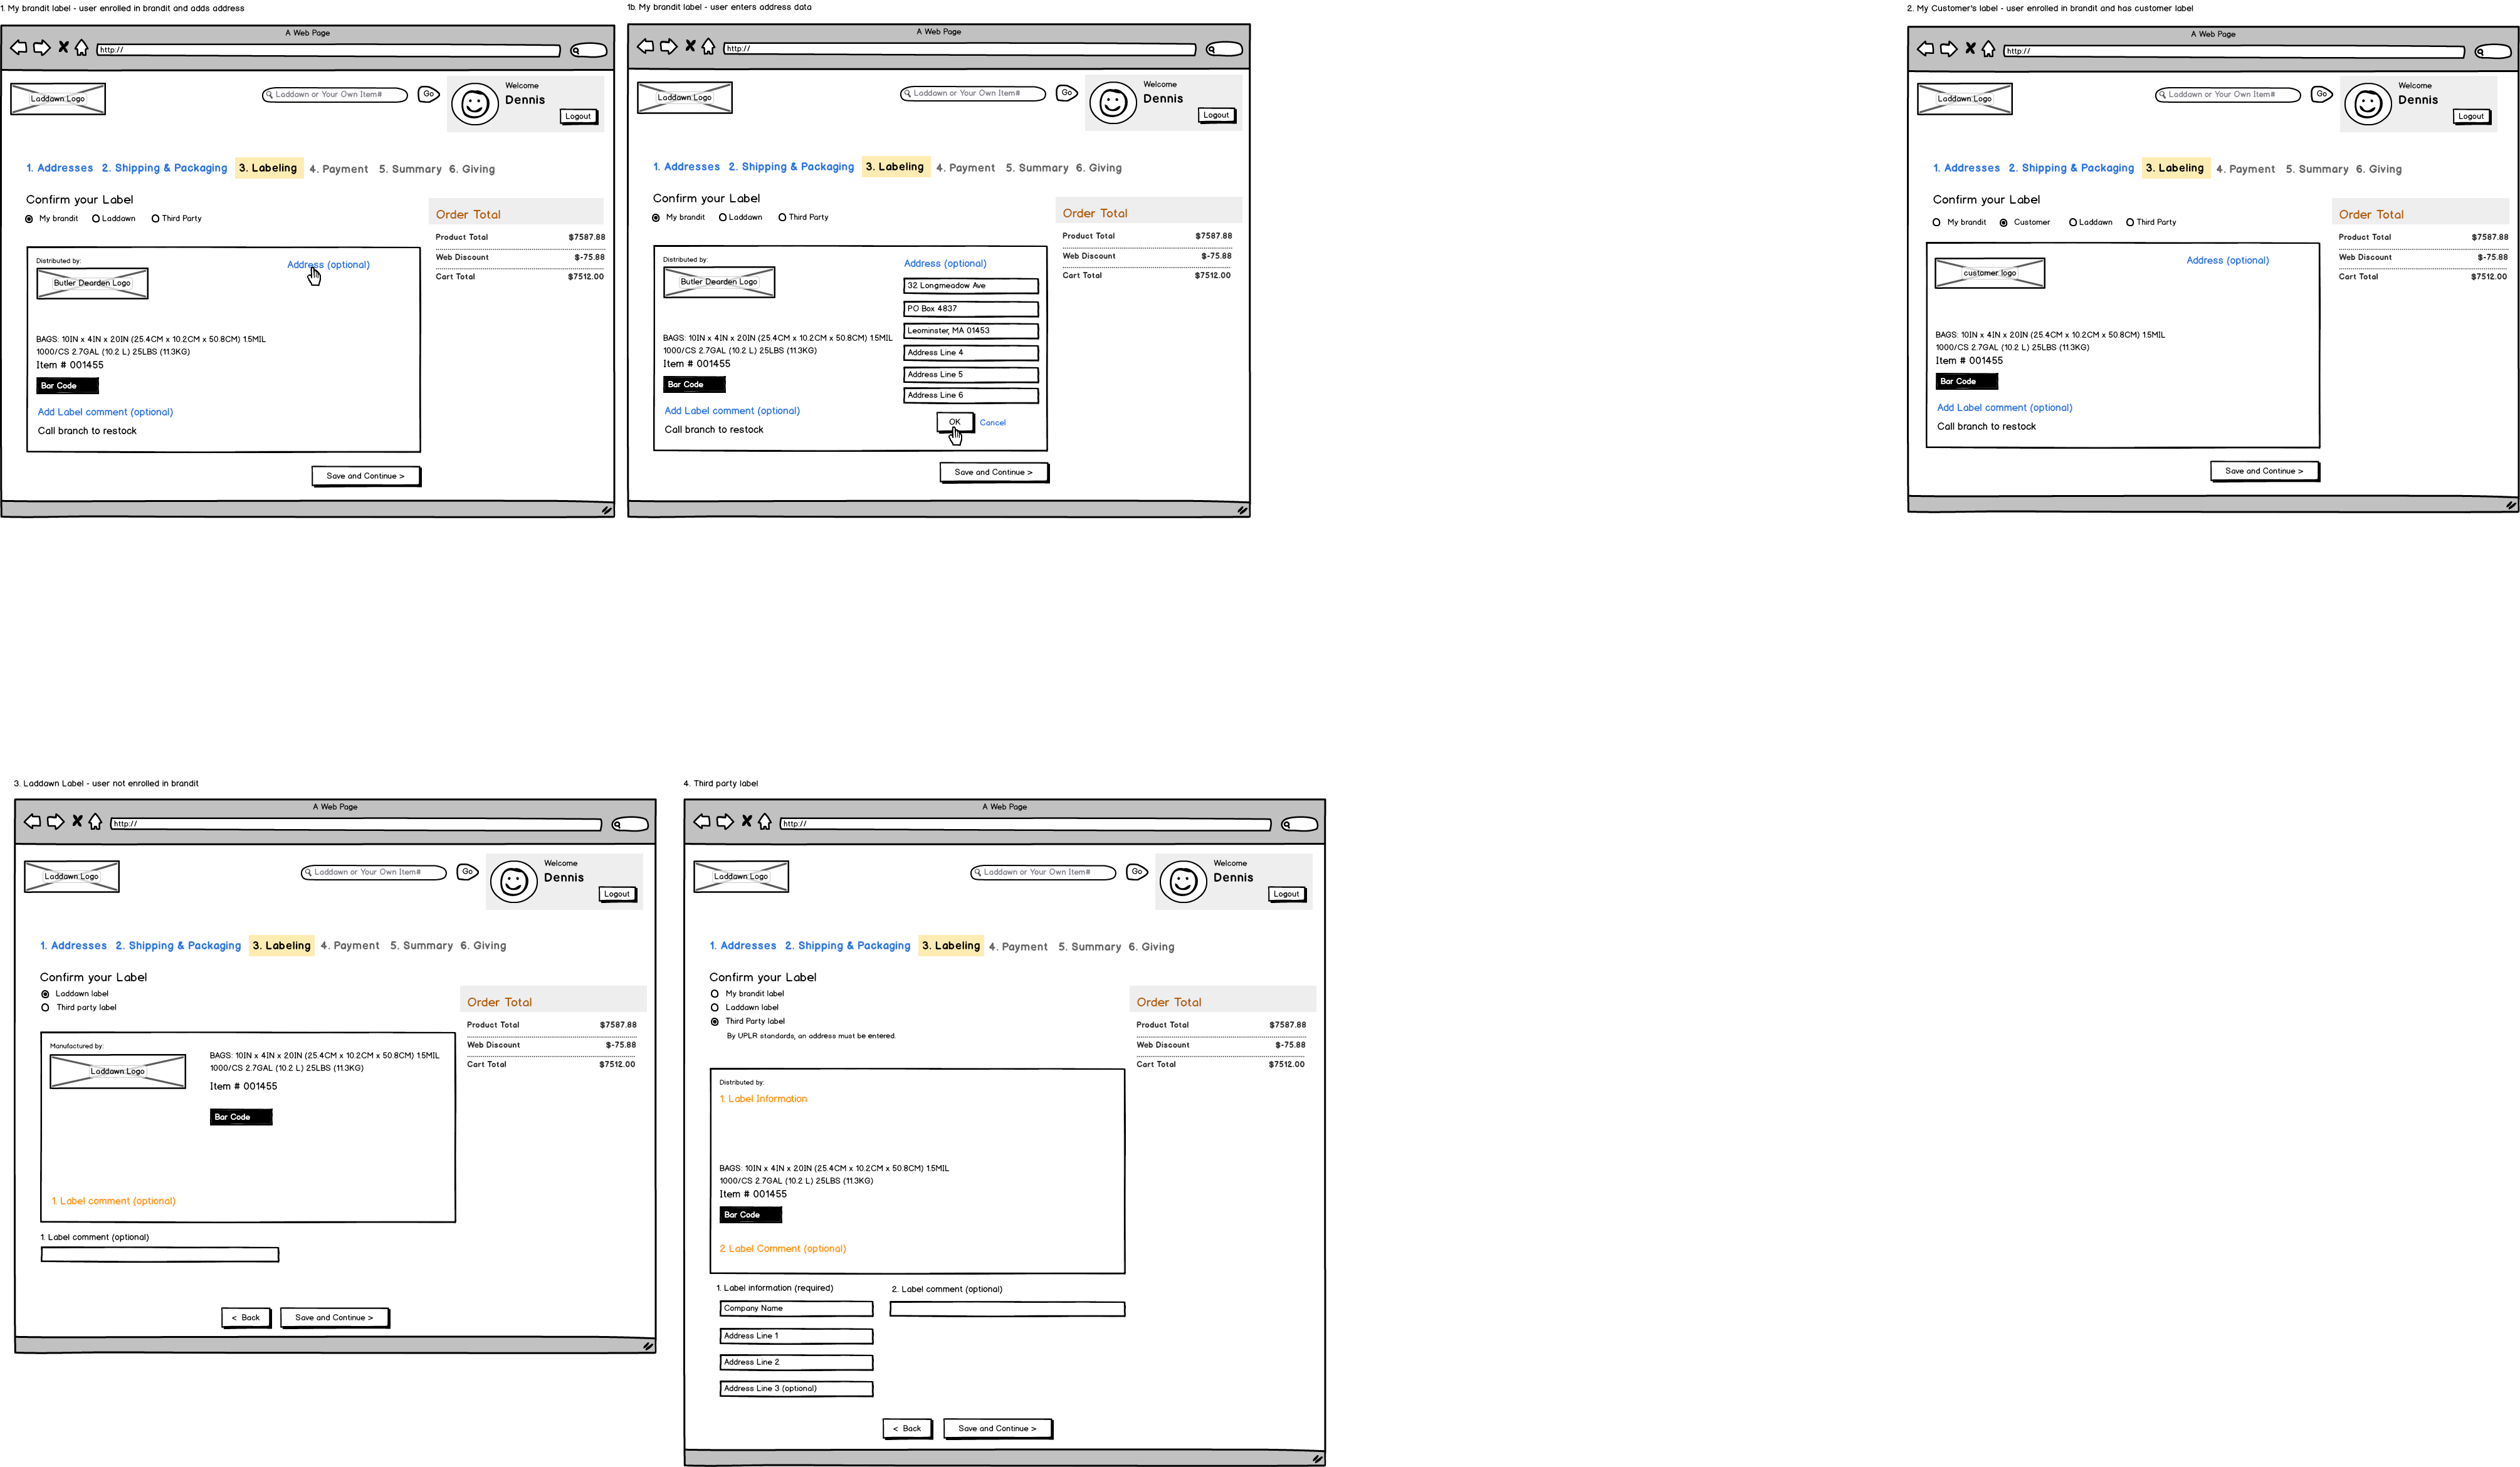
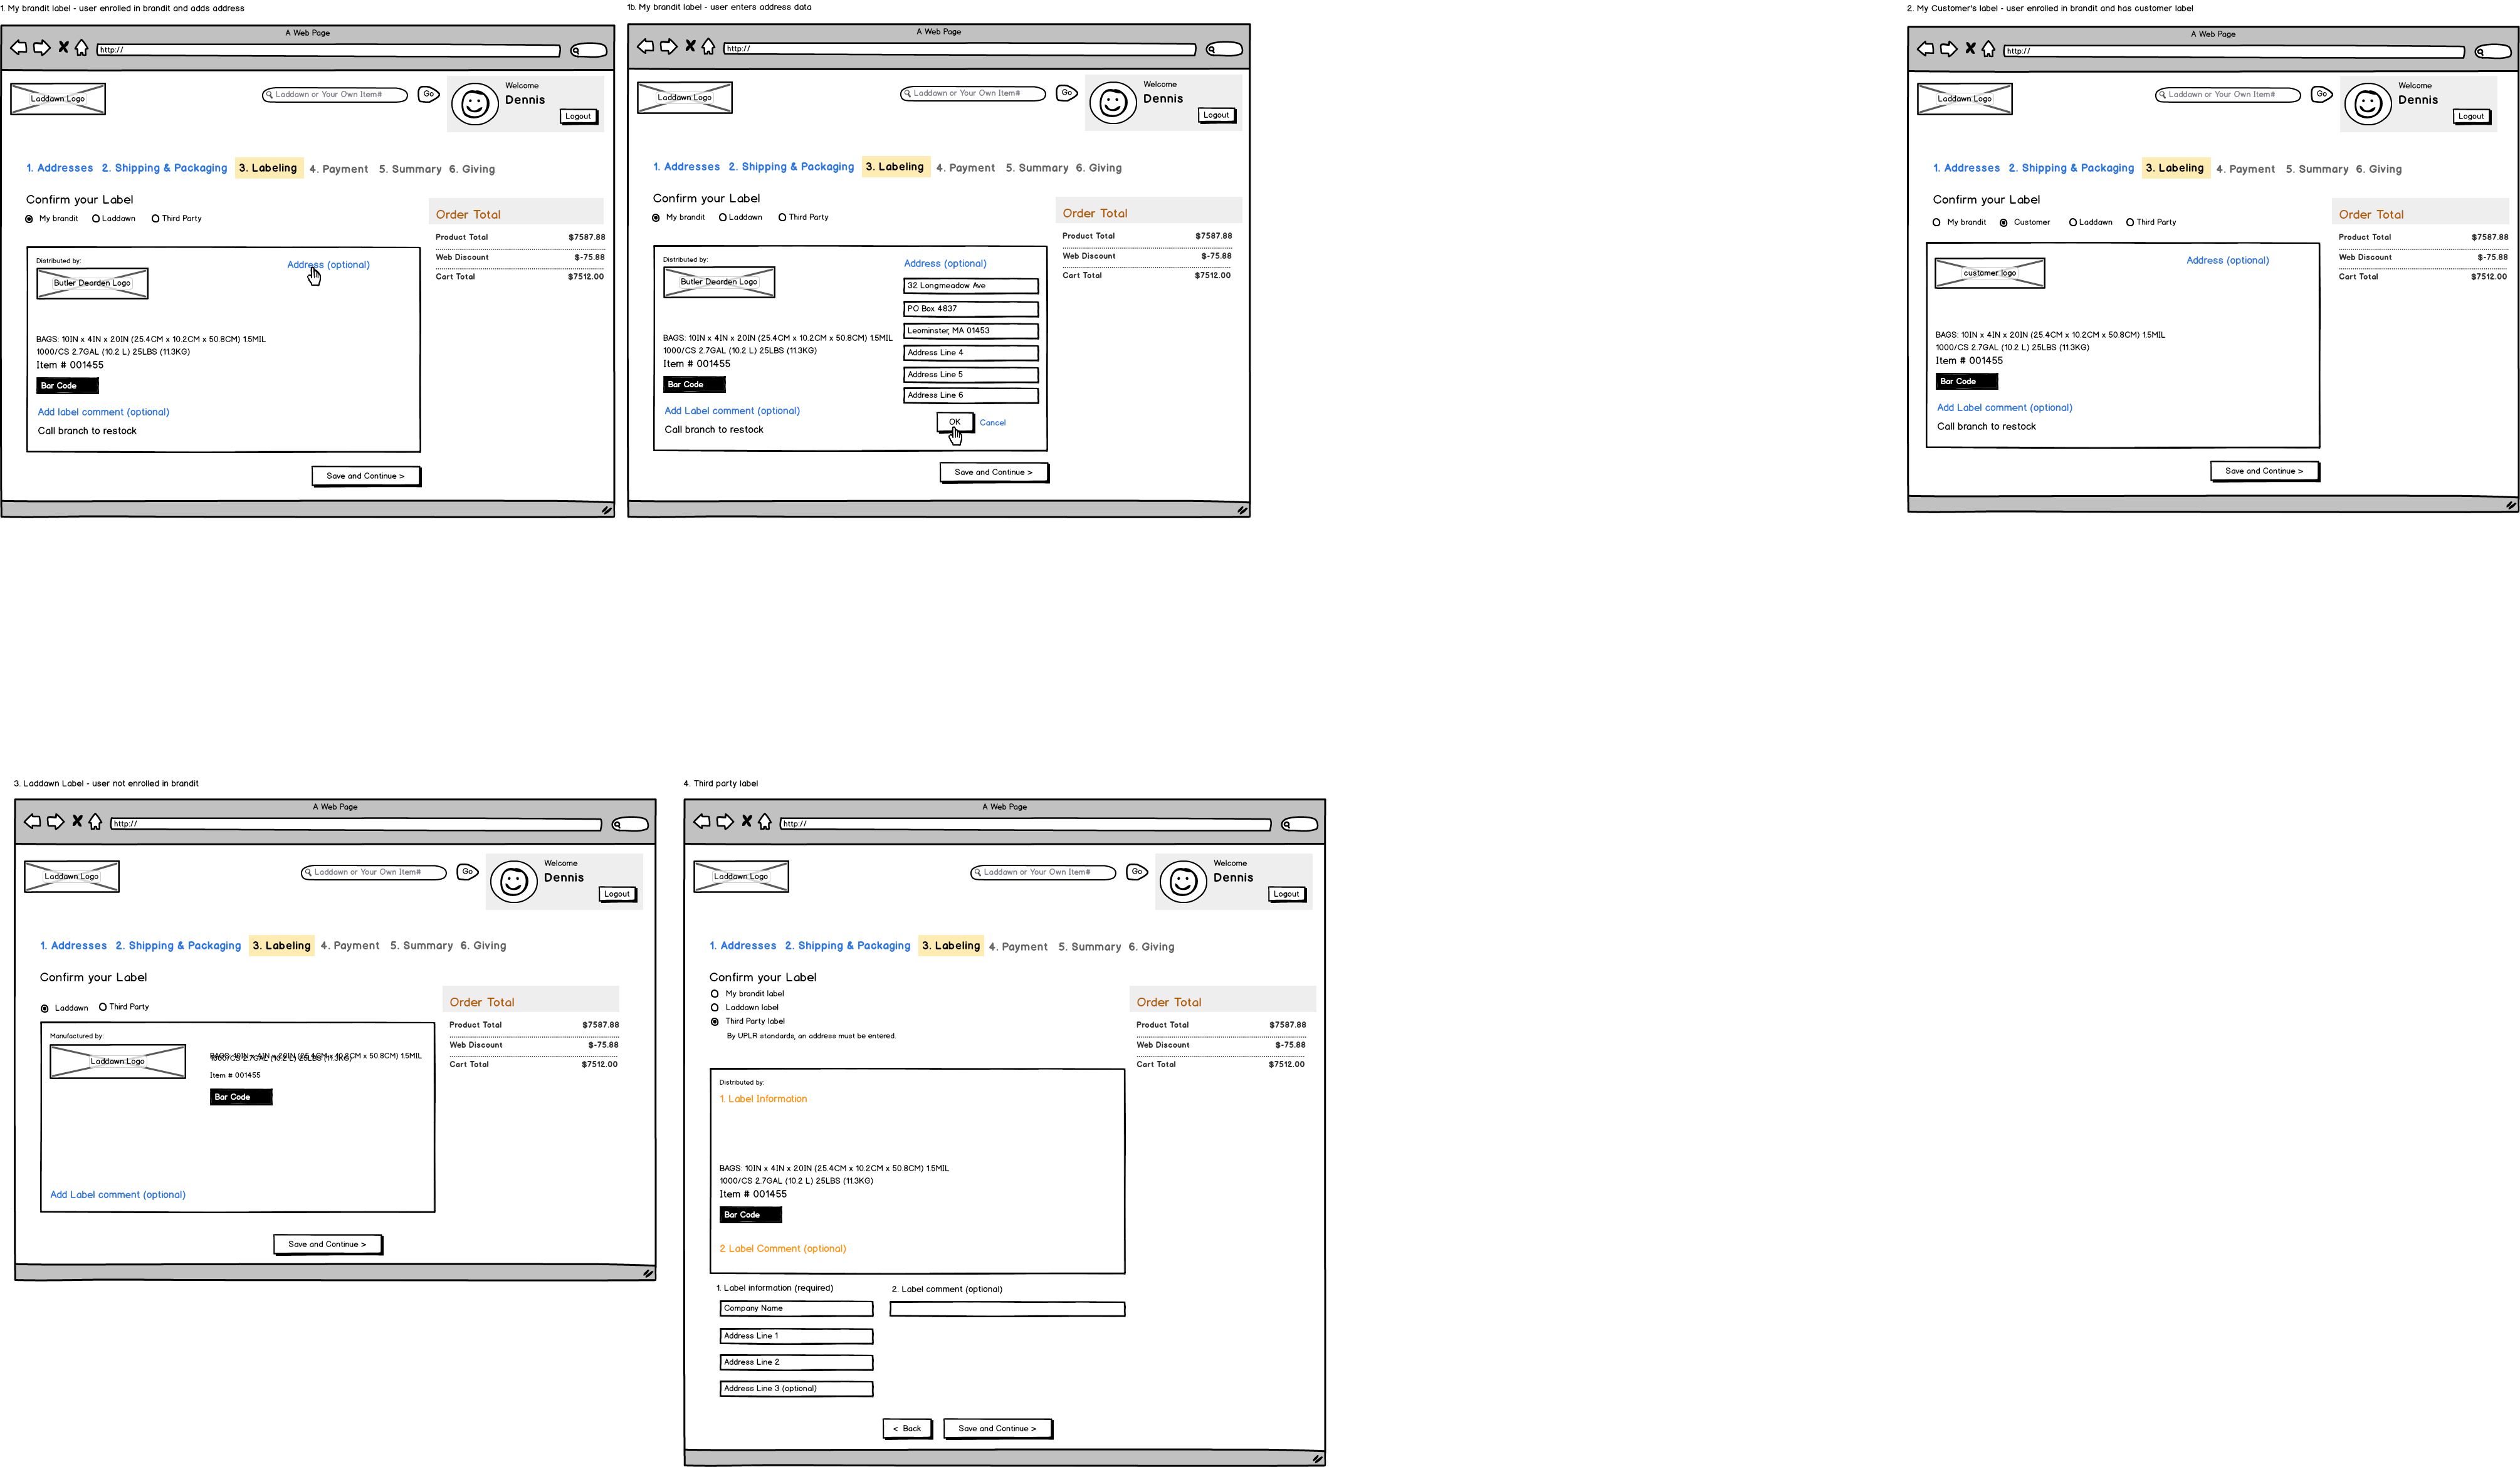
Section 1 - Choose you label type
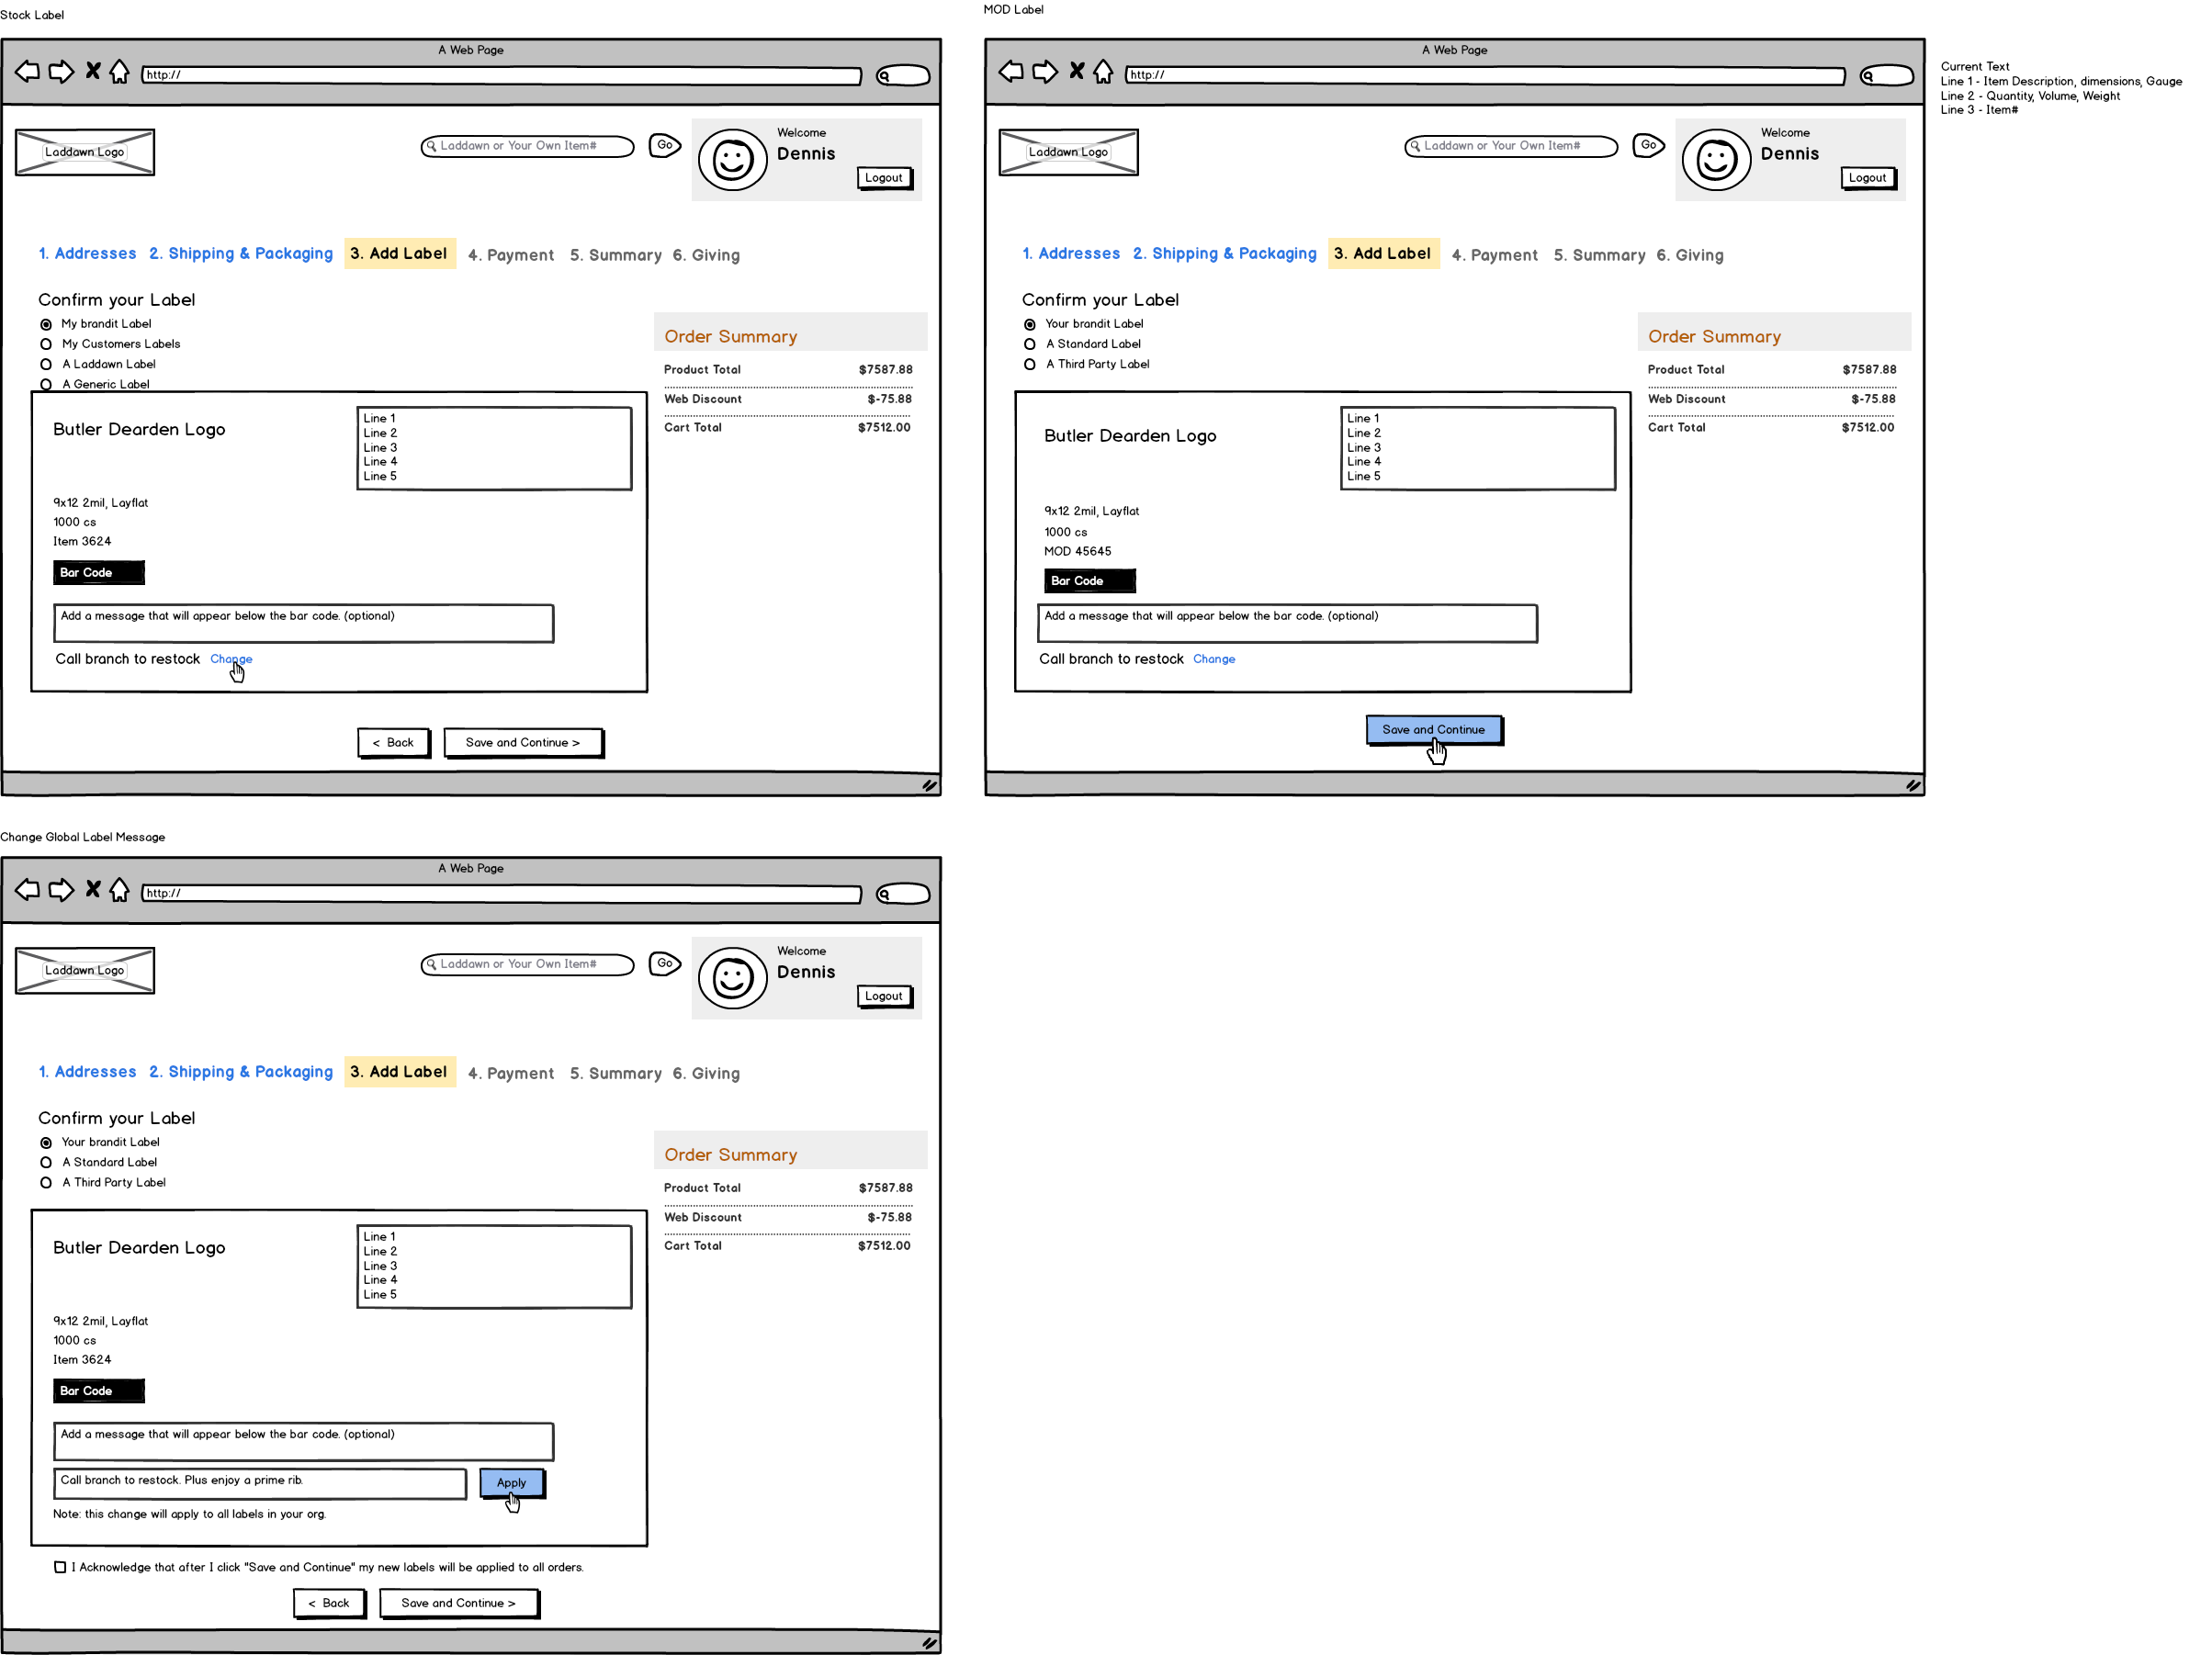
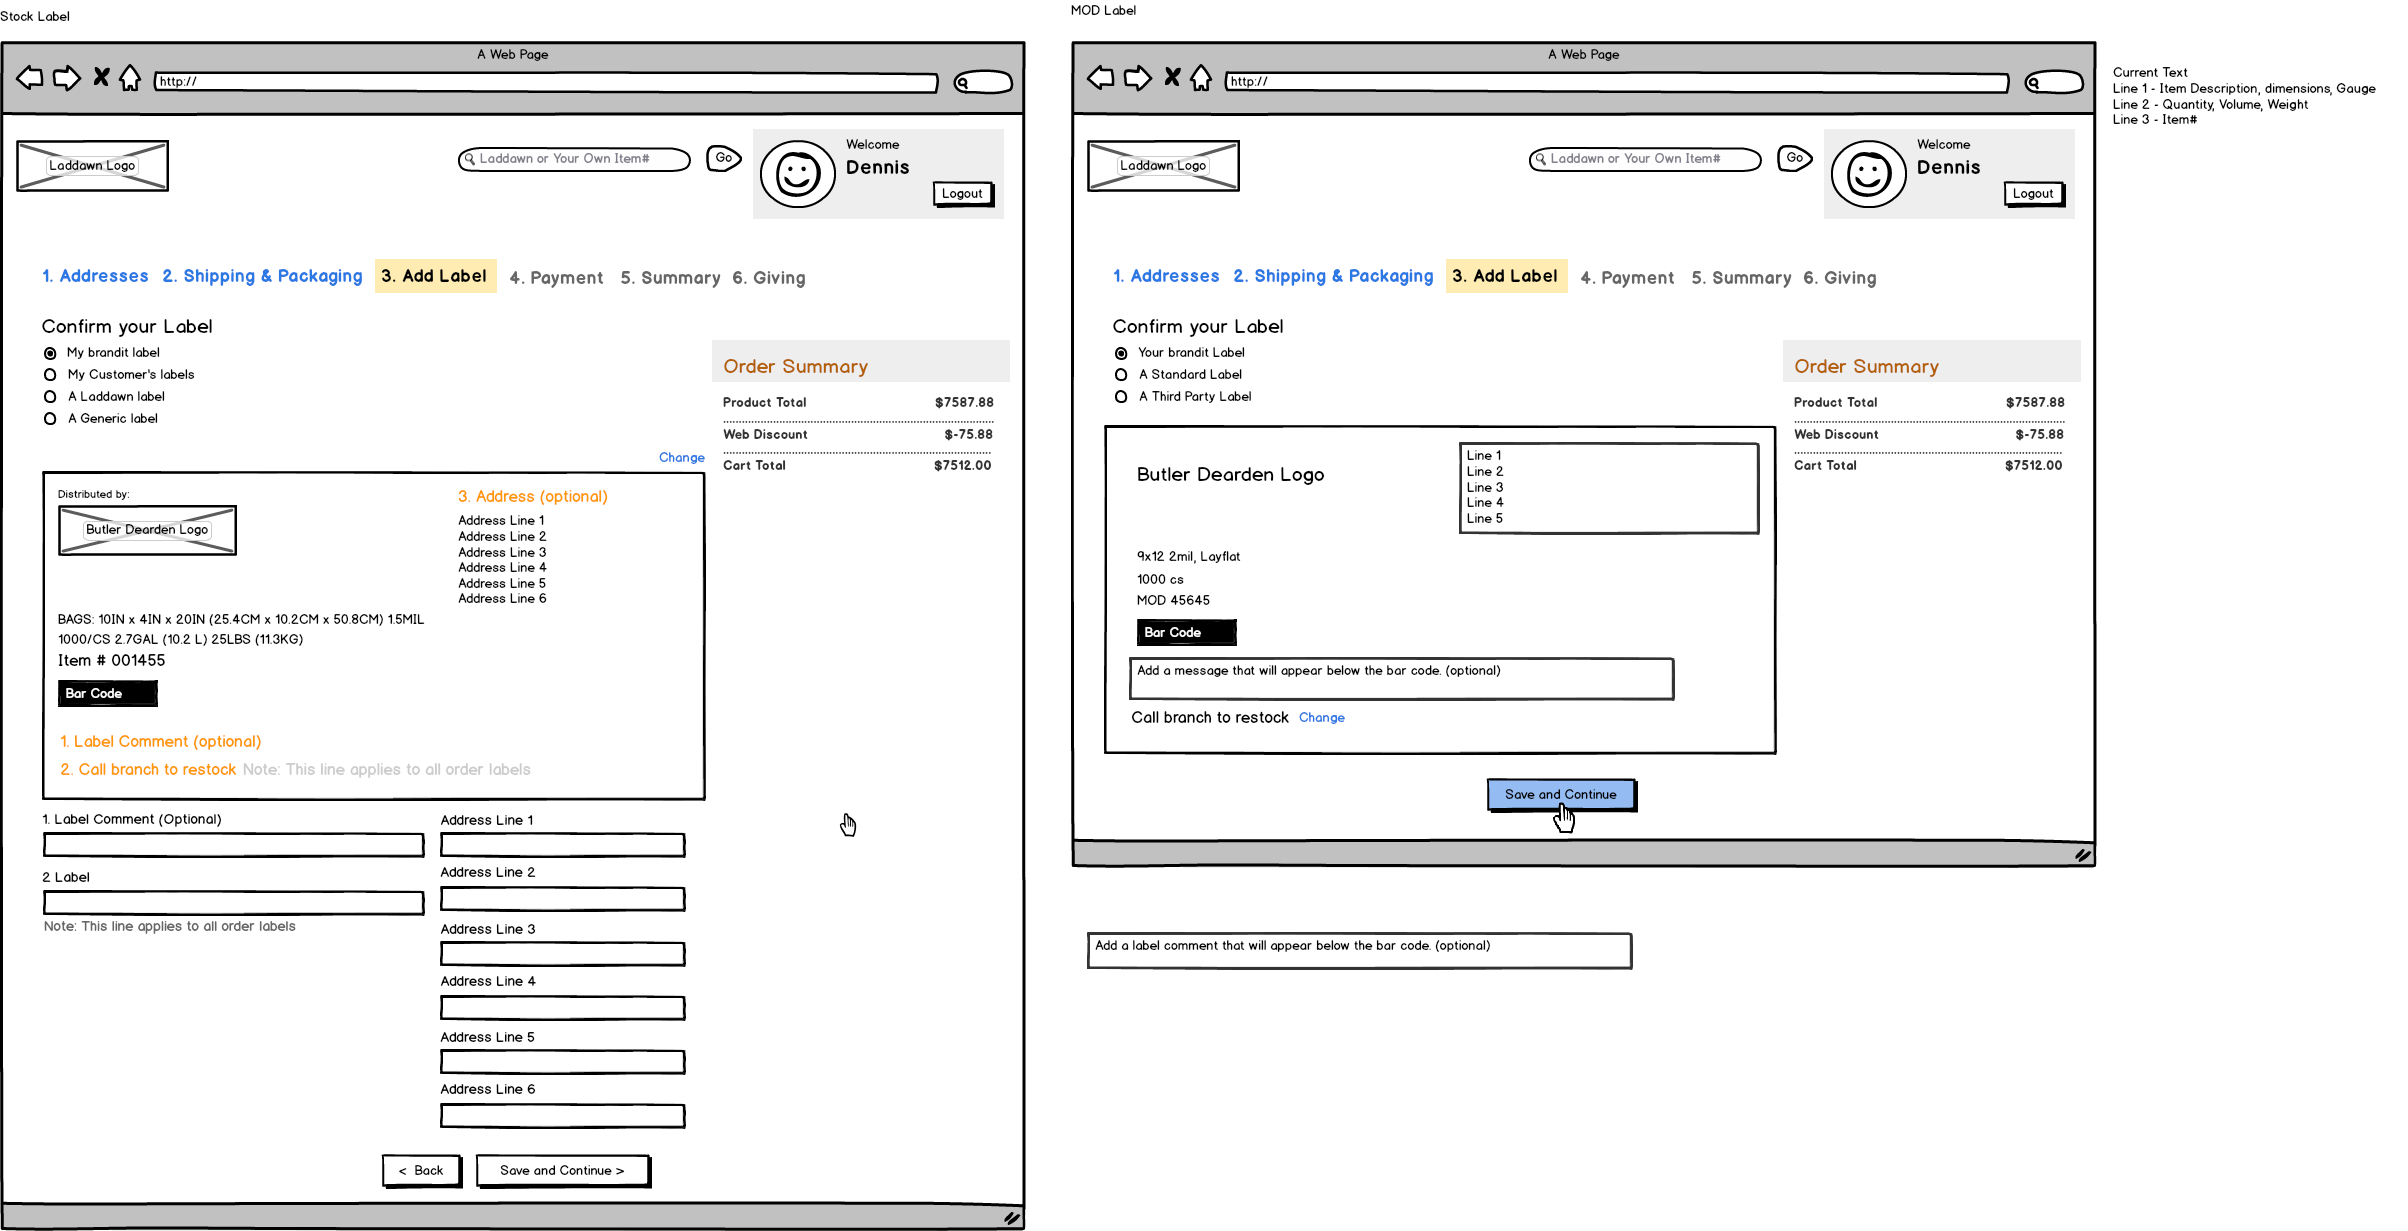
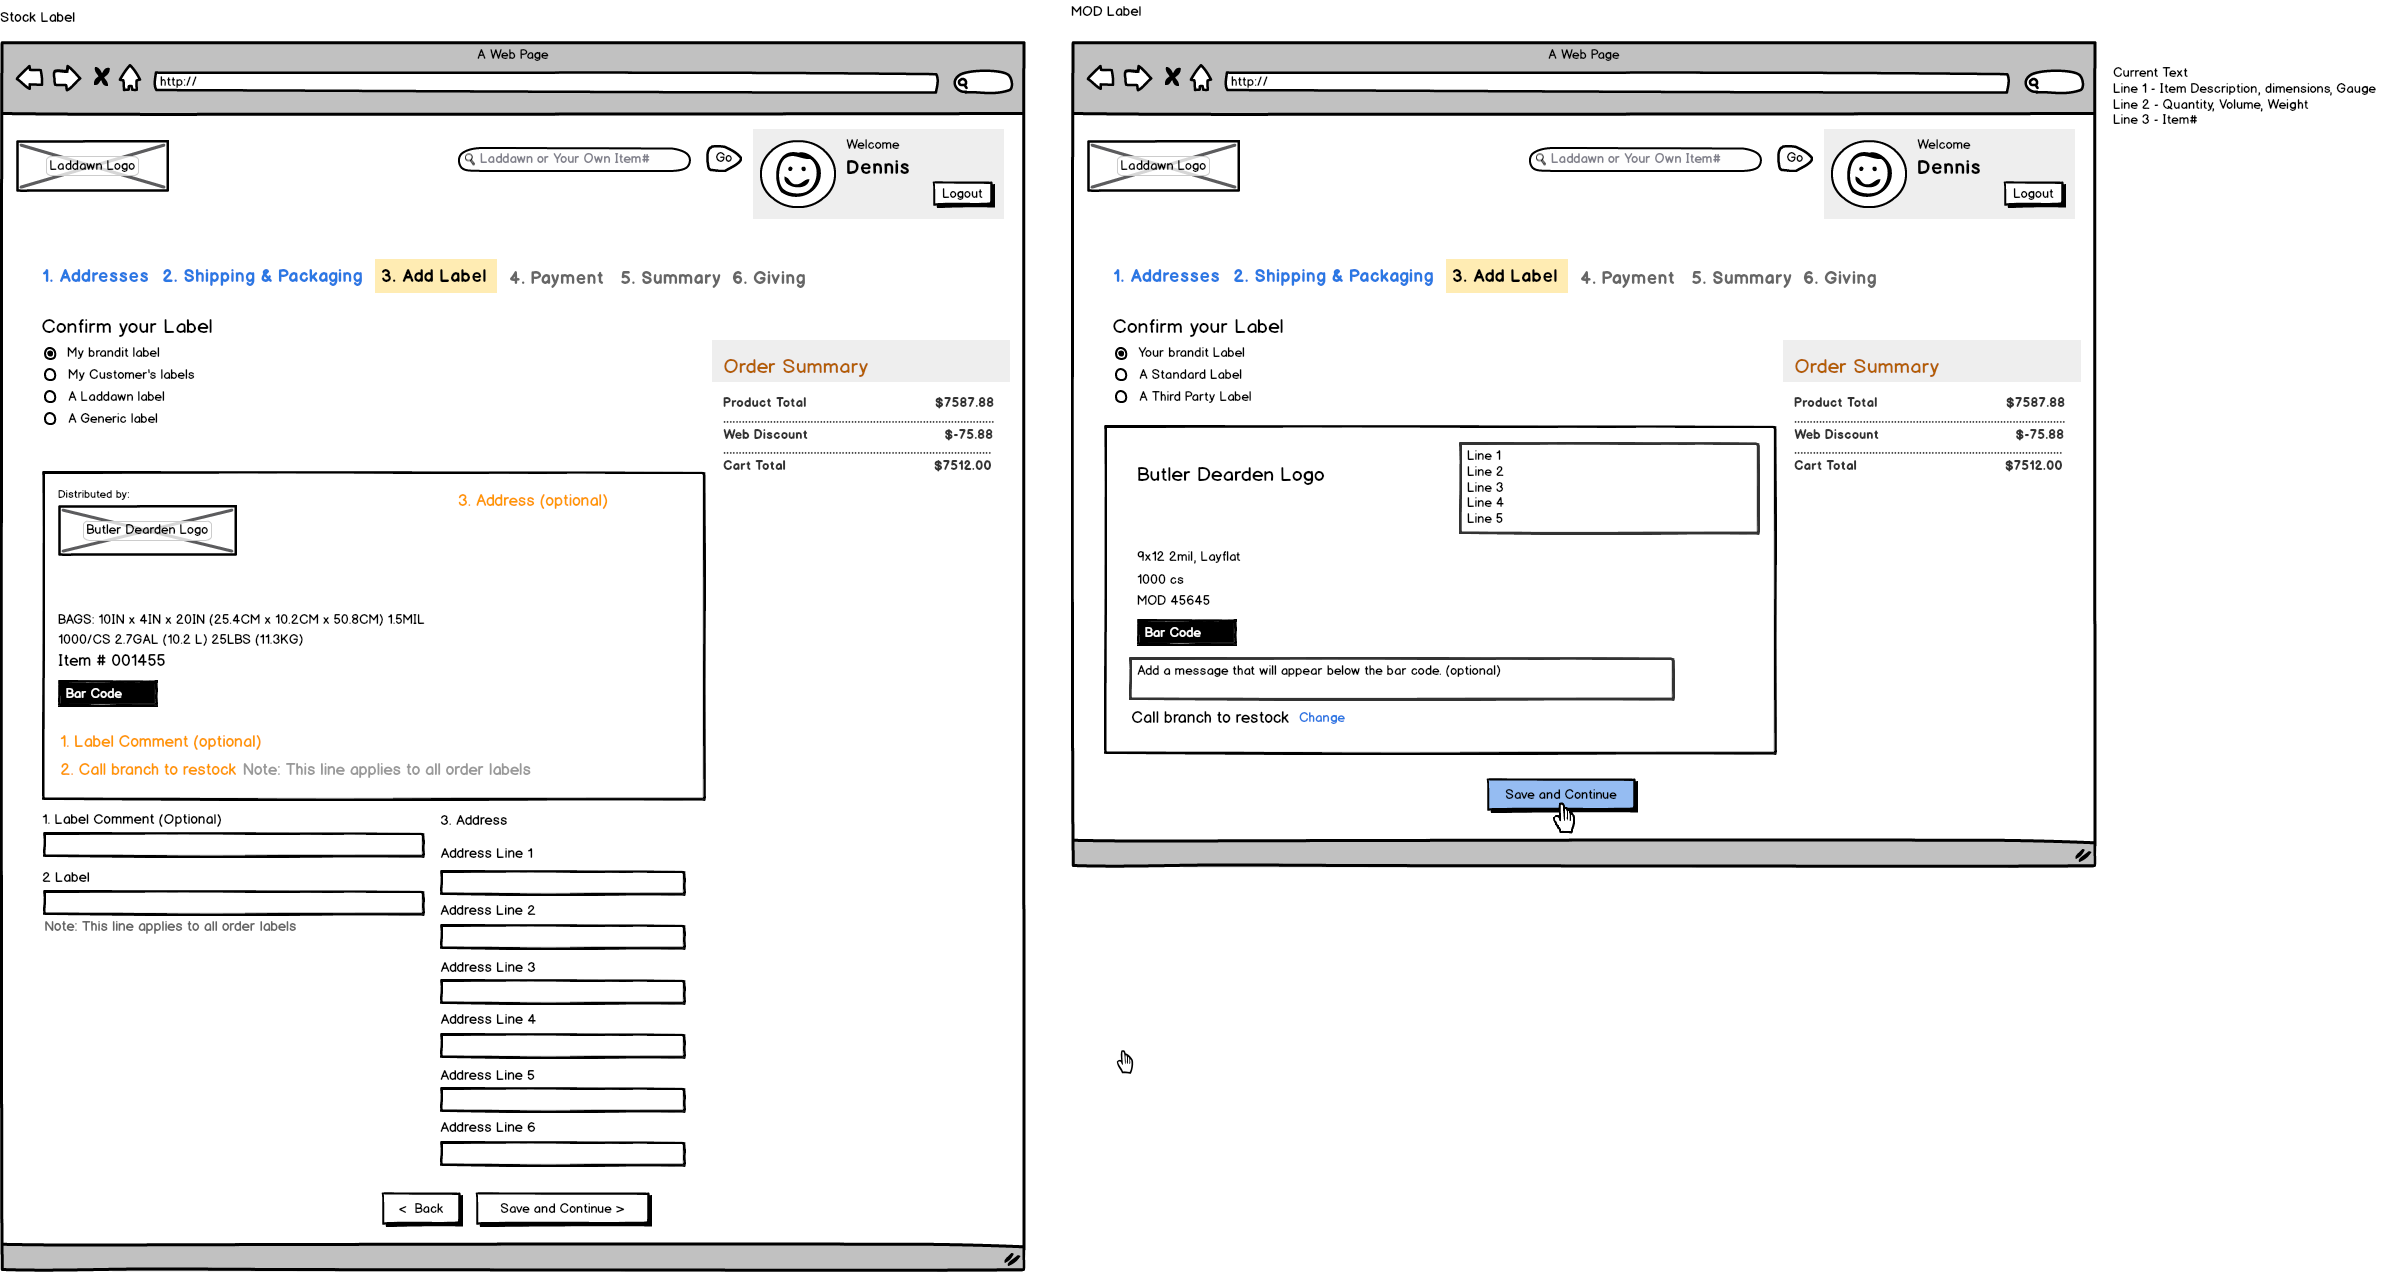
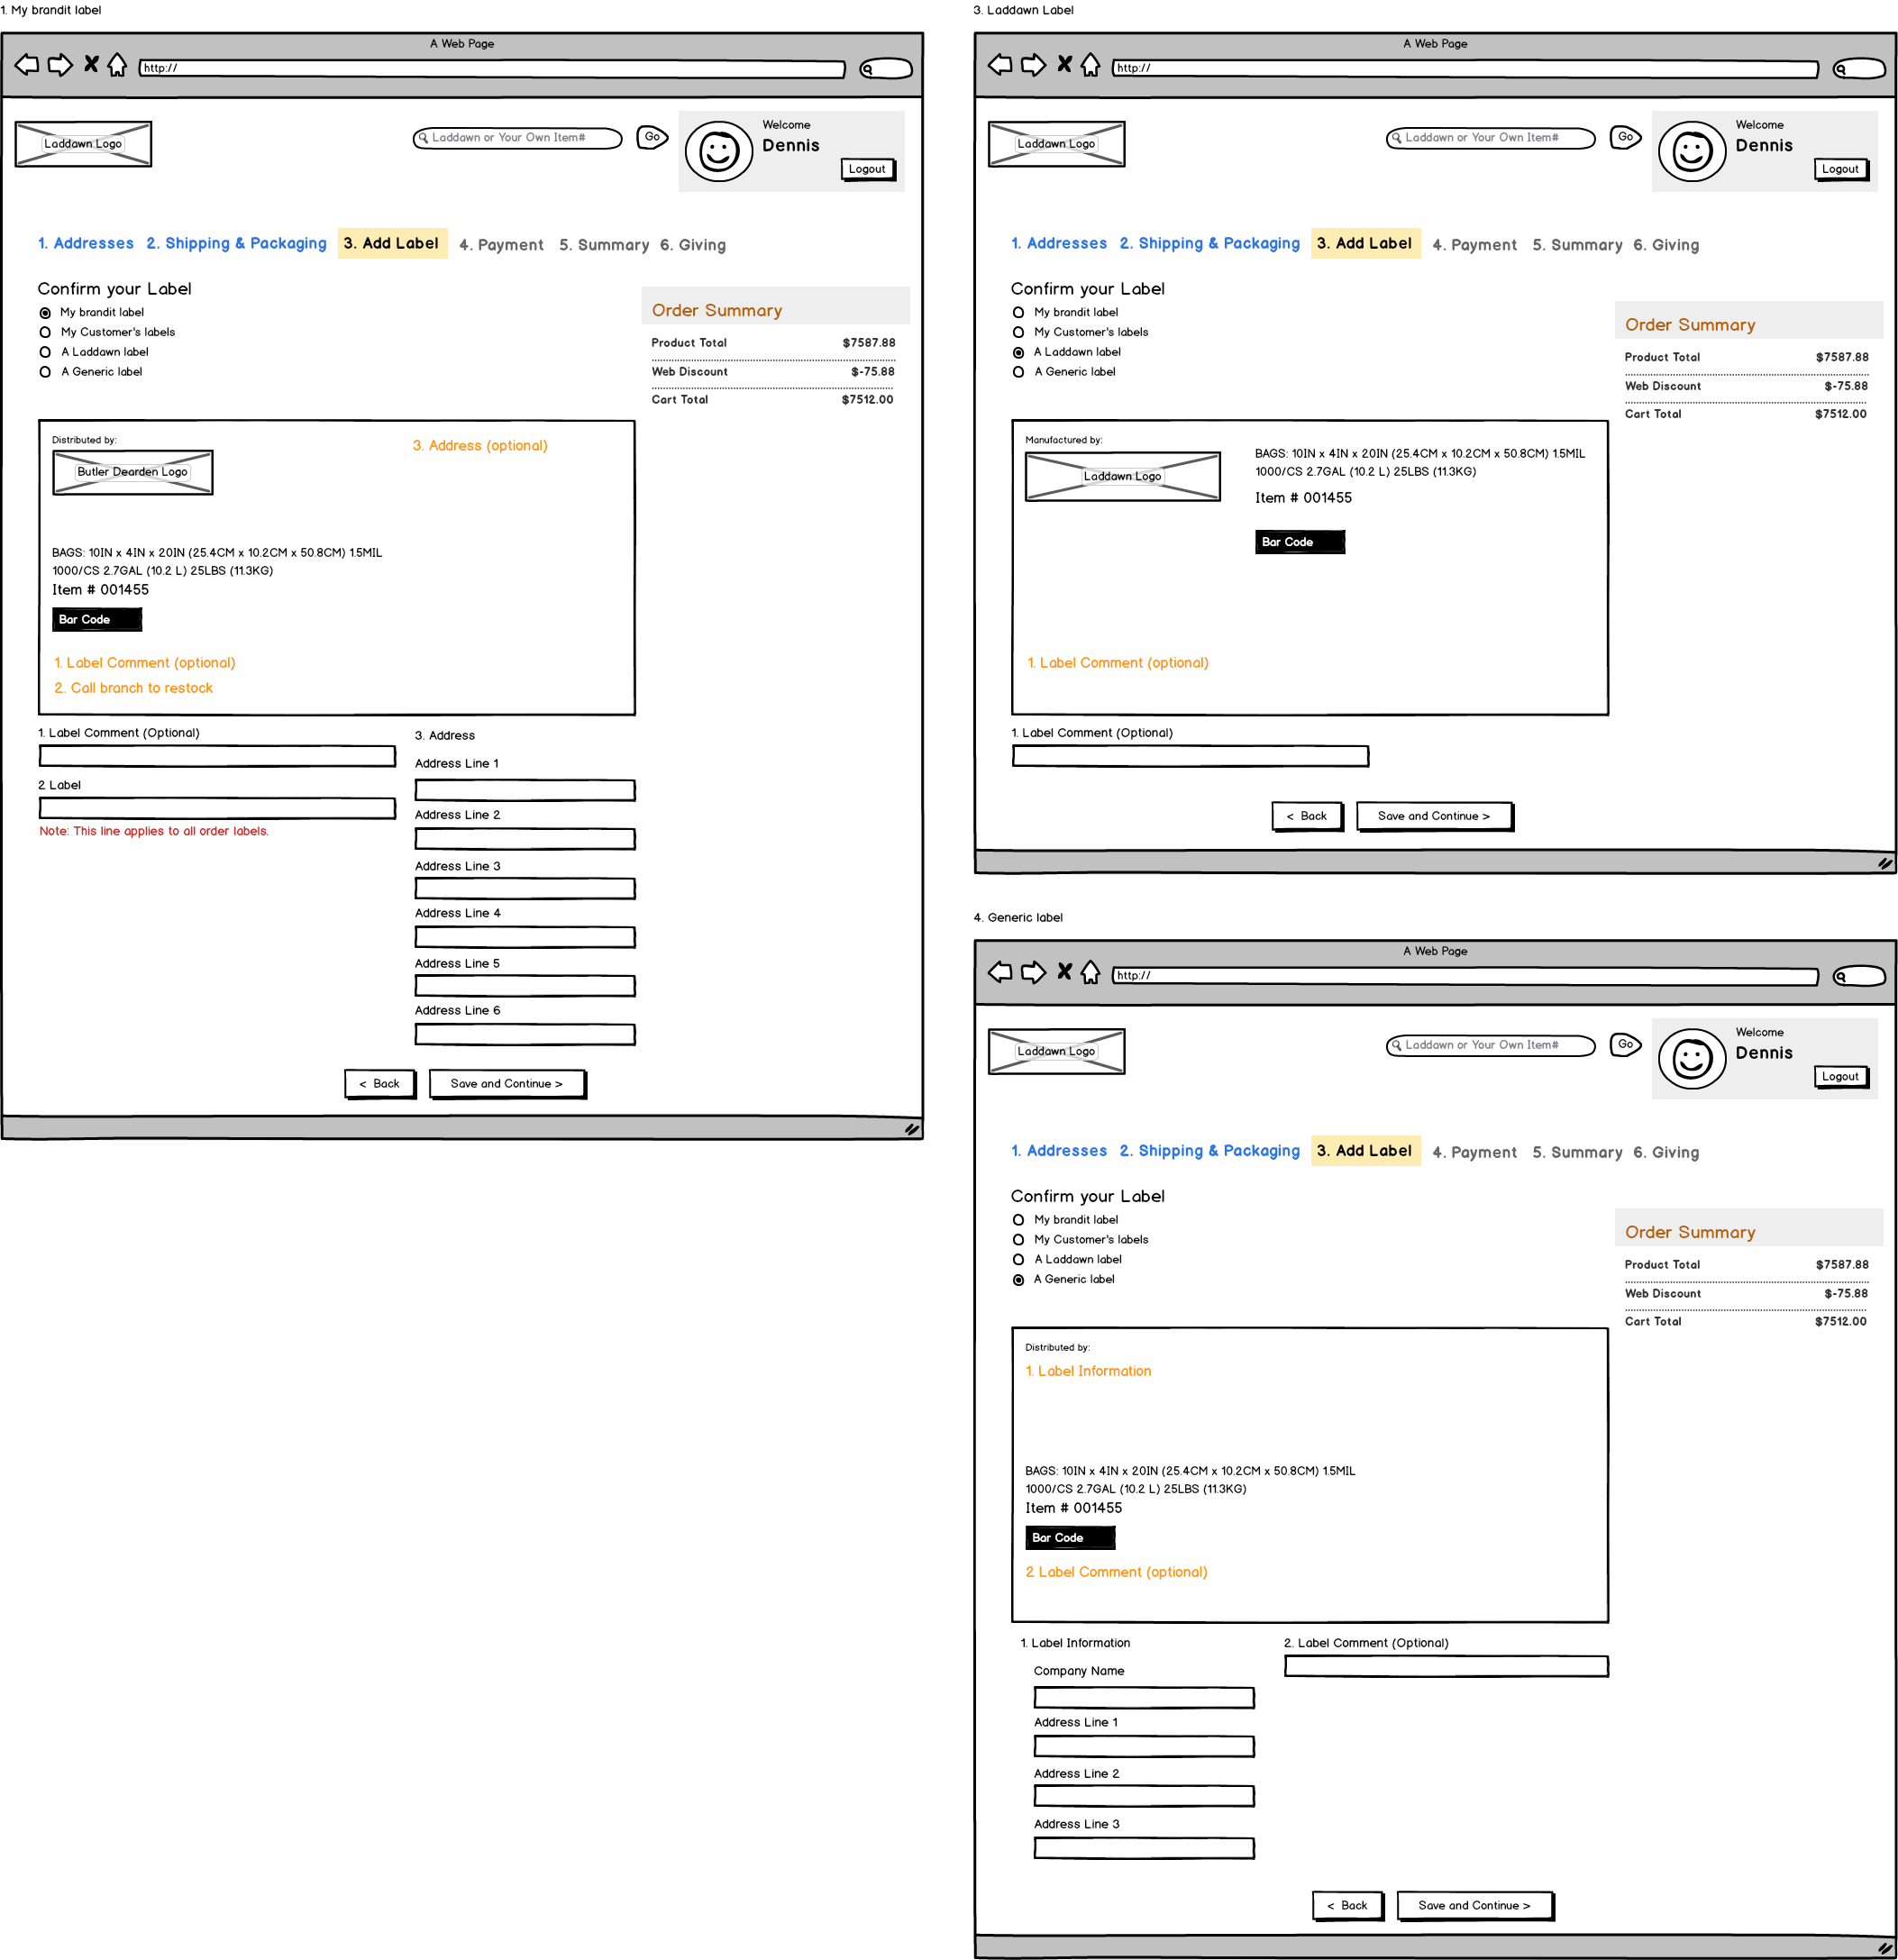
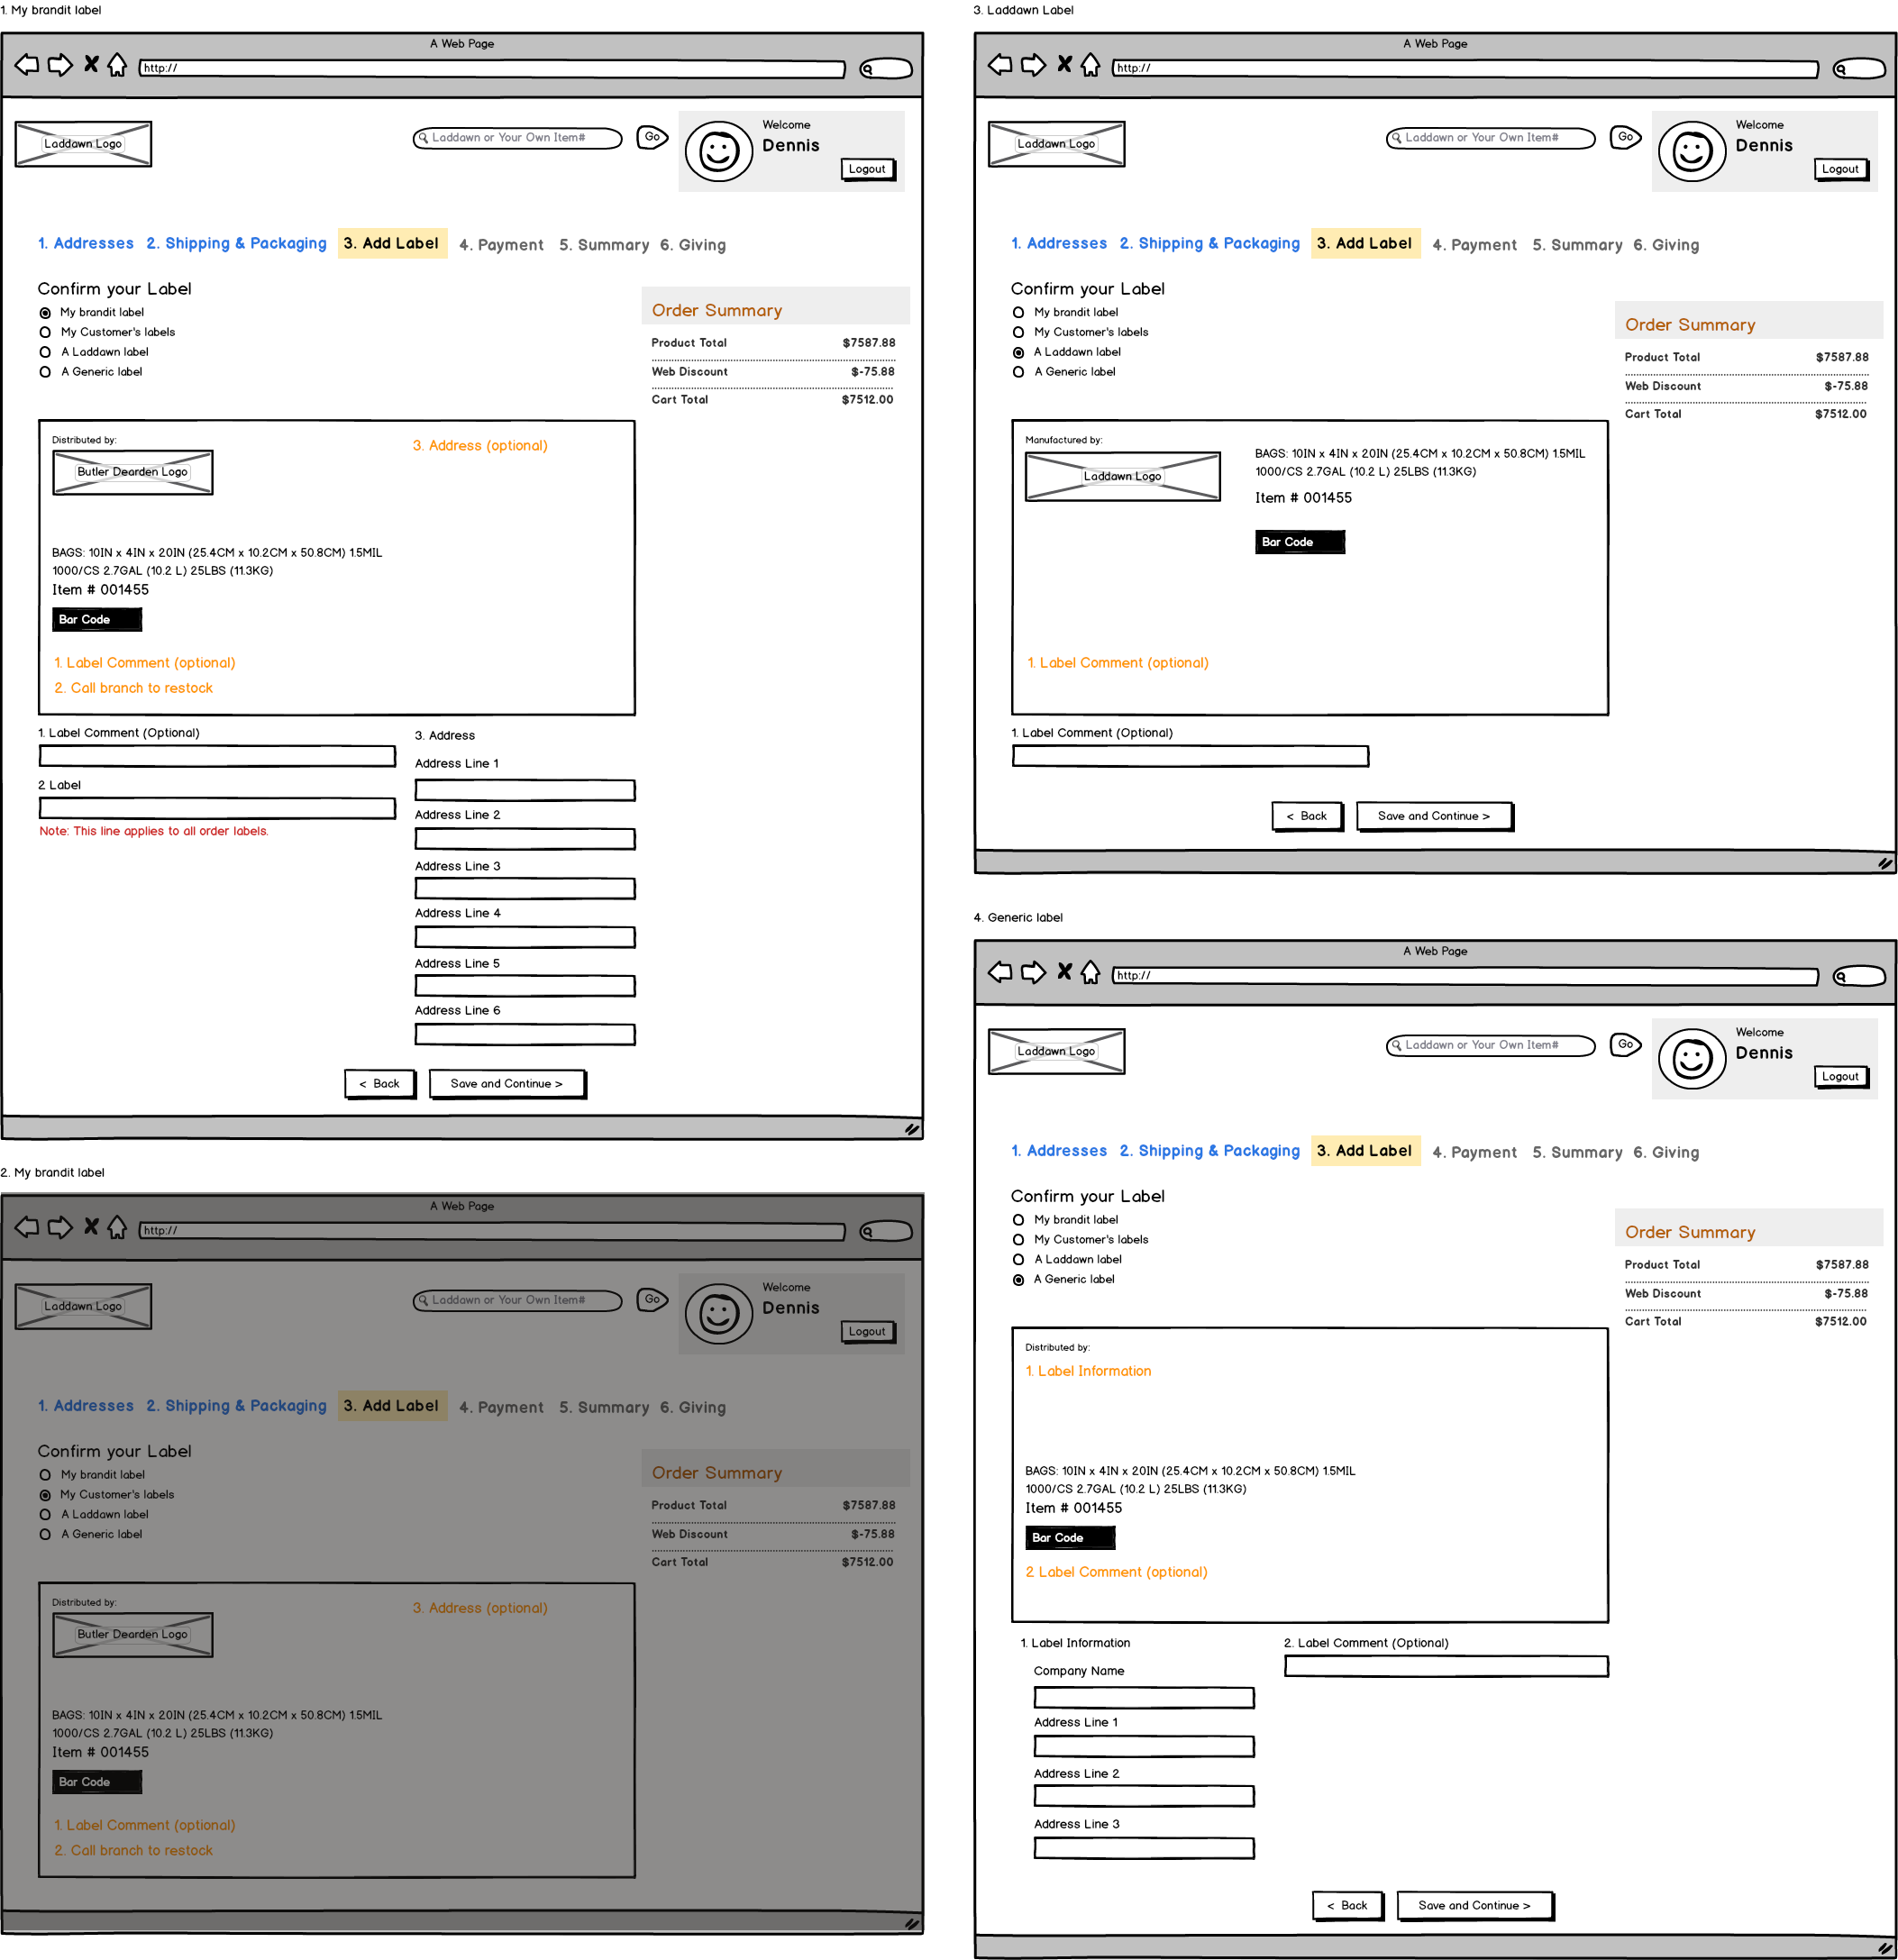
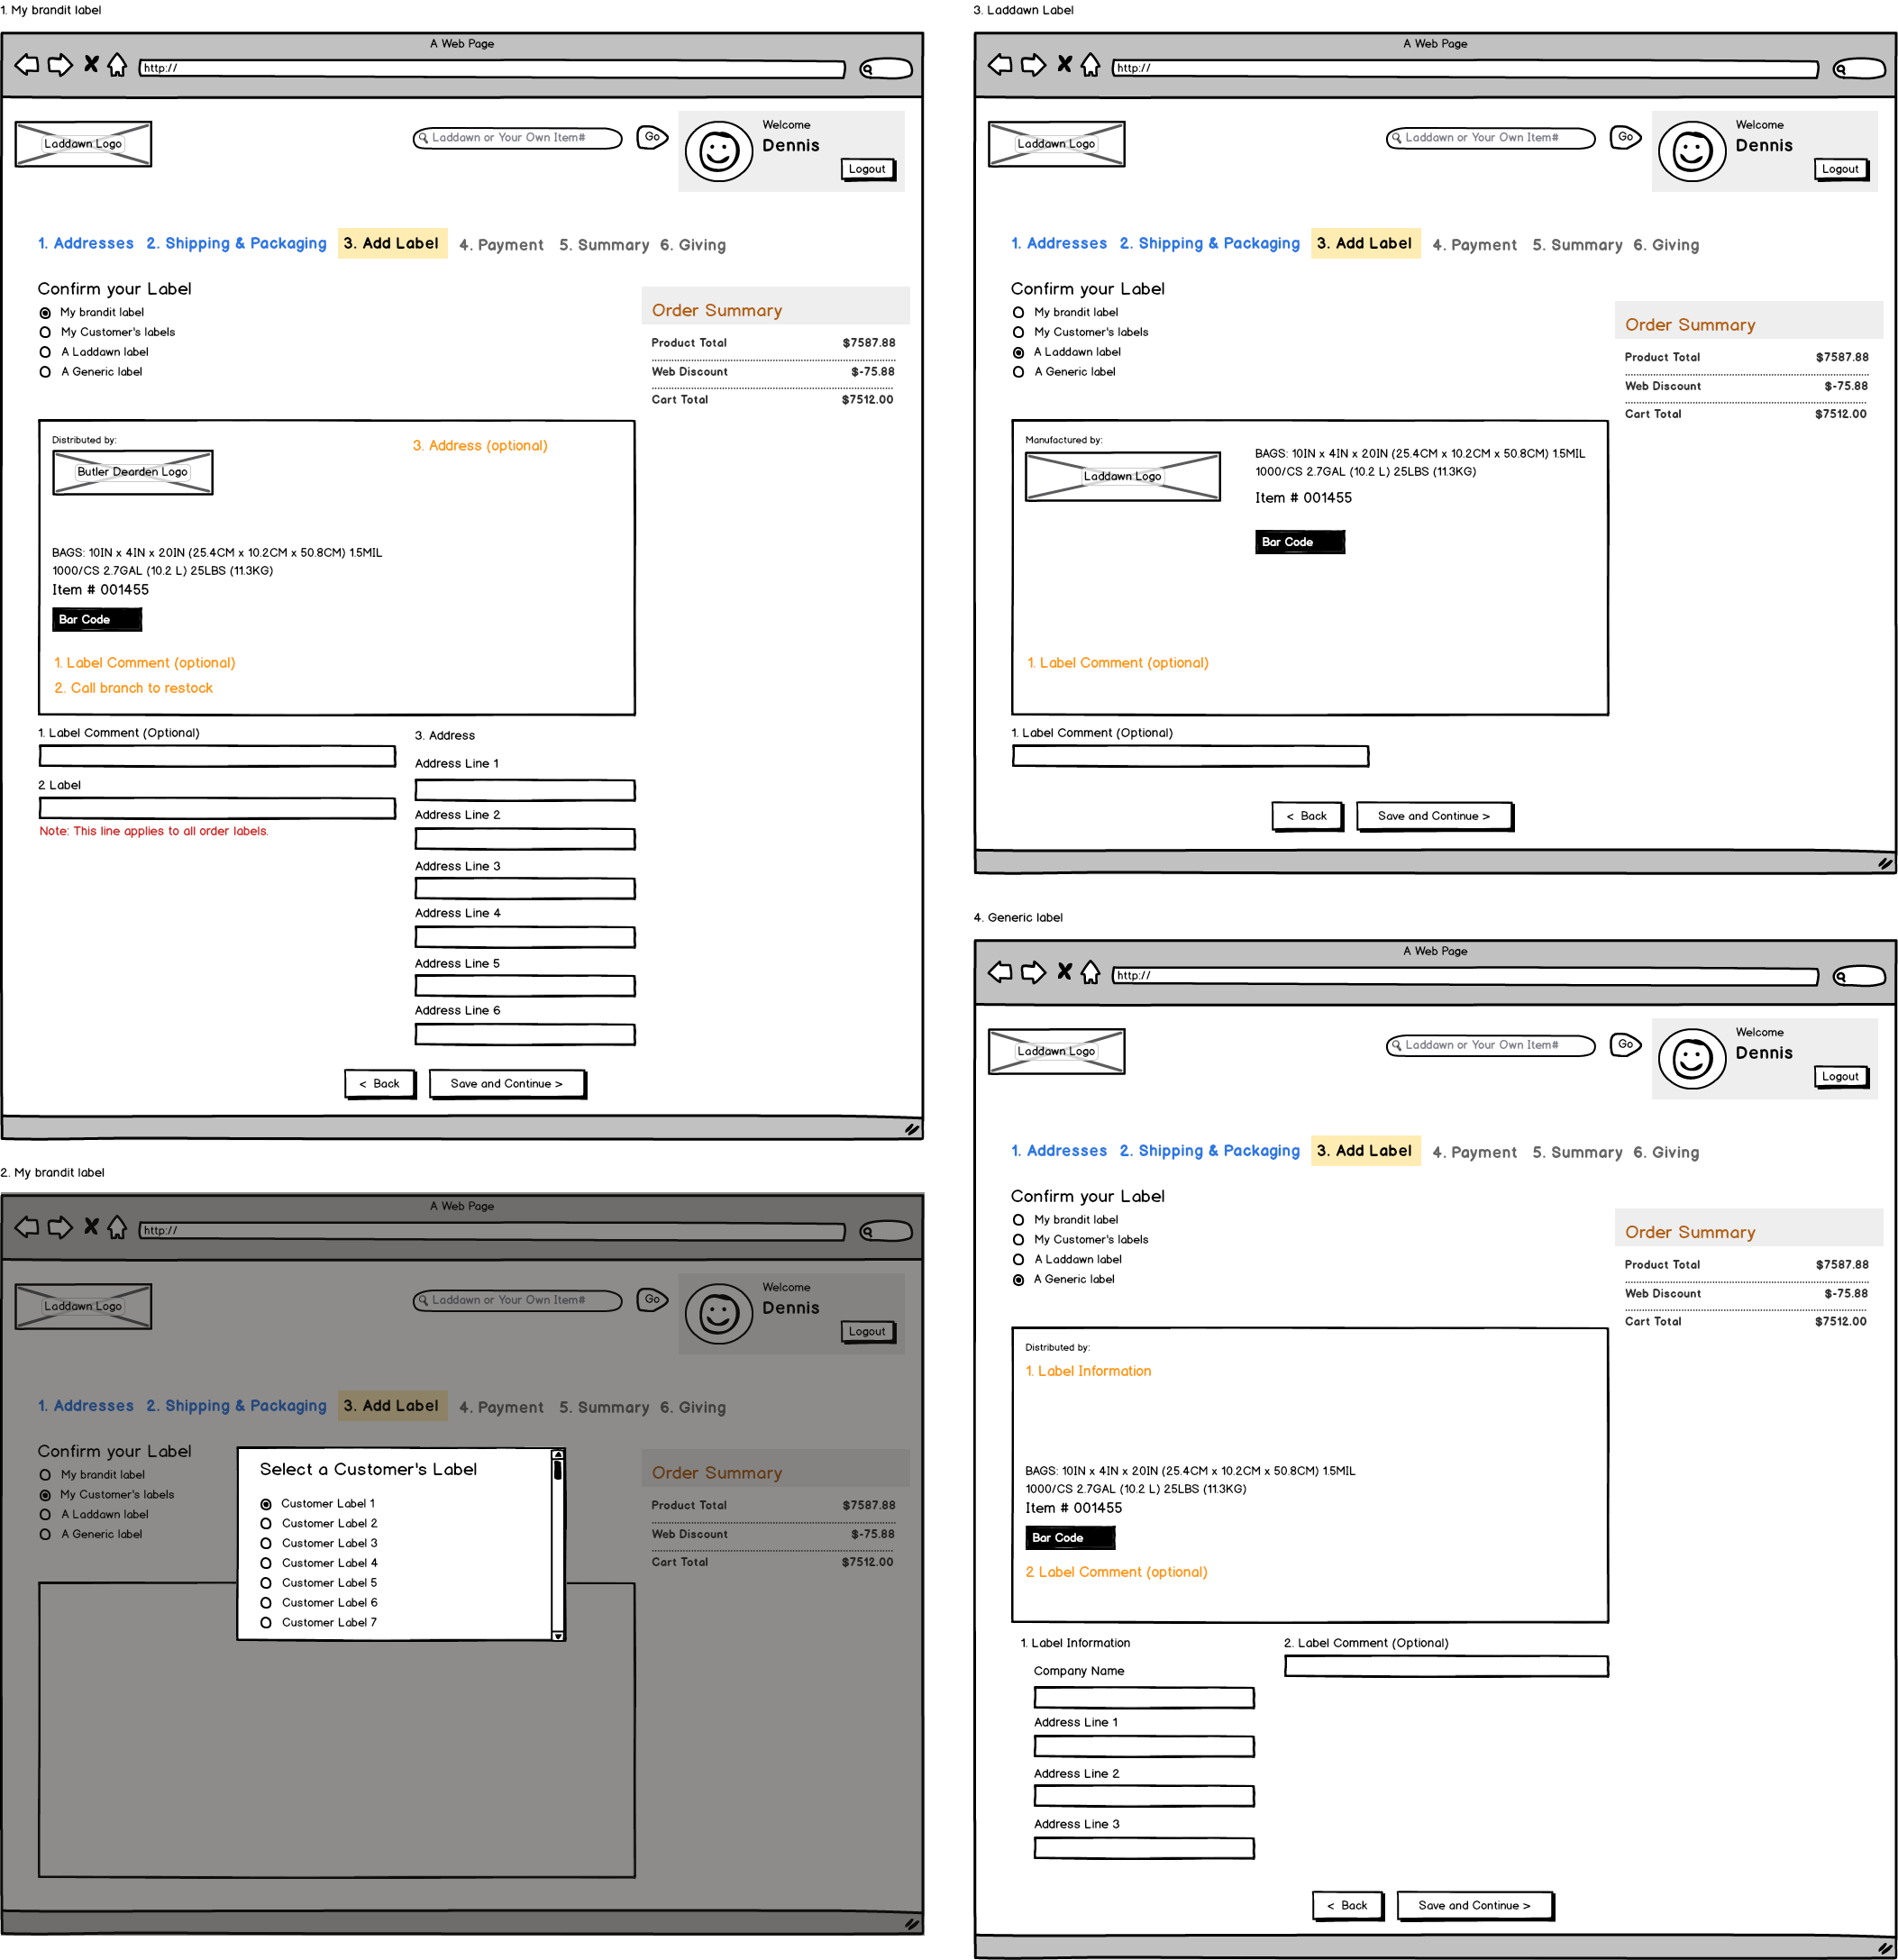
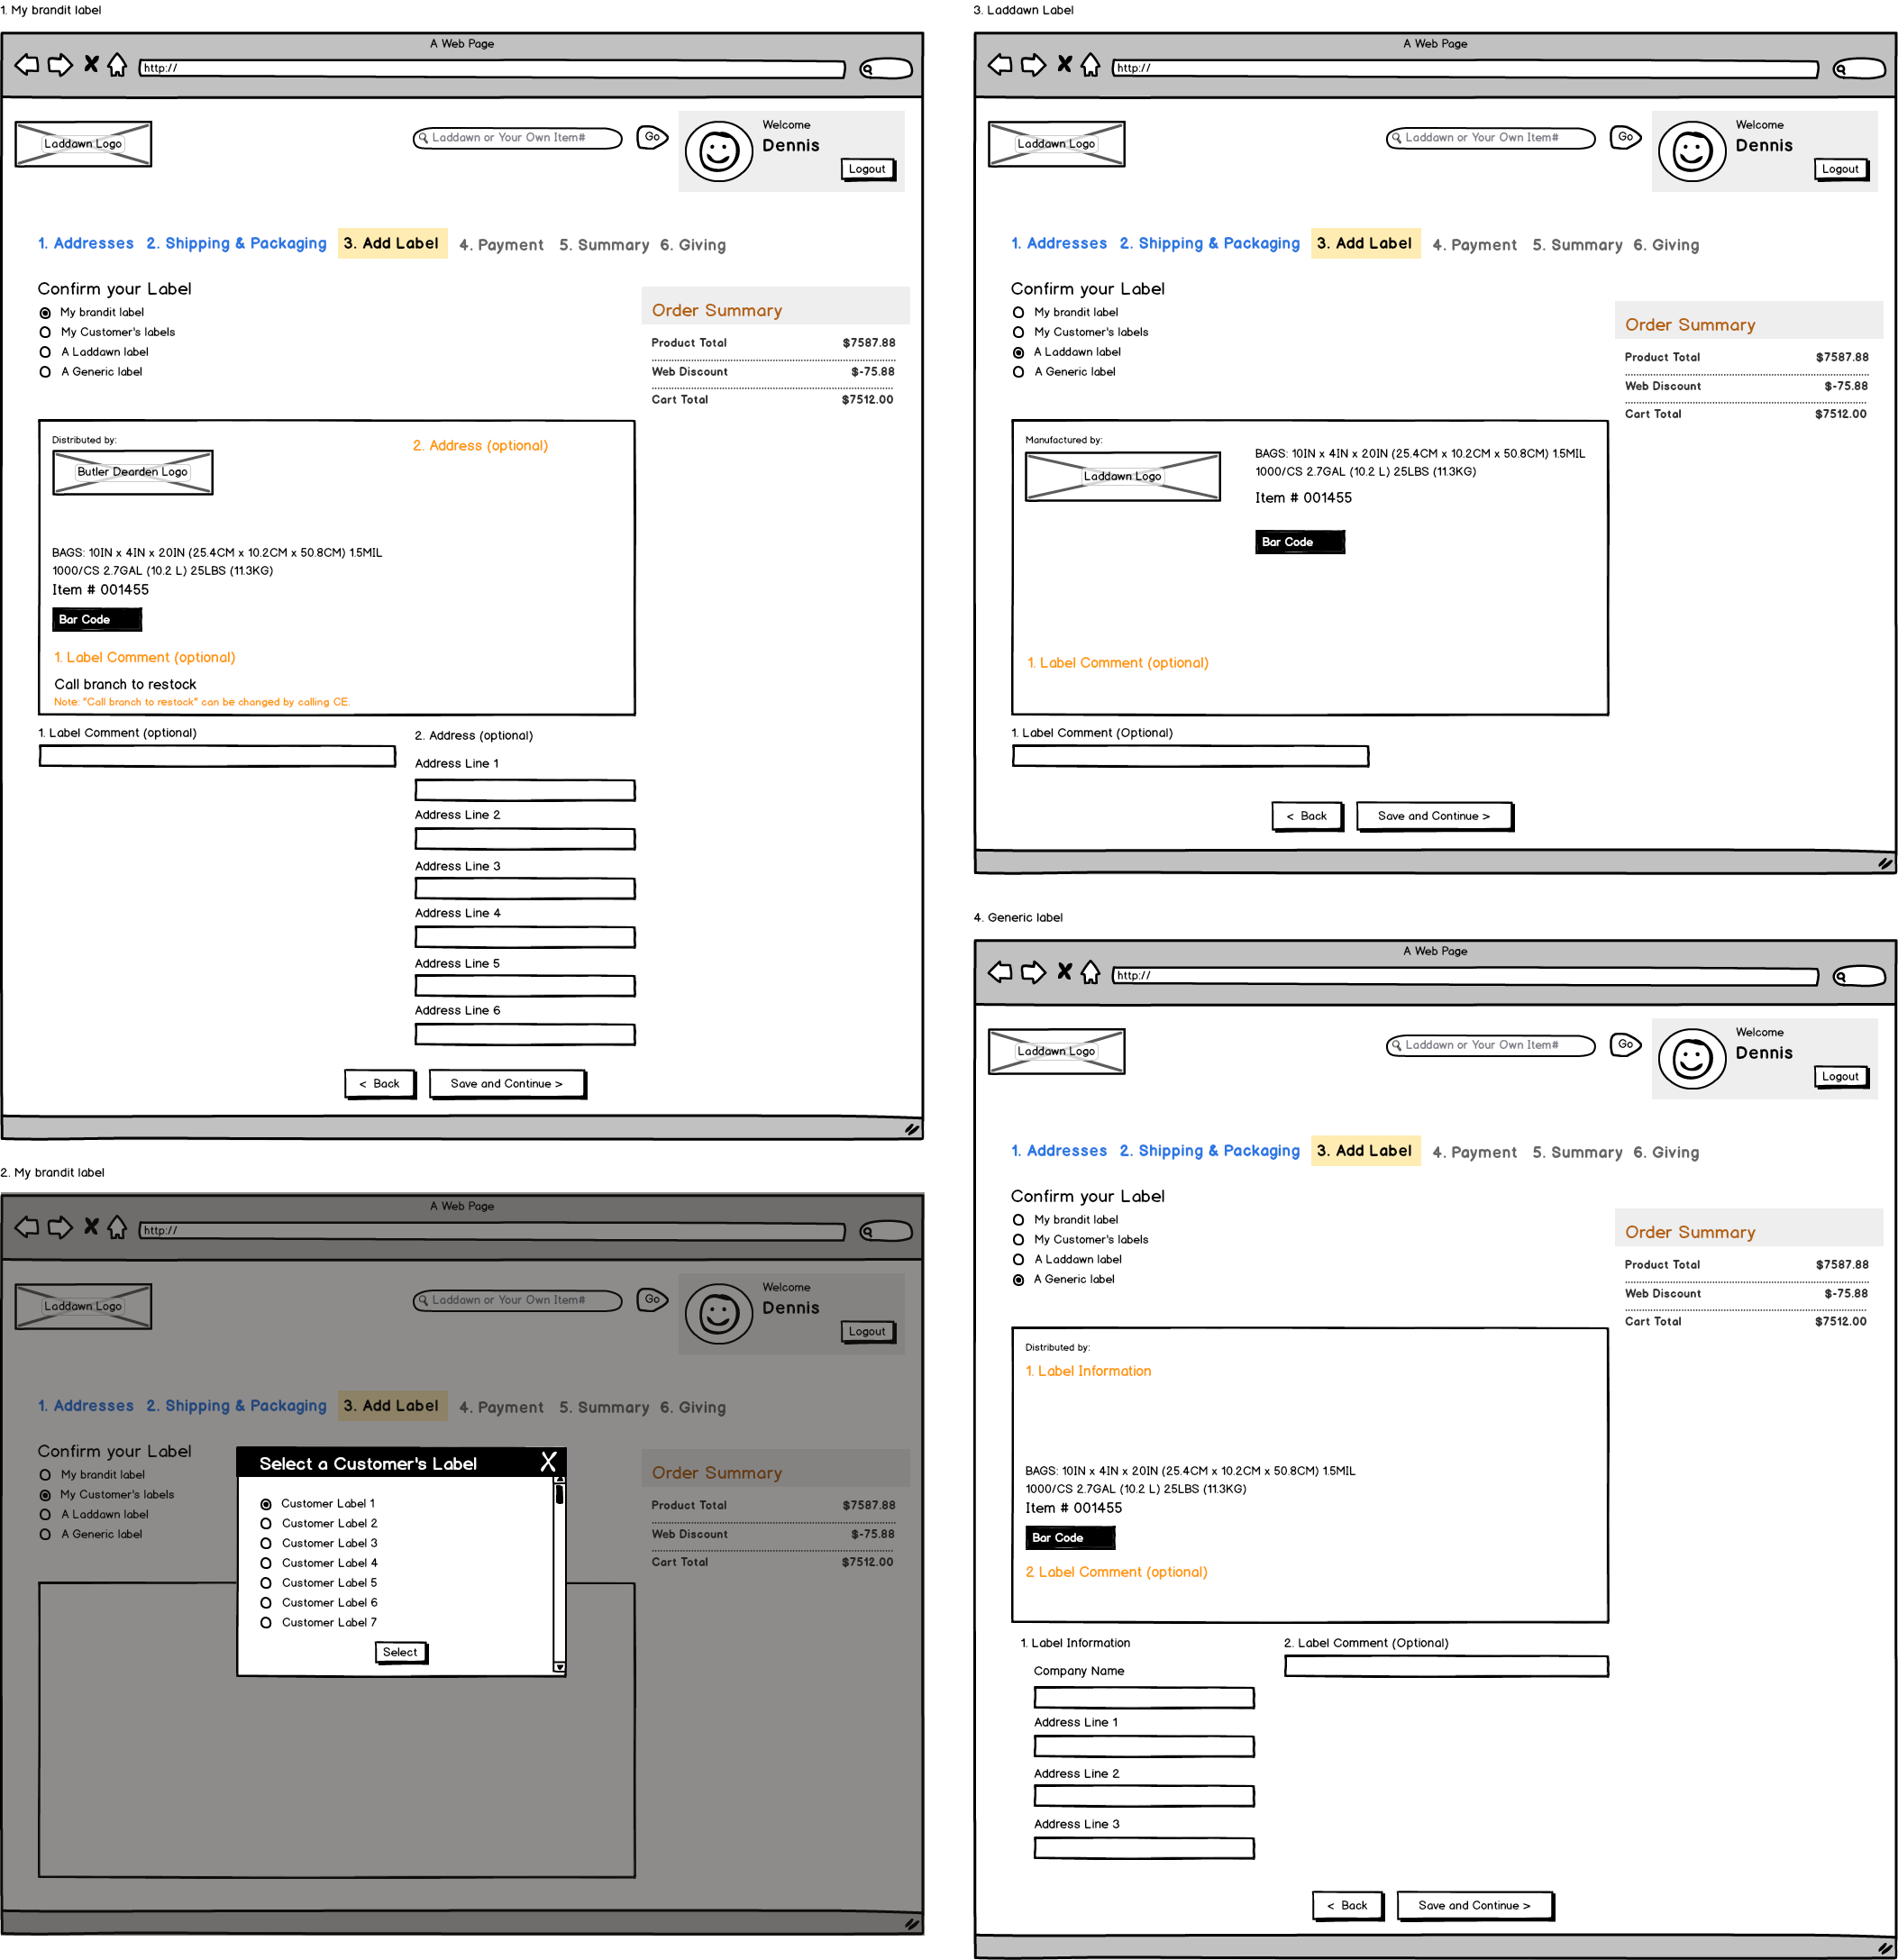
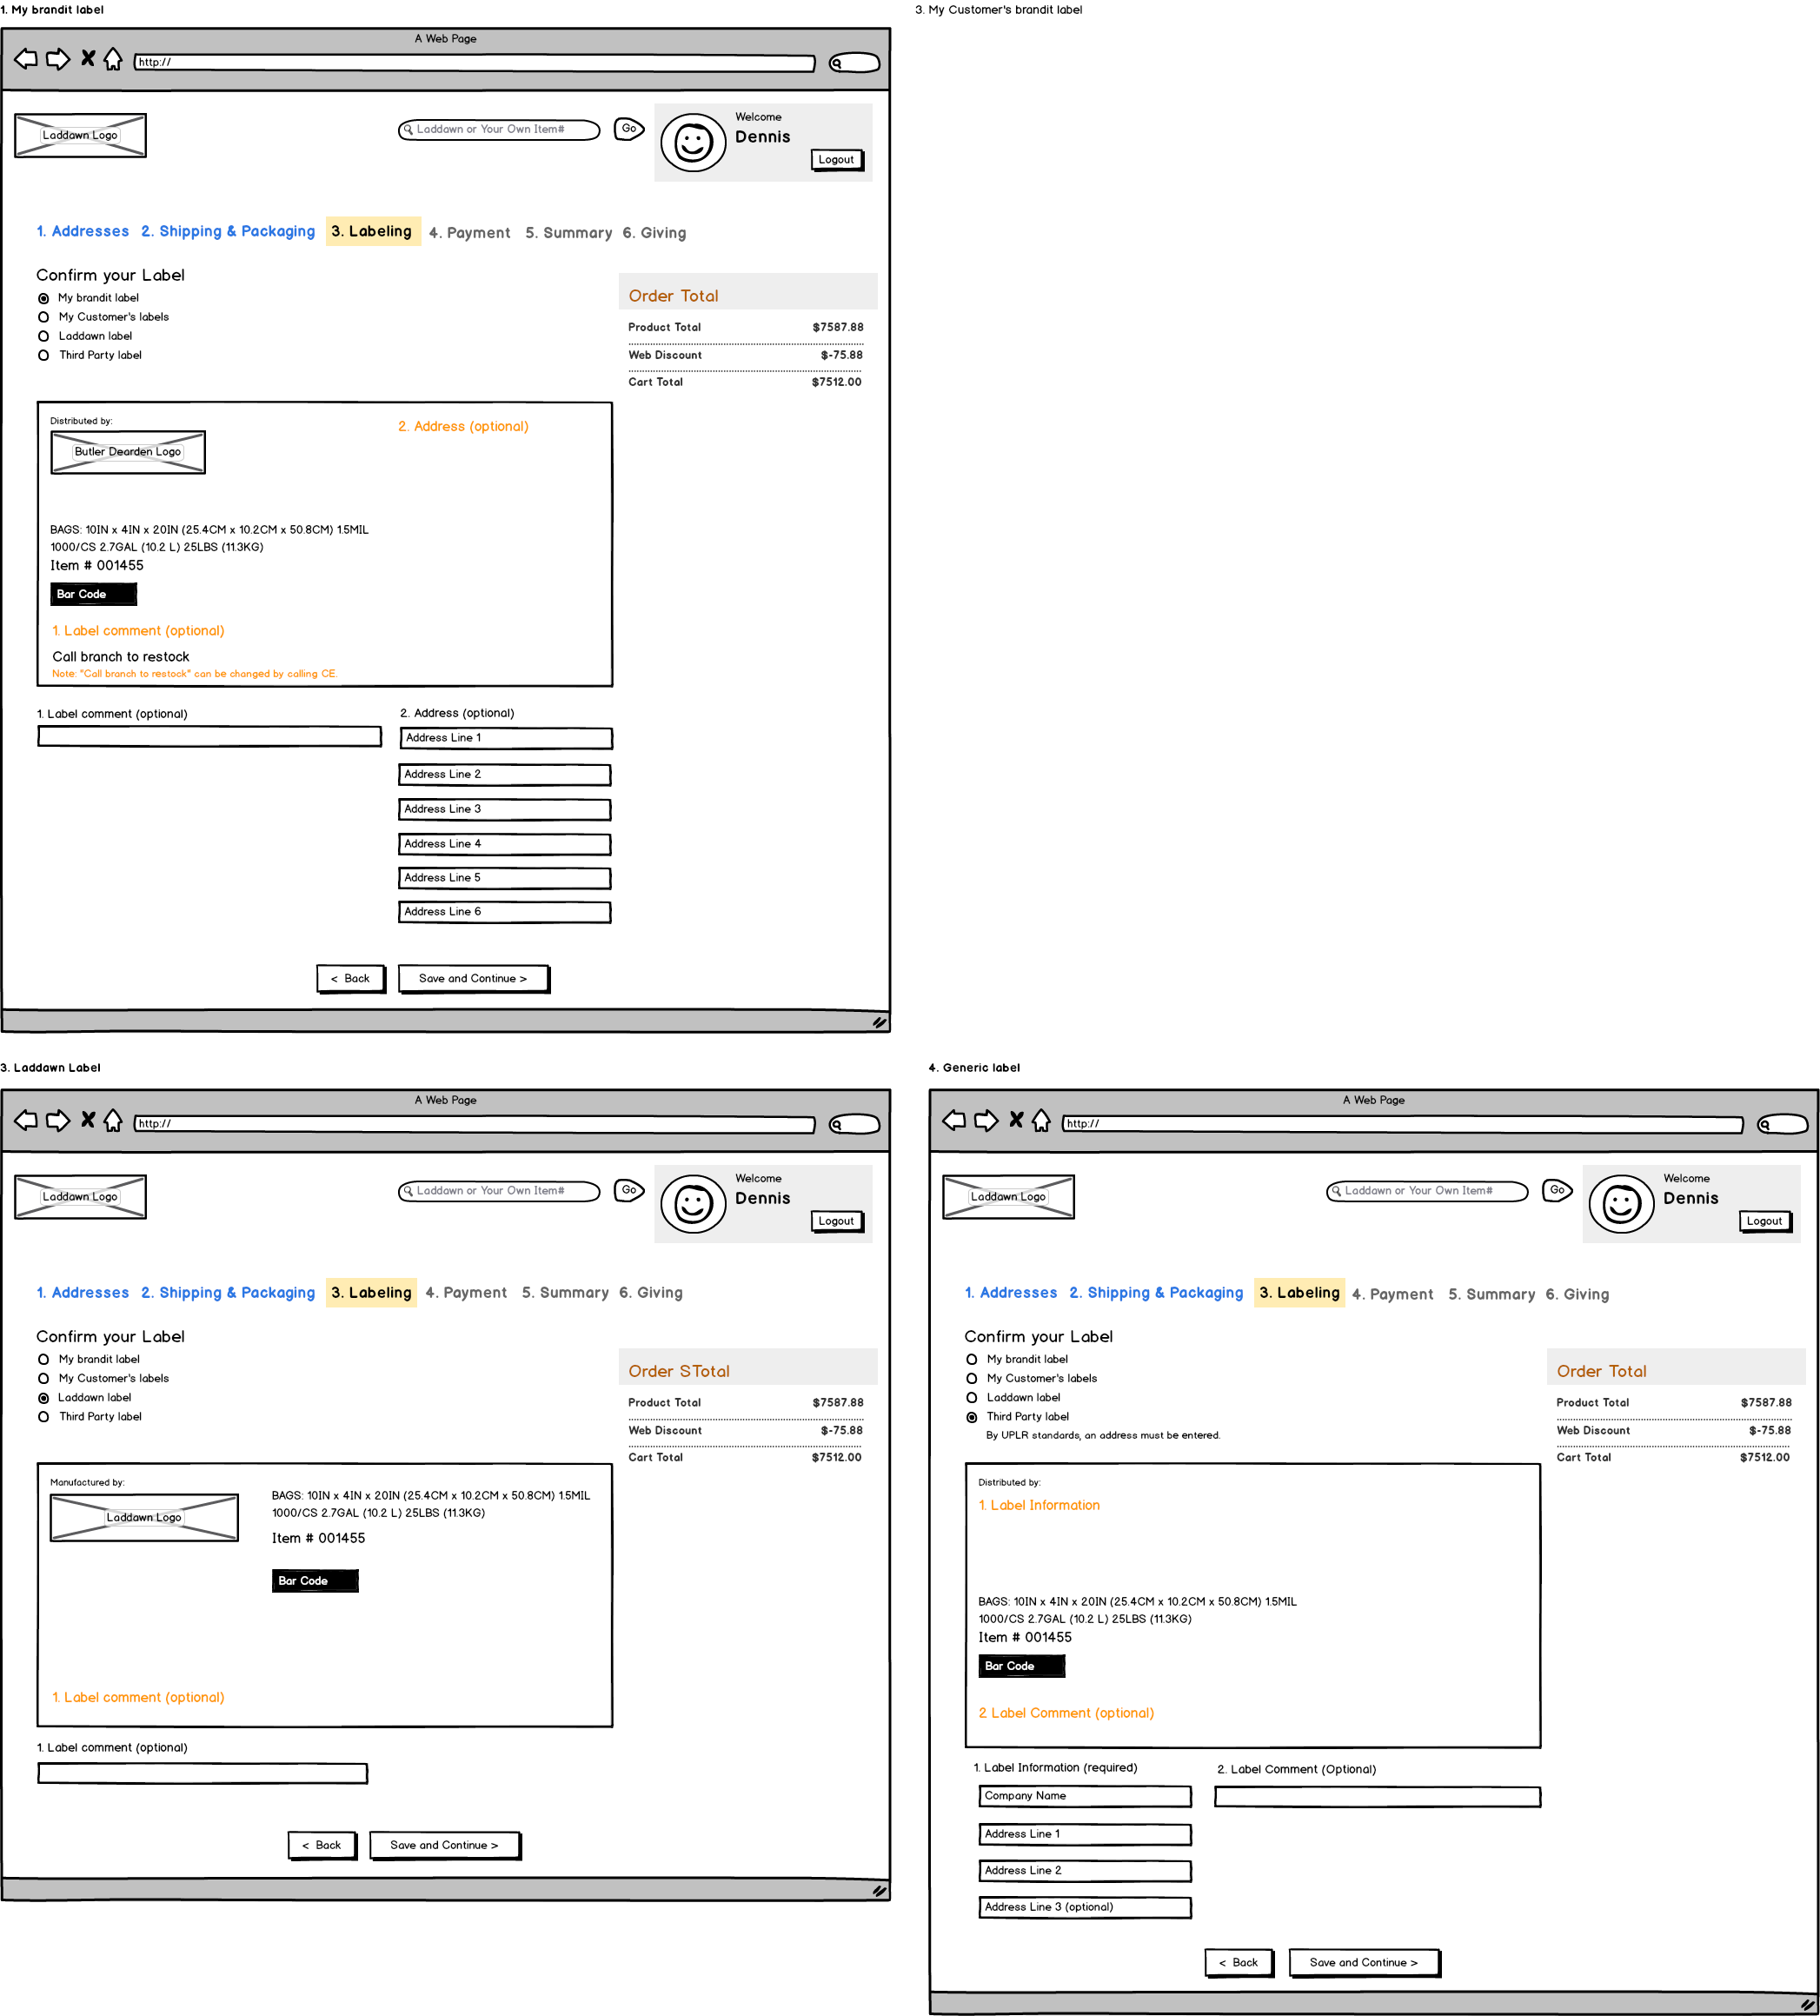
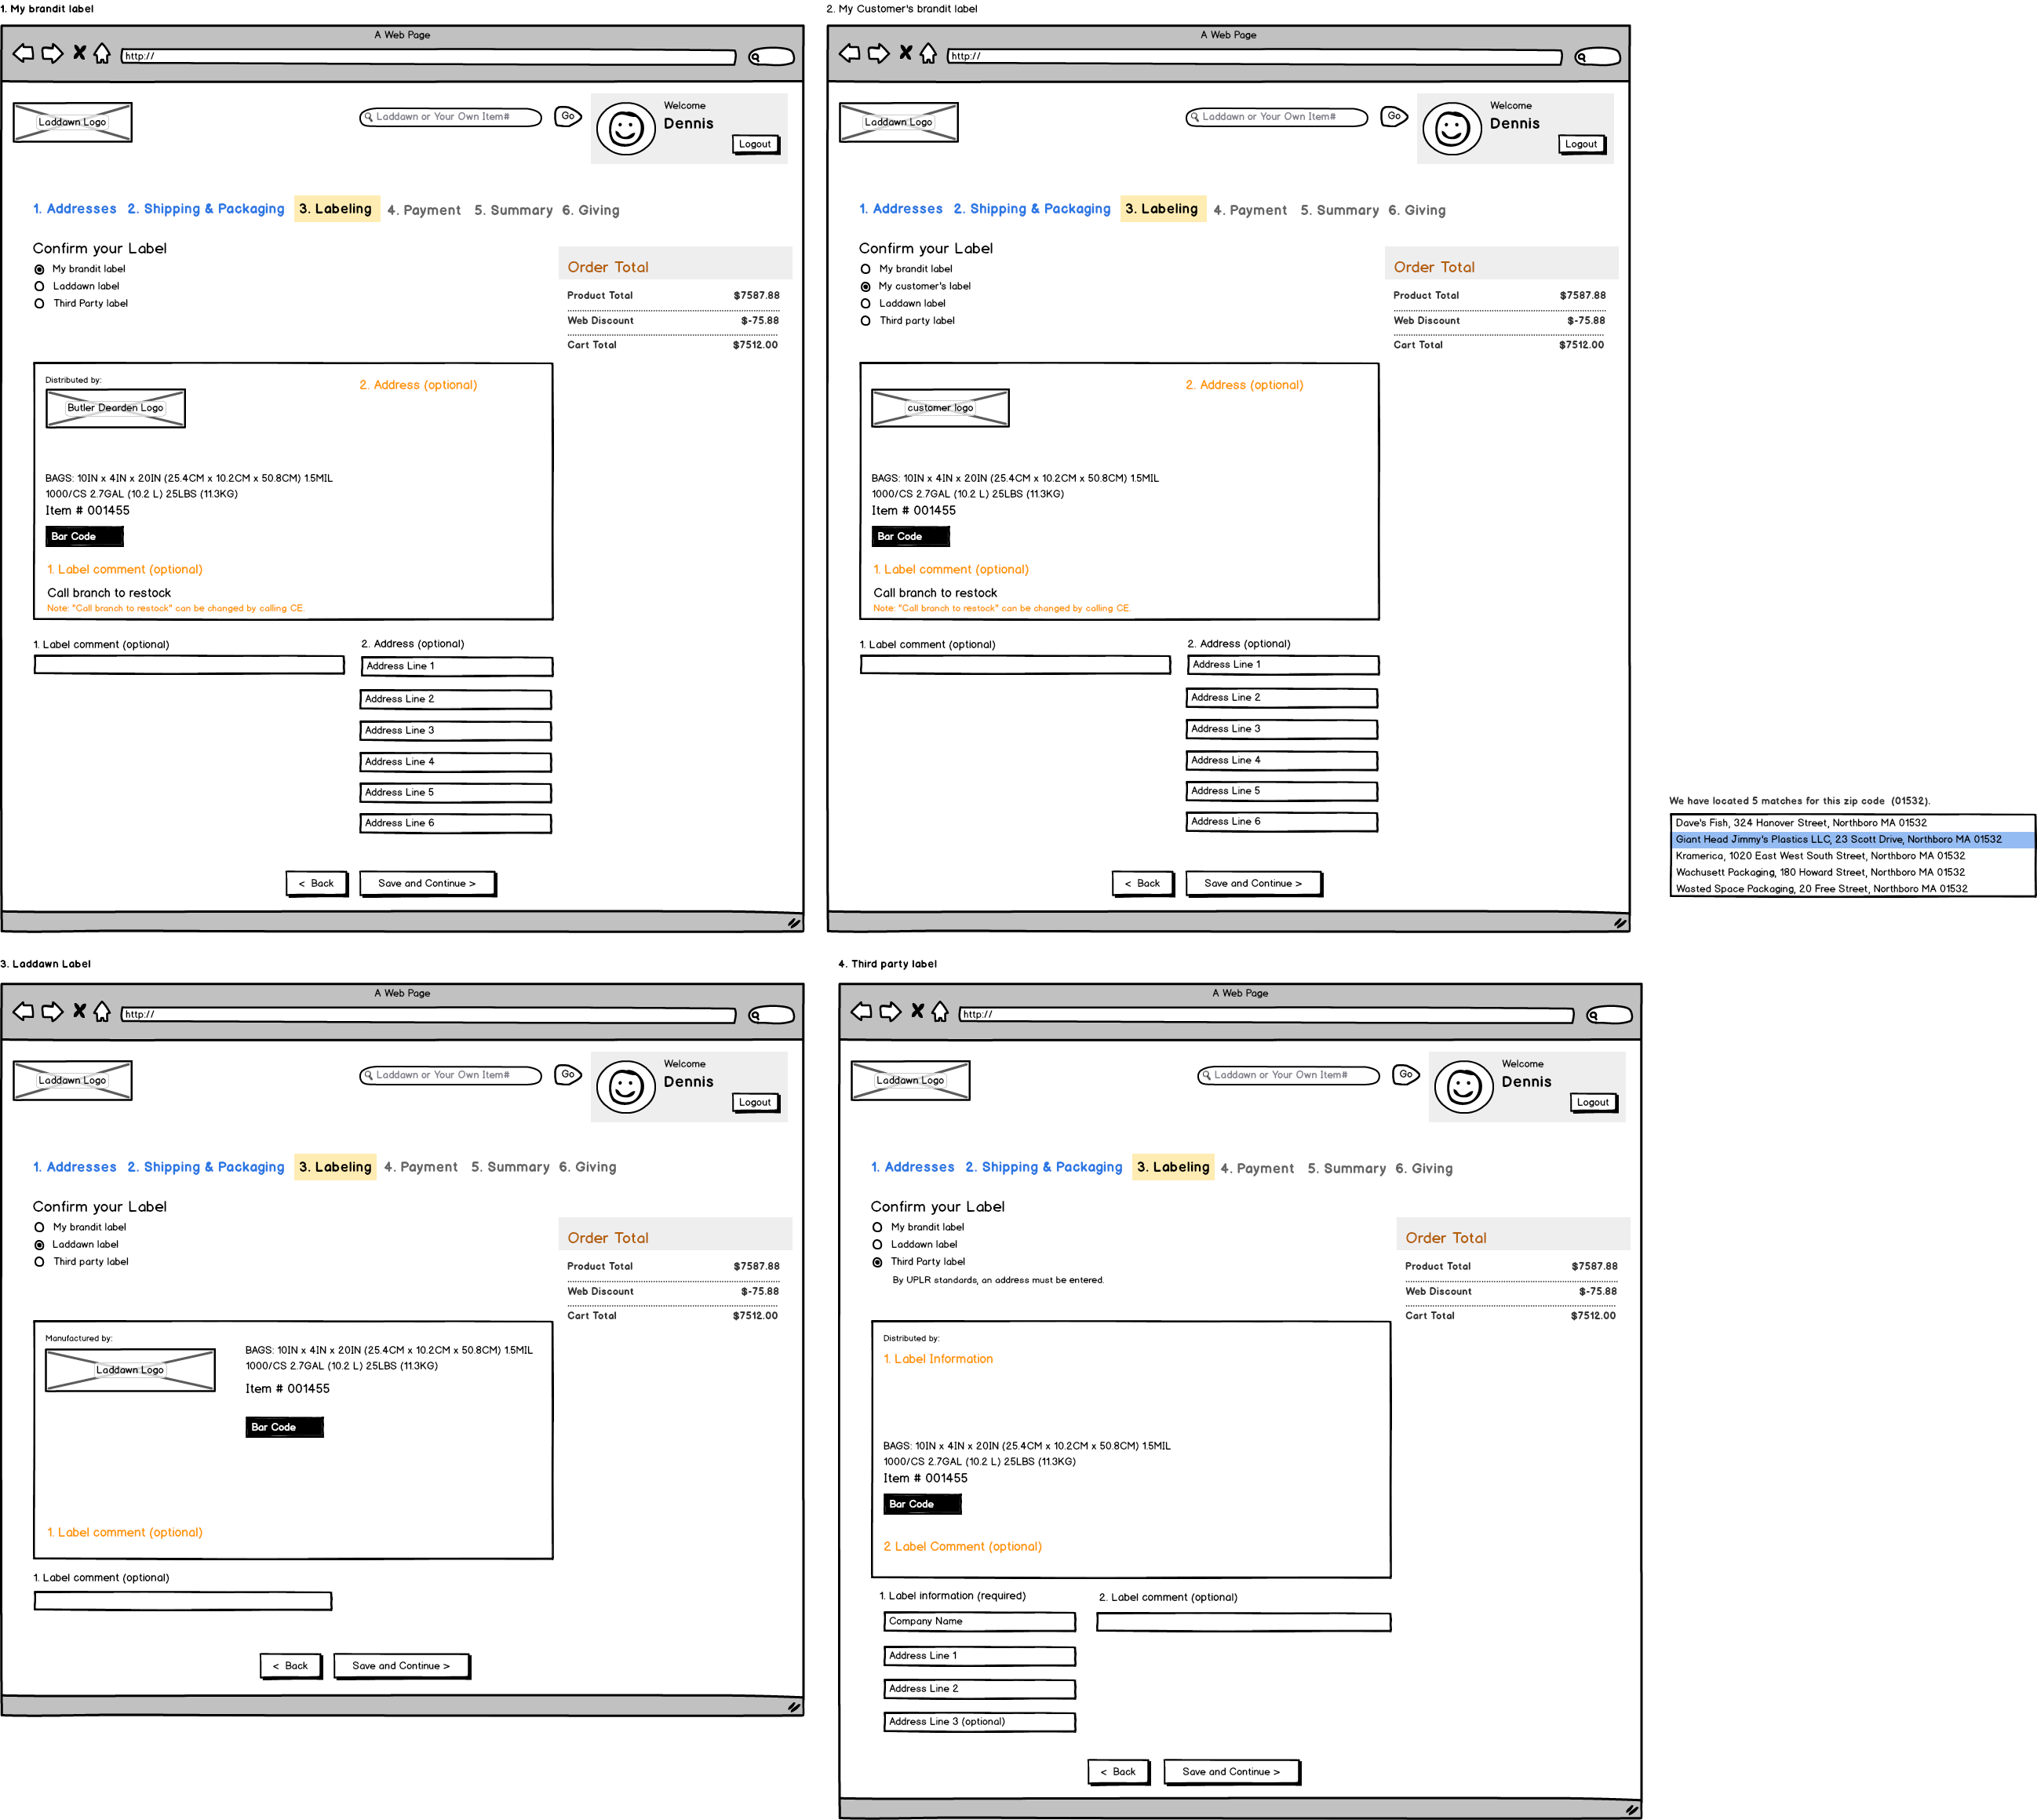
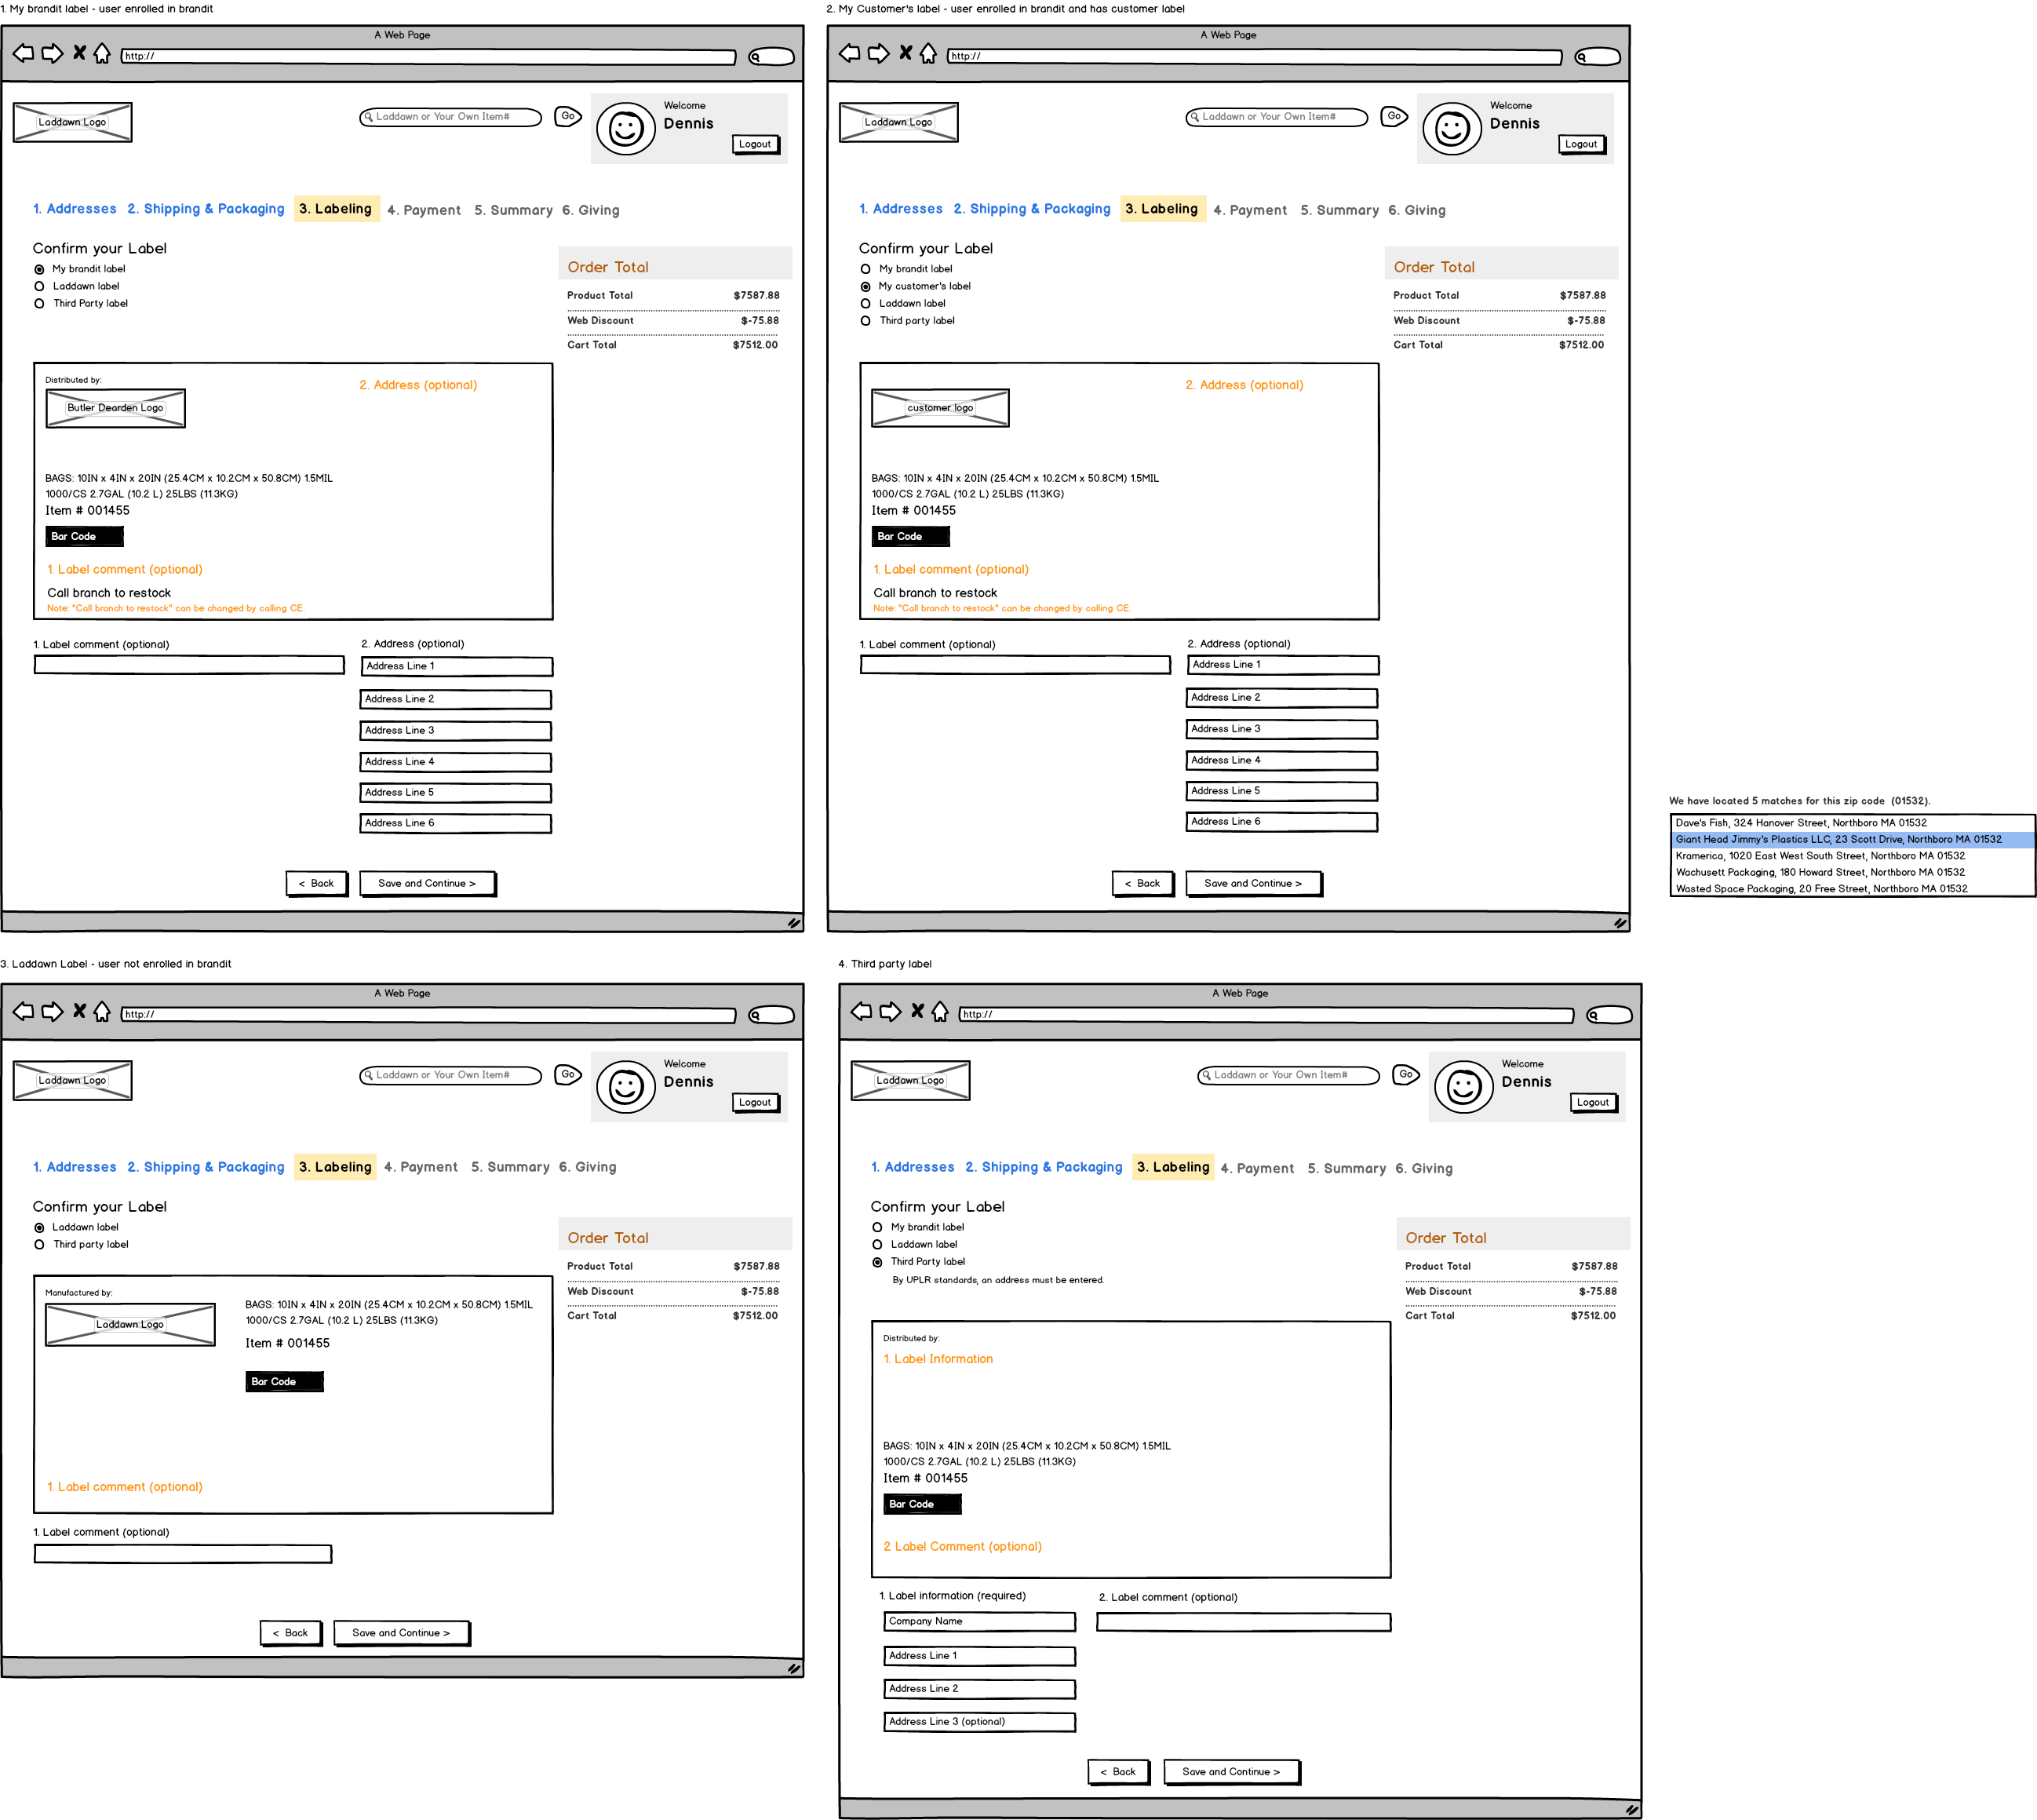
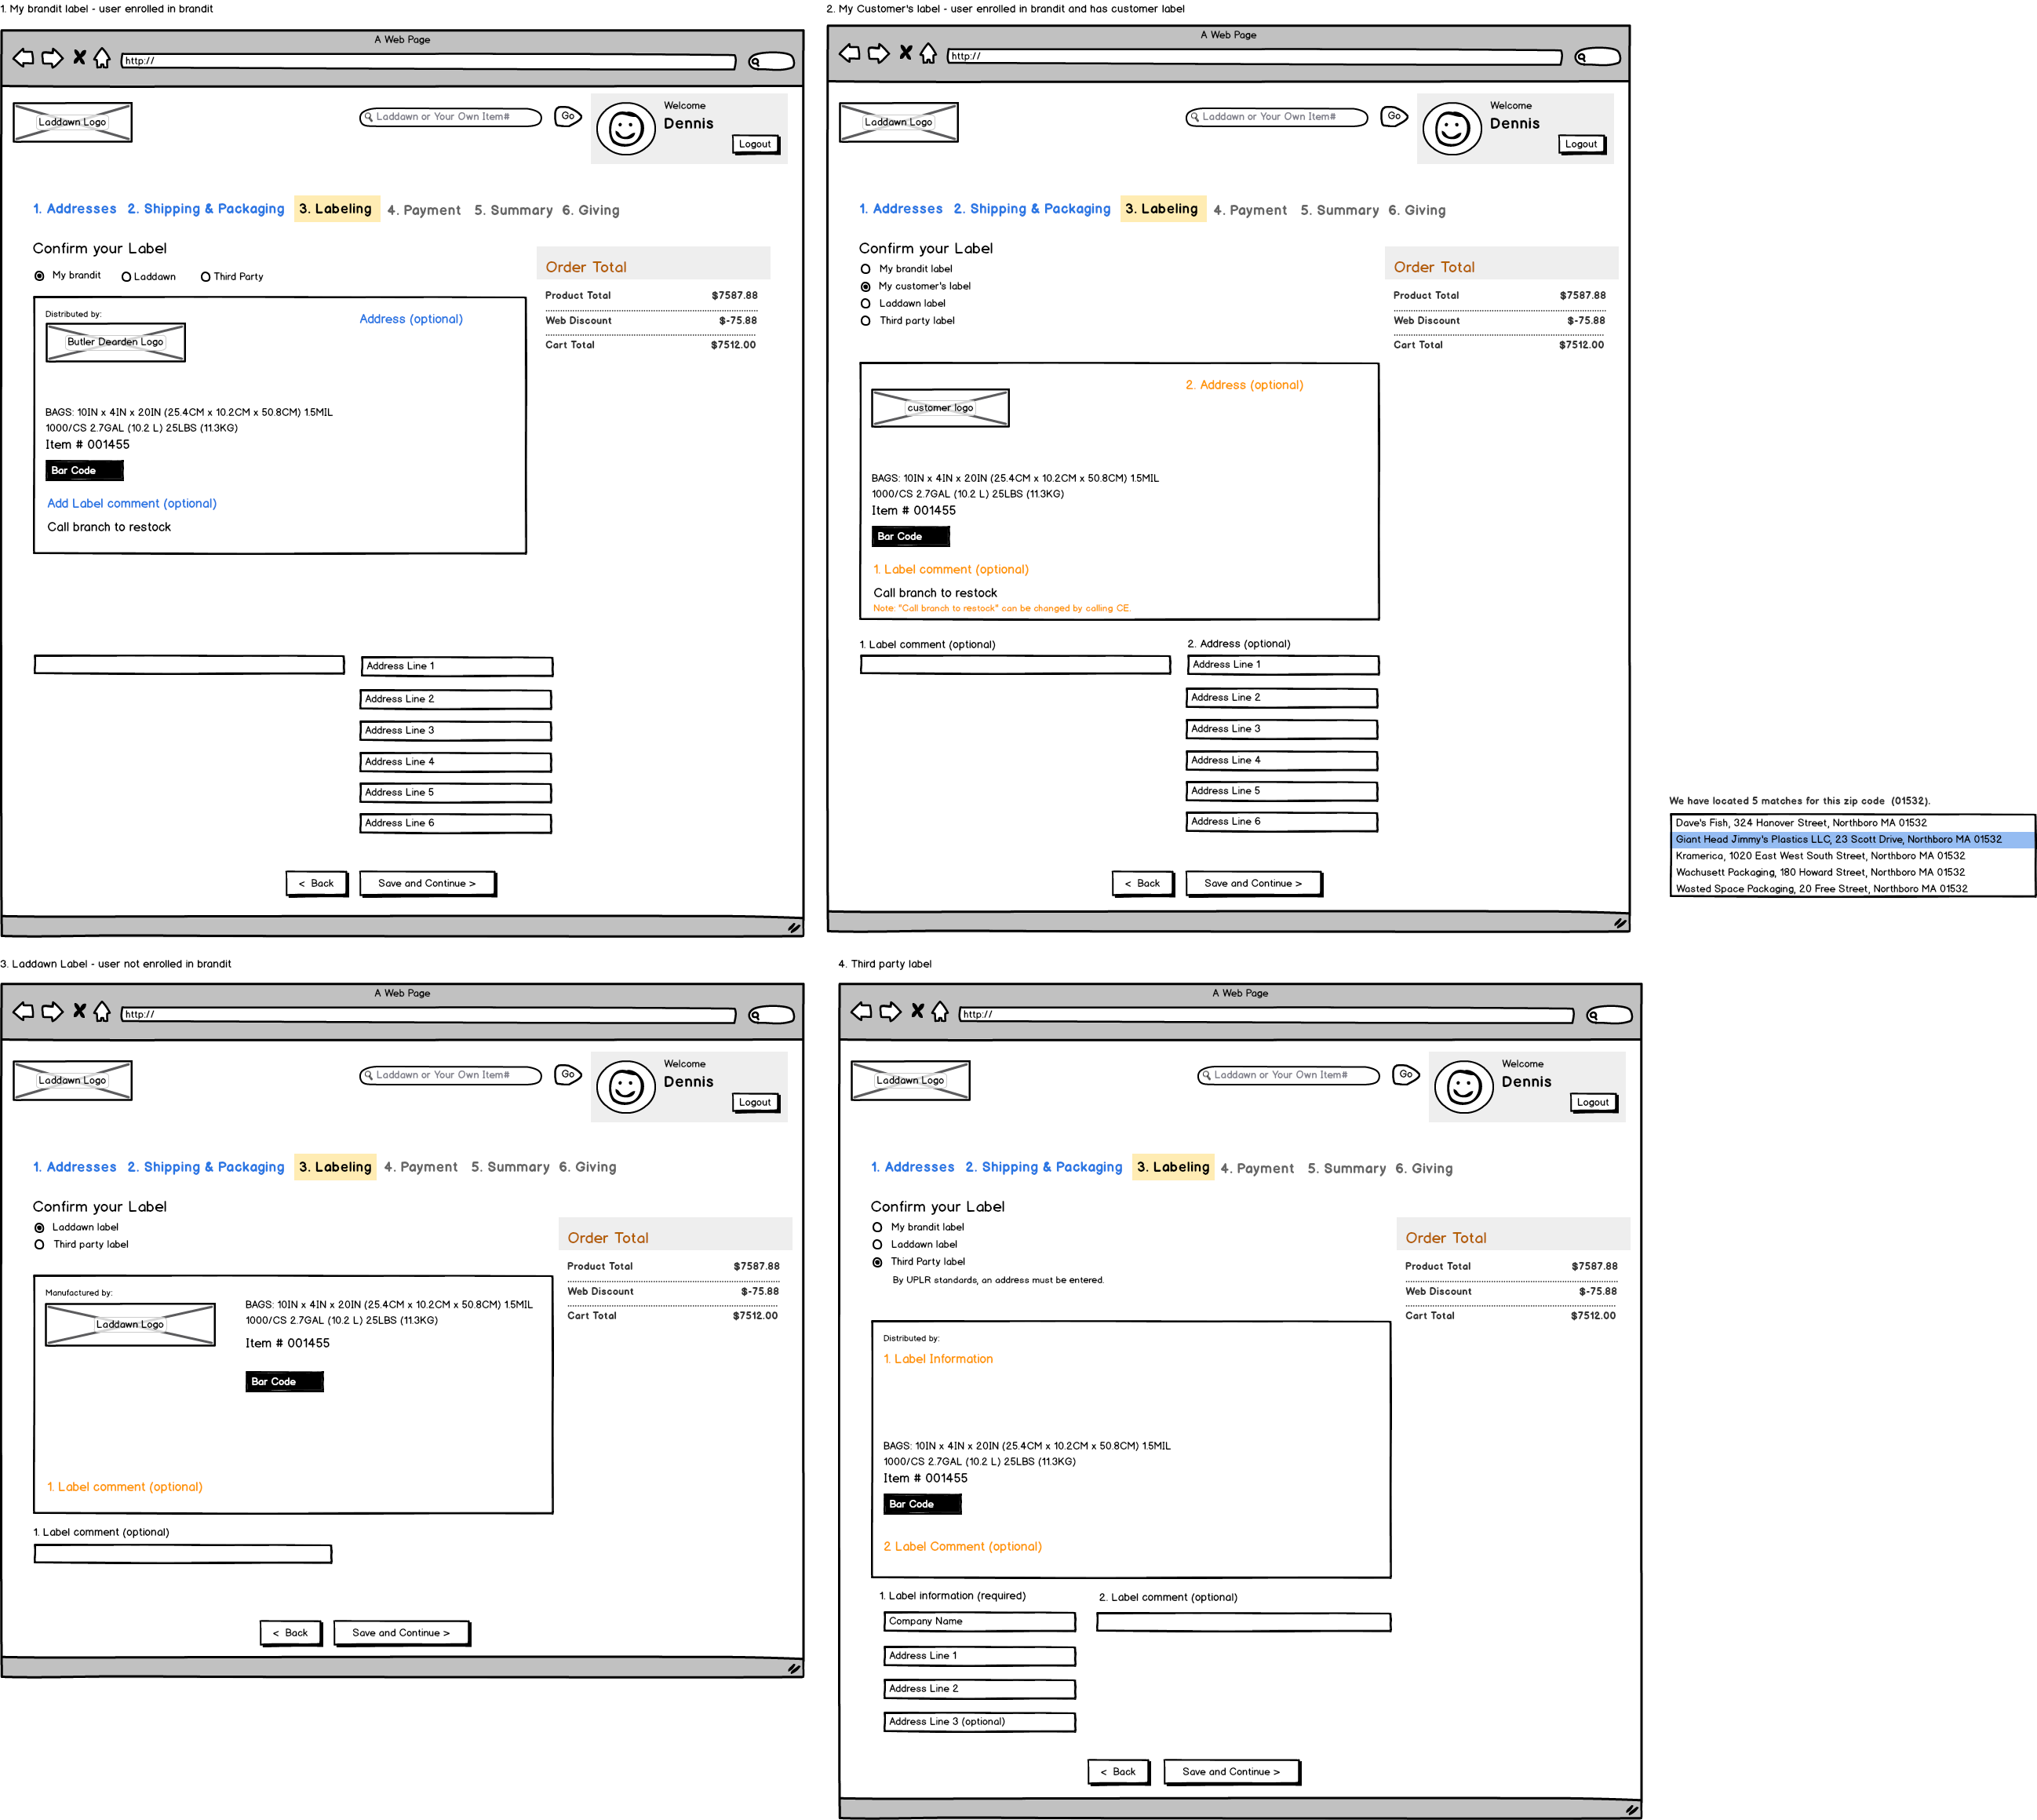
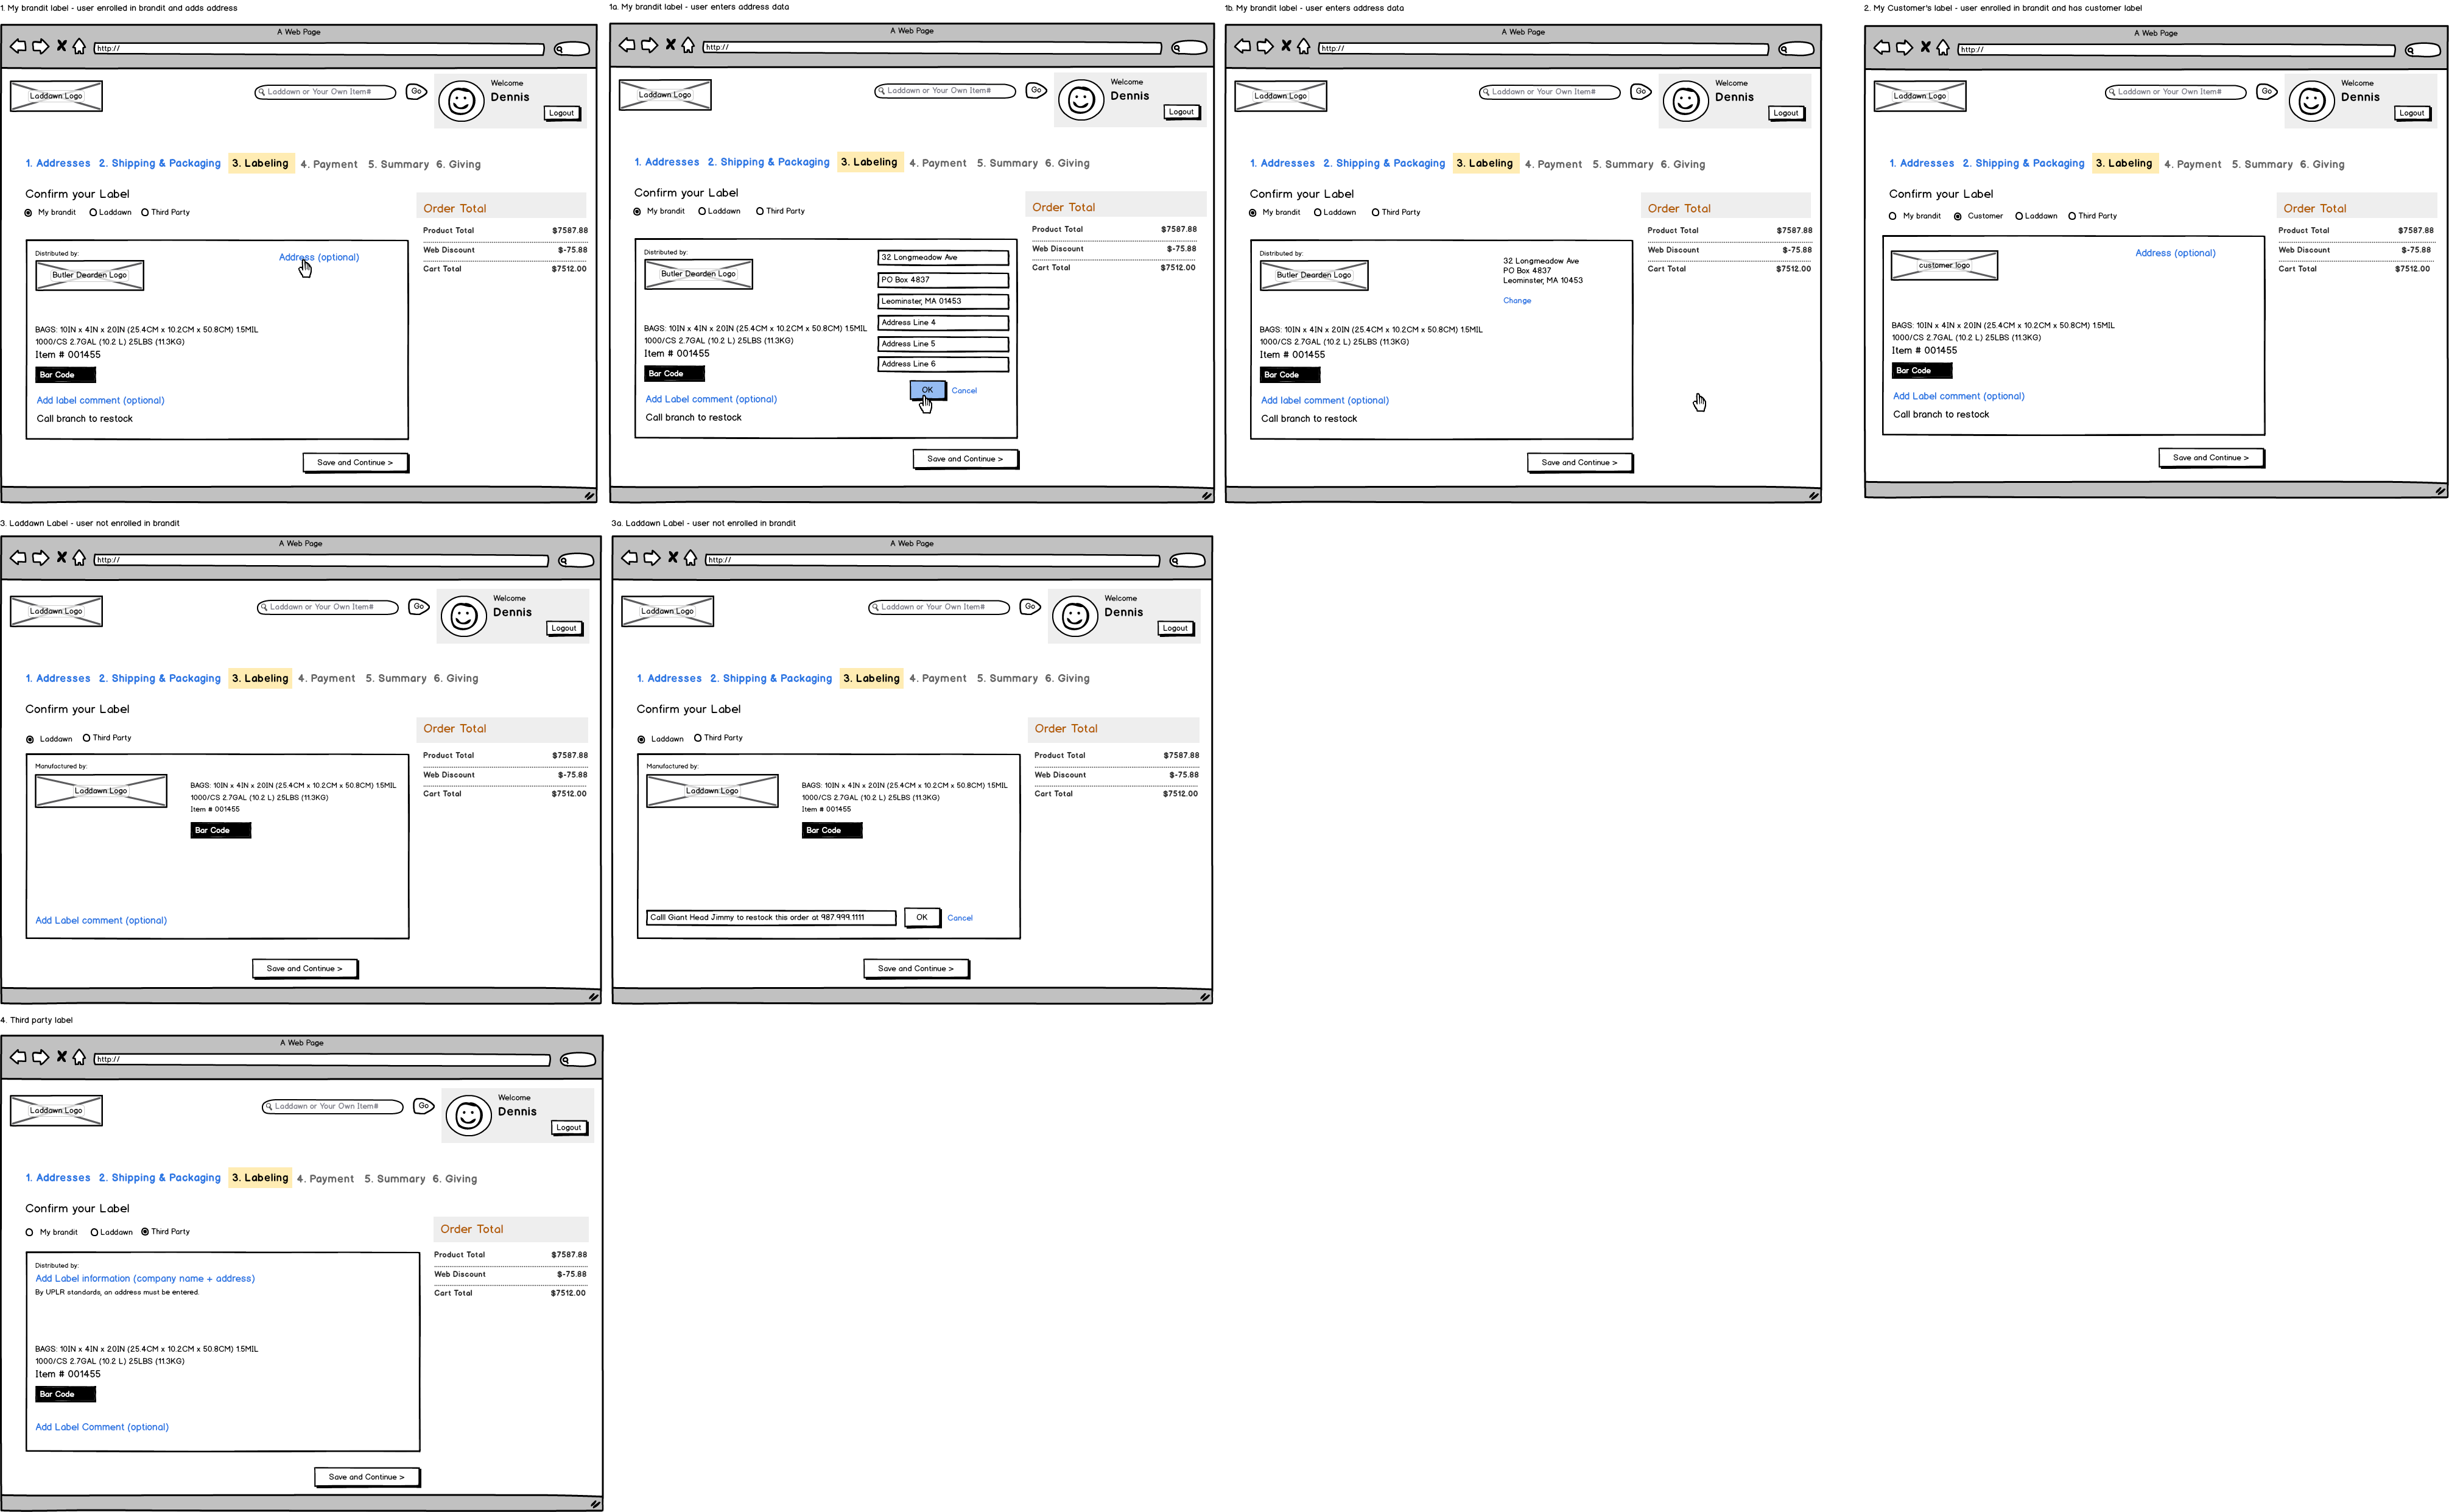
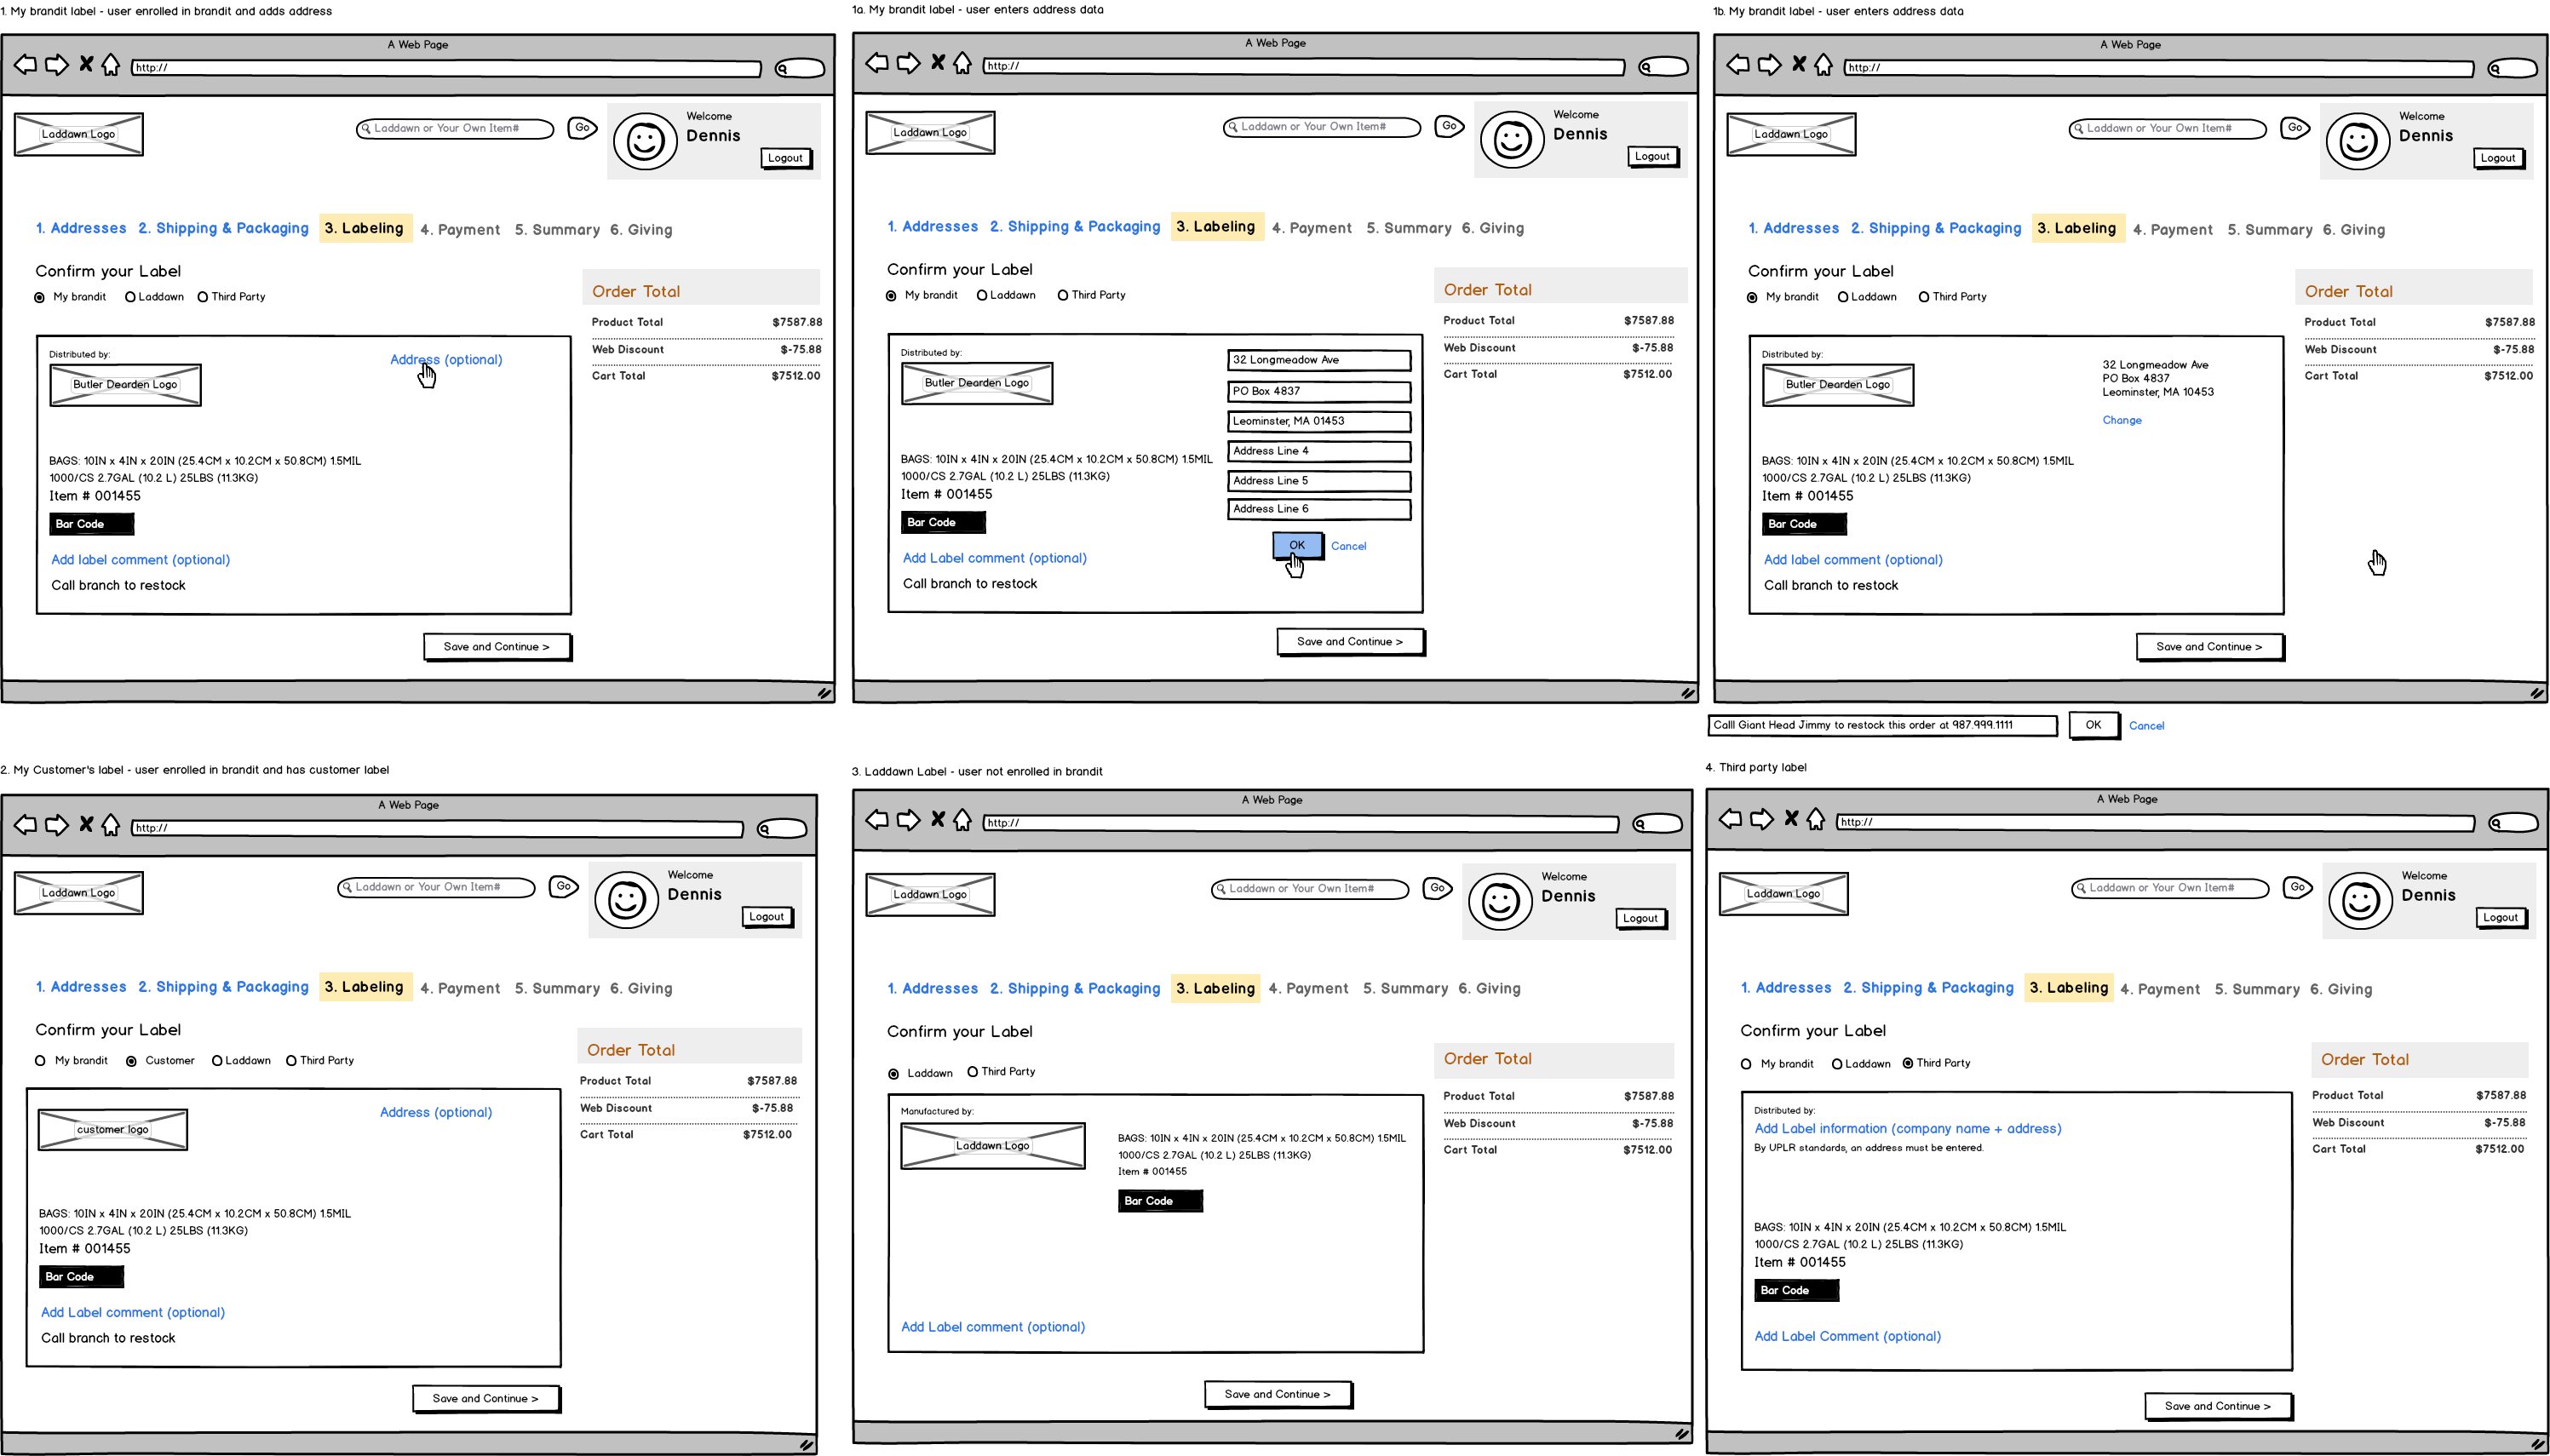
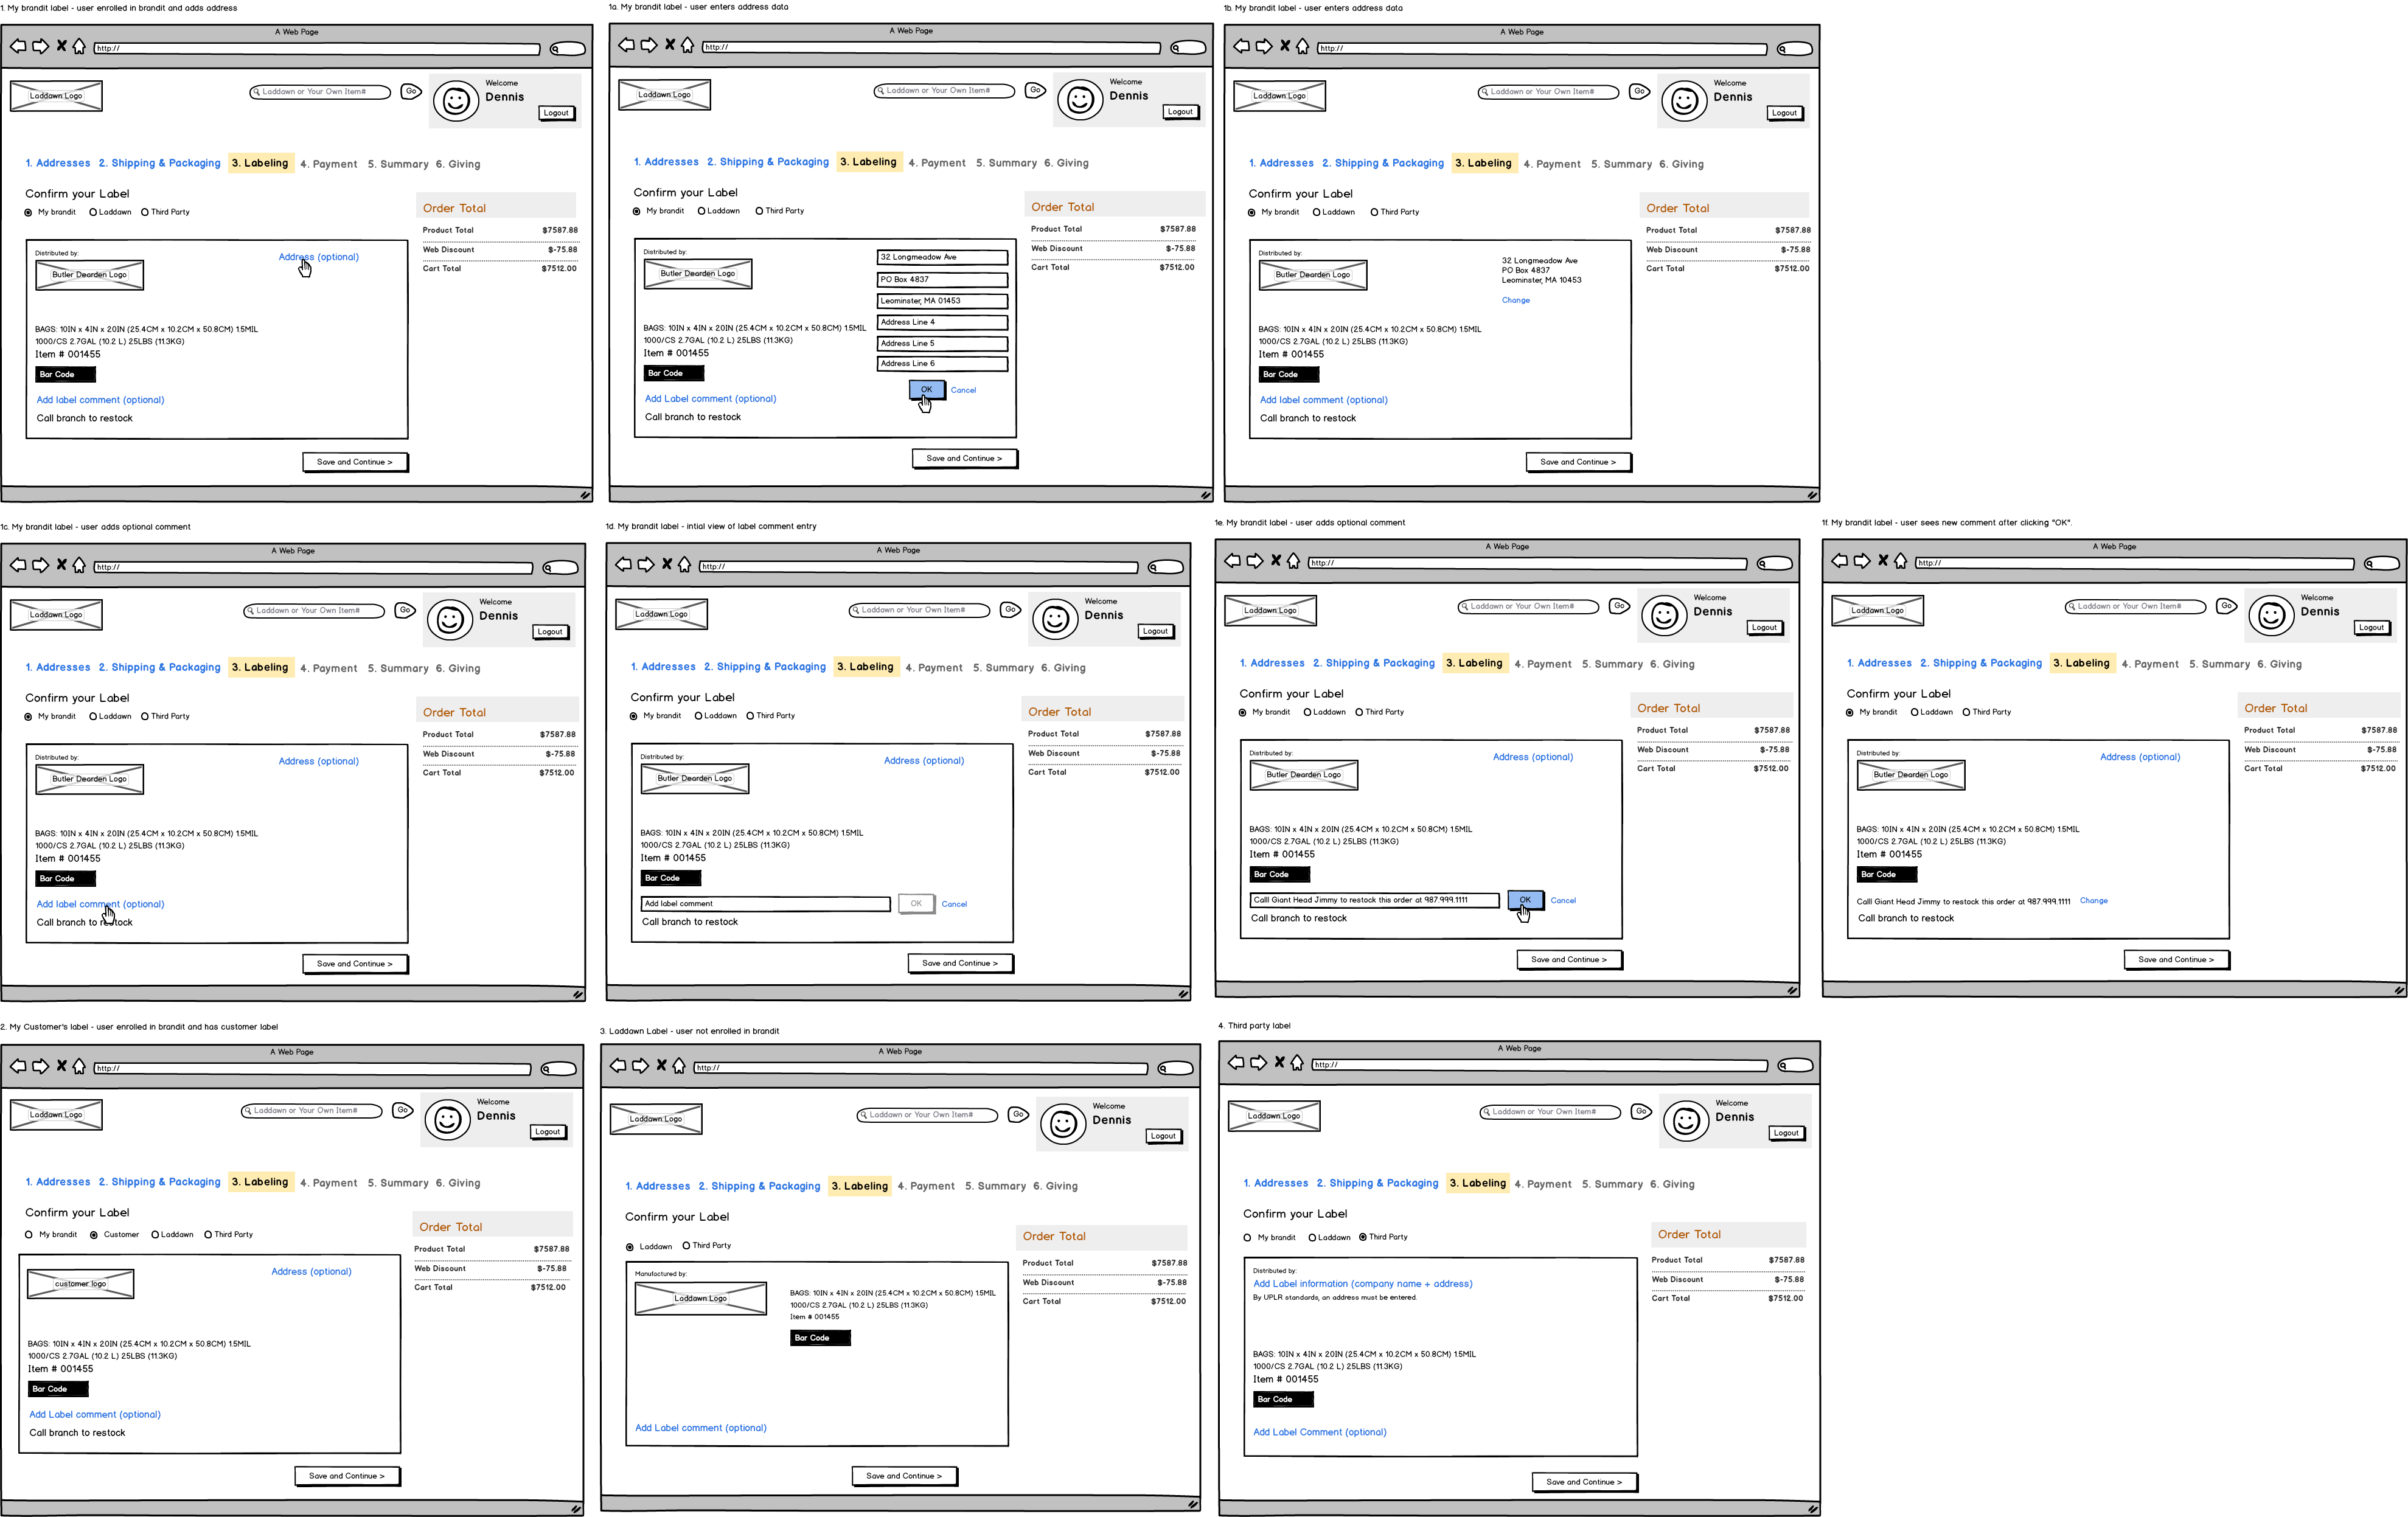
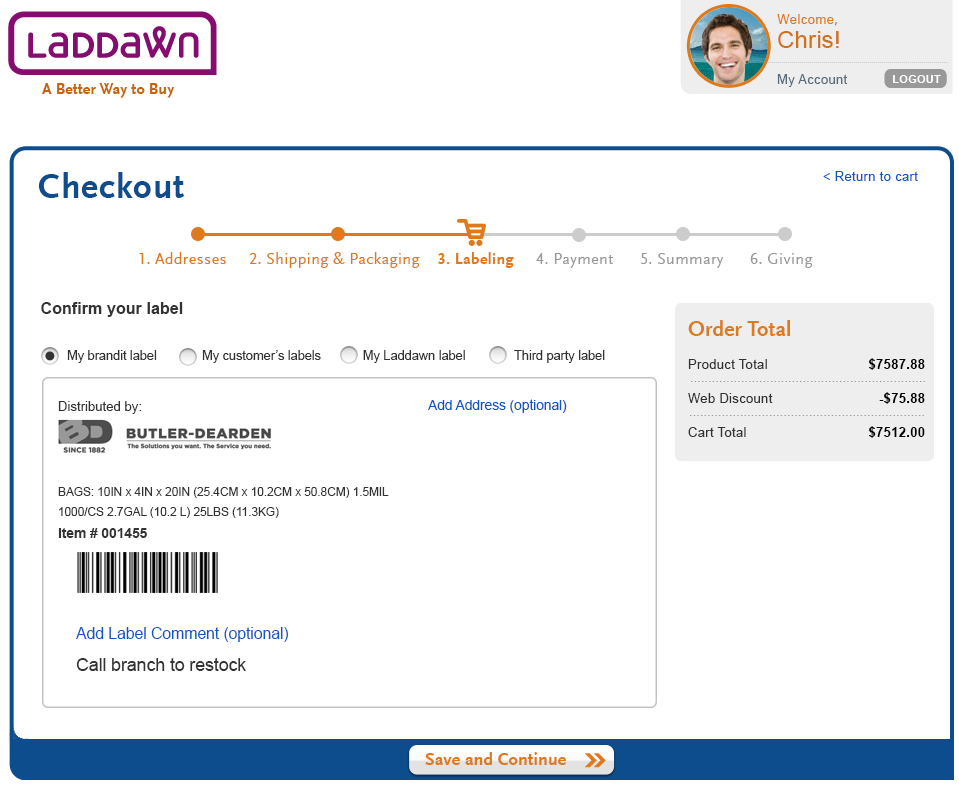
This is a dynamic section in which the user may have up to 4 brandit choices. They are "My brandit label", "My customers label", "Laddawn label", and "Third party label." Each label type has different form fields that are mostly optional. The core data components of a label include a logo, bag dimensions (inches + cm), gauge, unit type, volume (gal + L), and weight (lbs + kg), and item #, a bar code and optional label comments. Some notes on each label type:
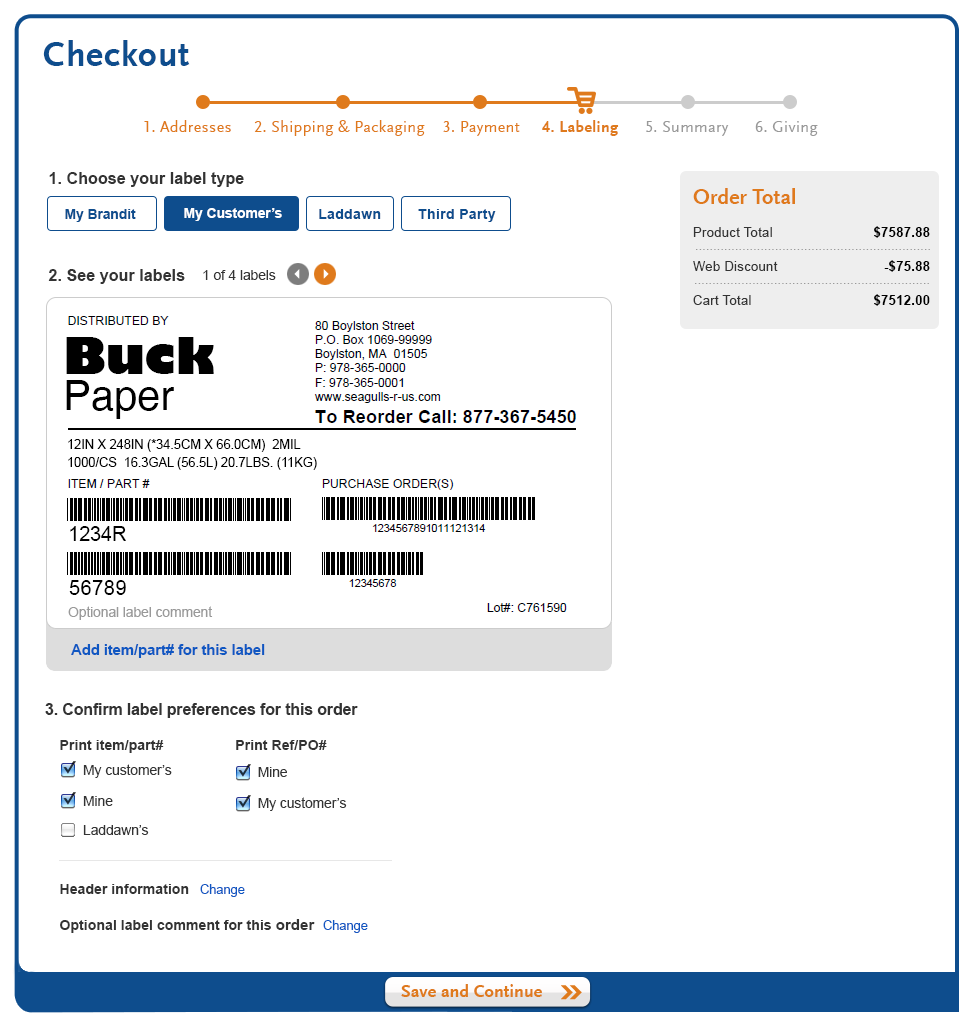
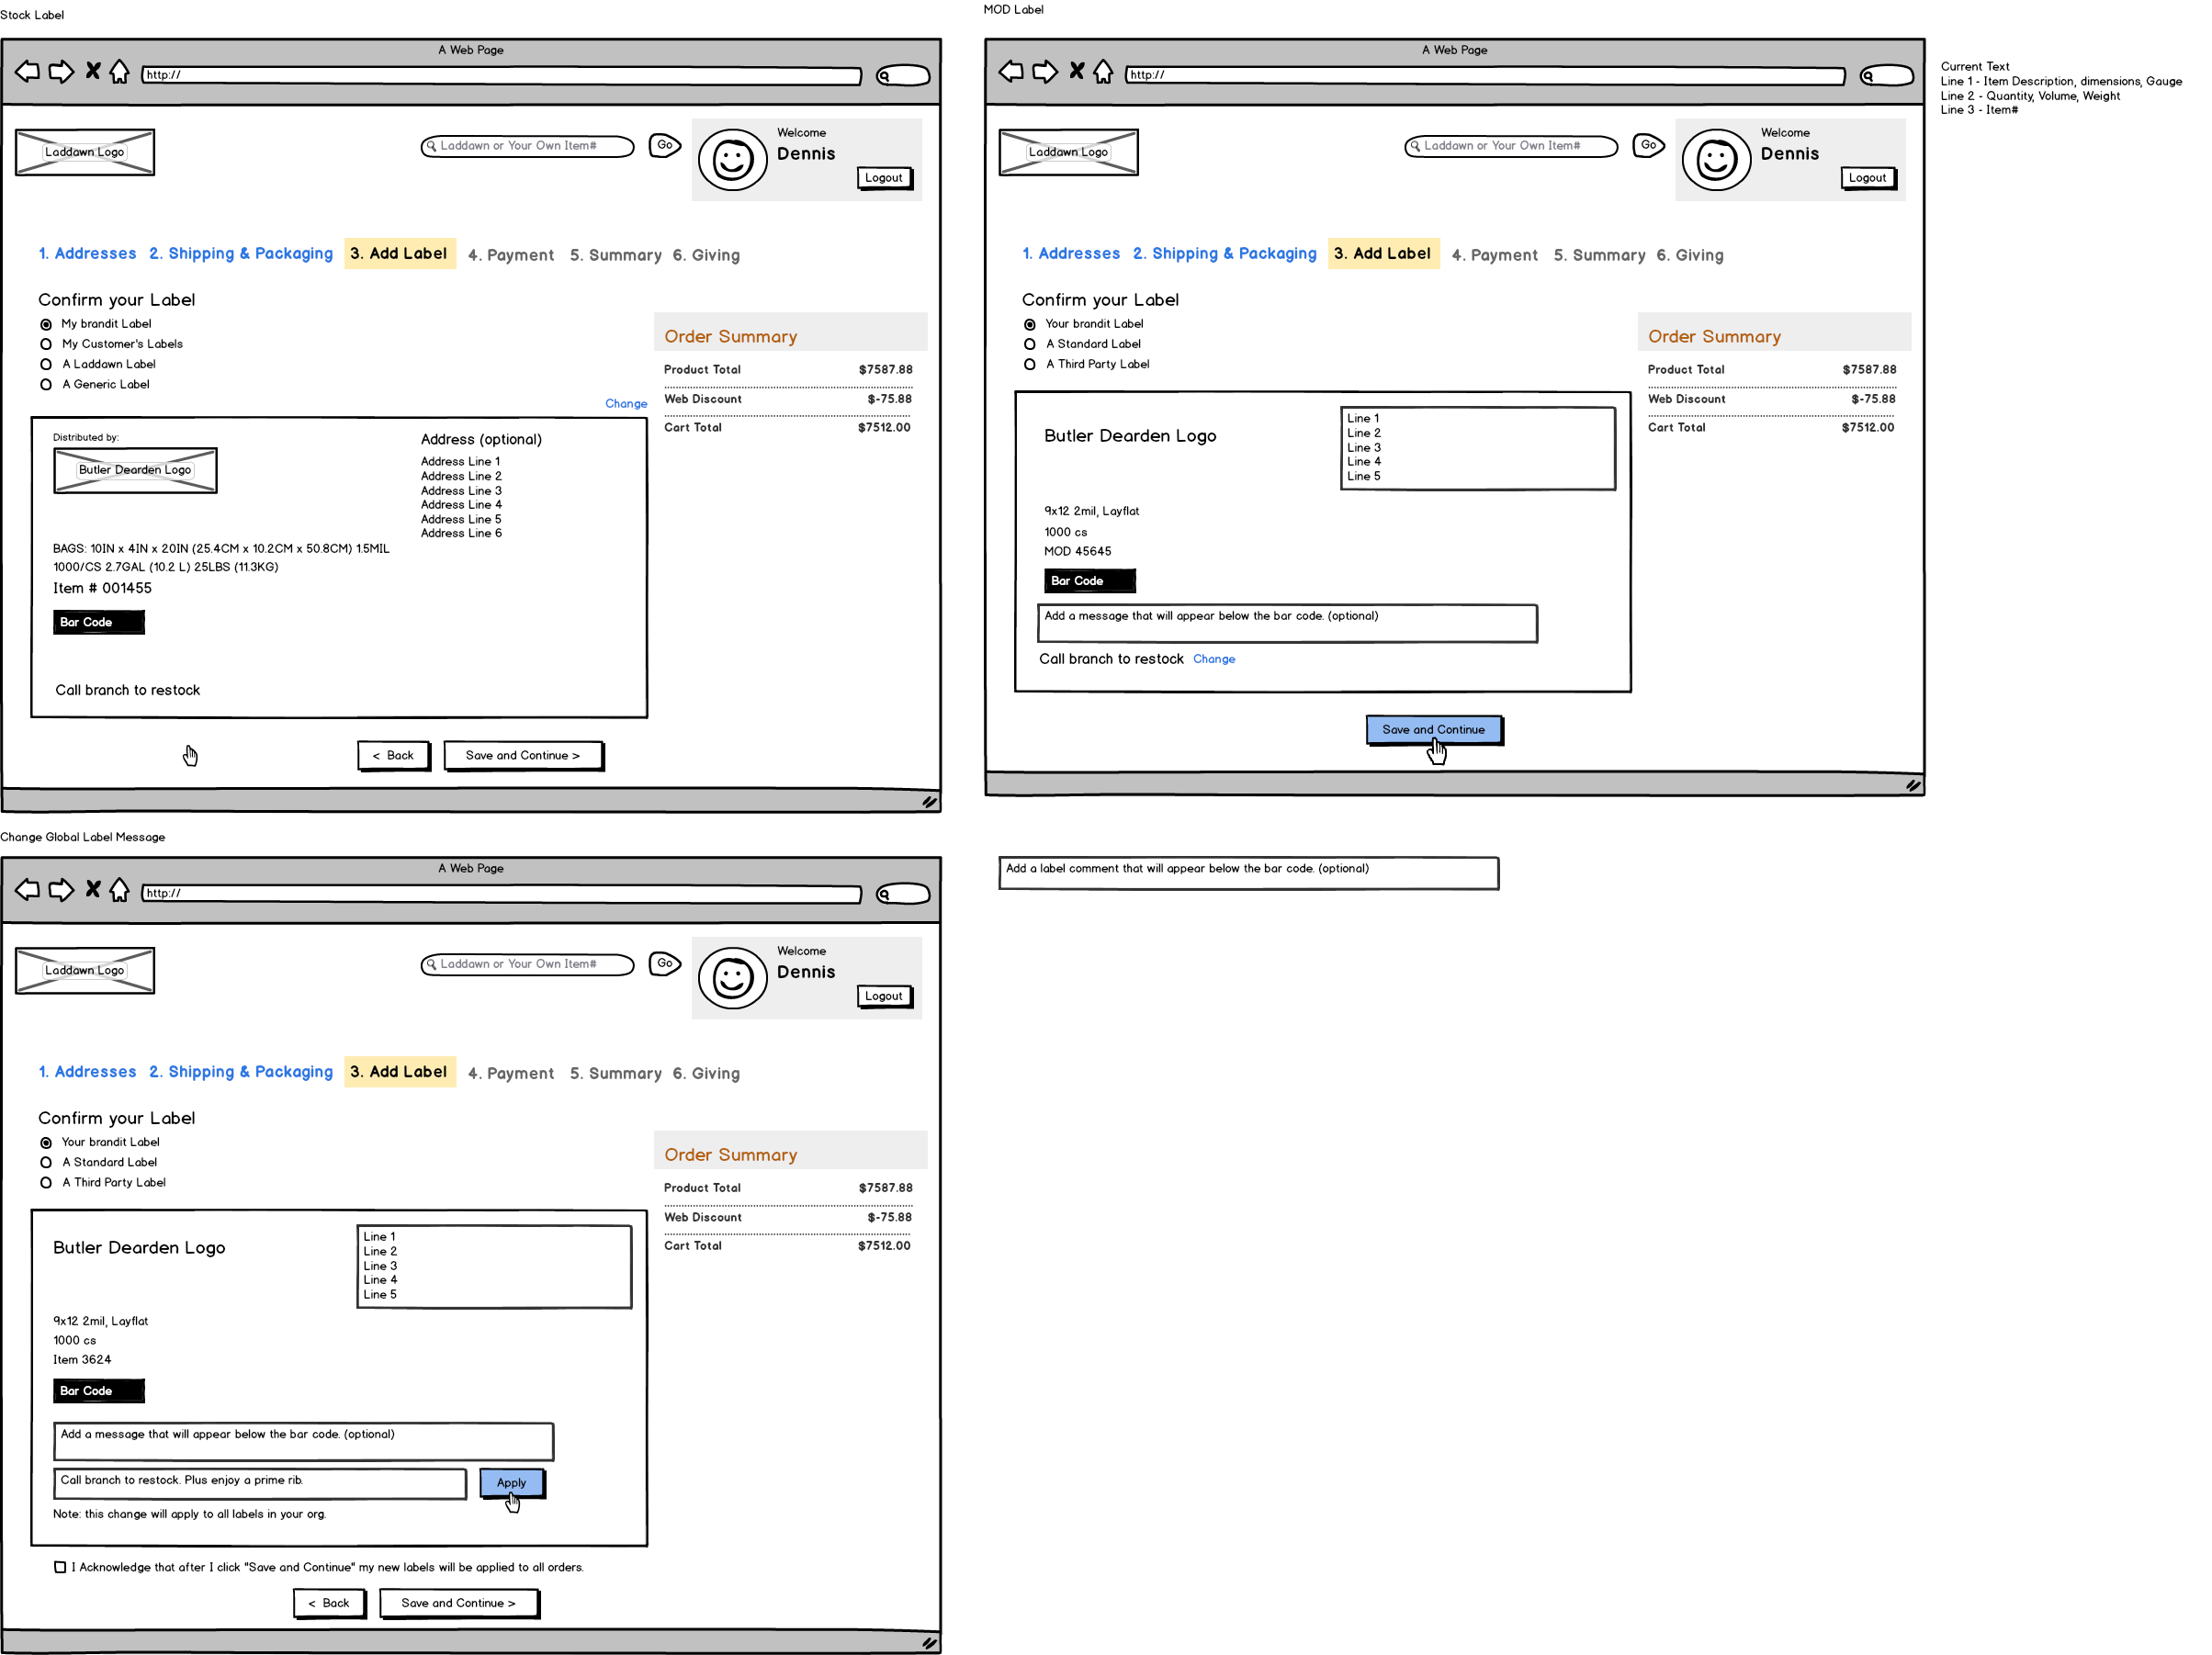
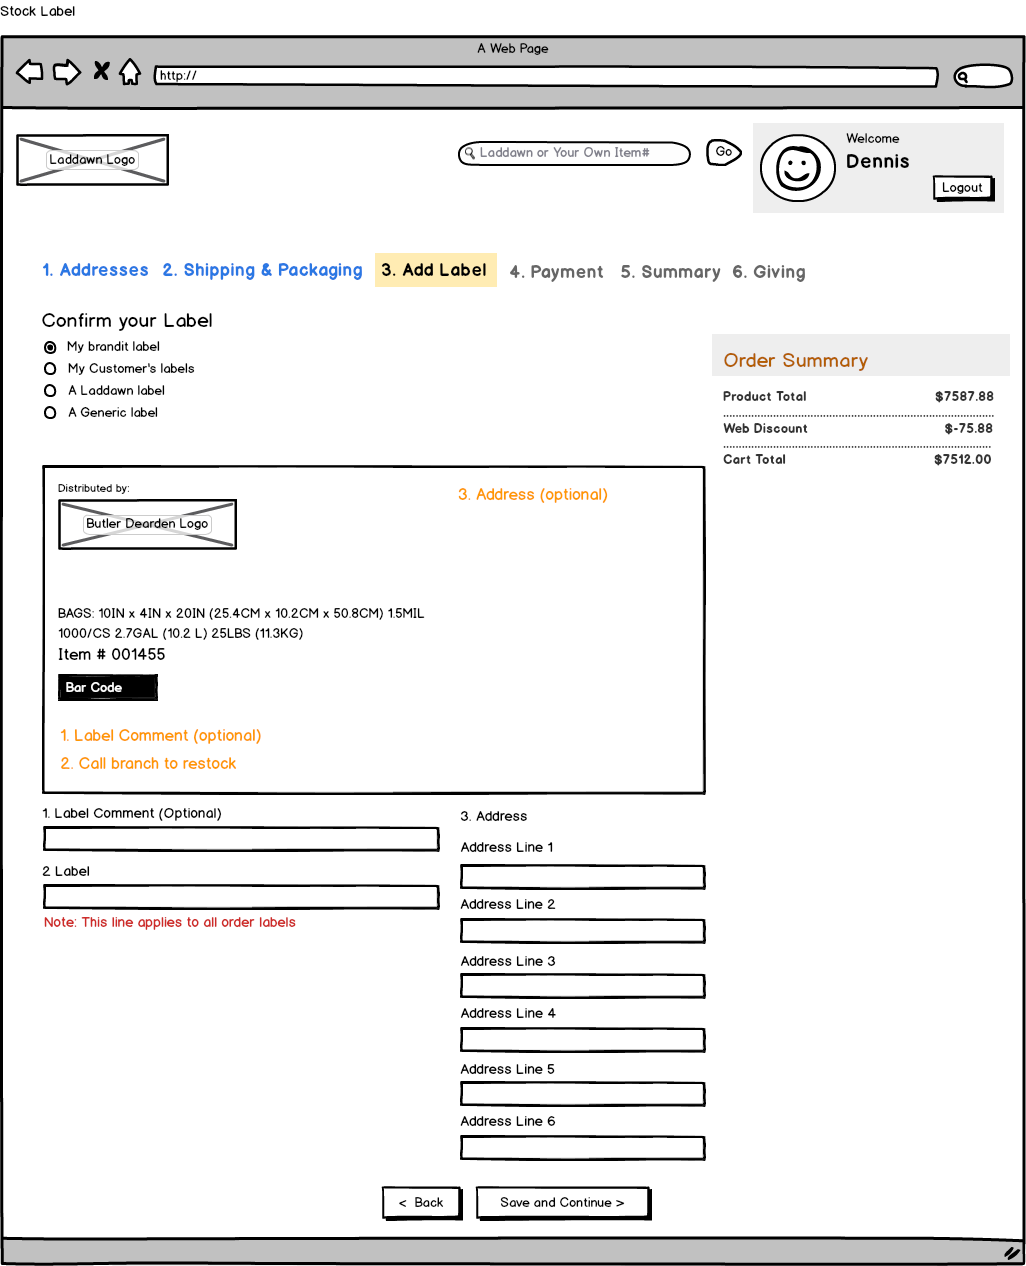
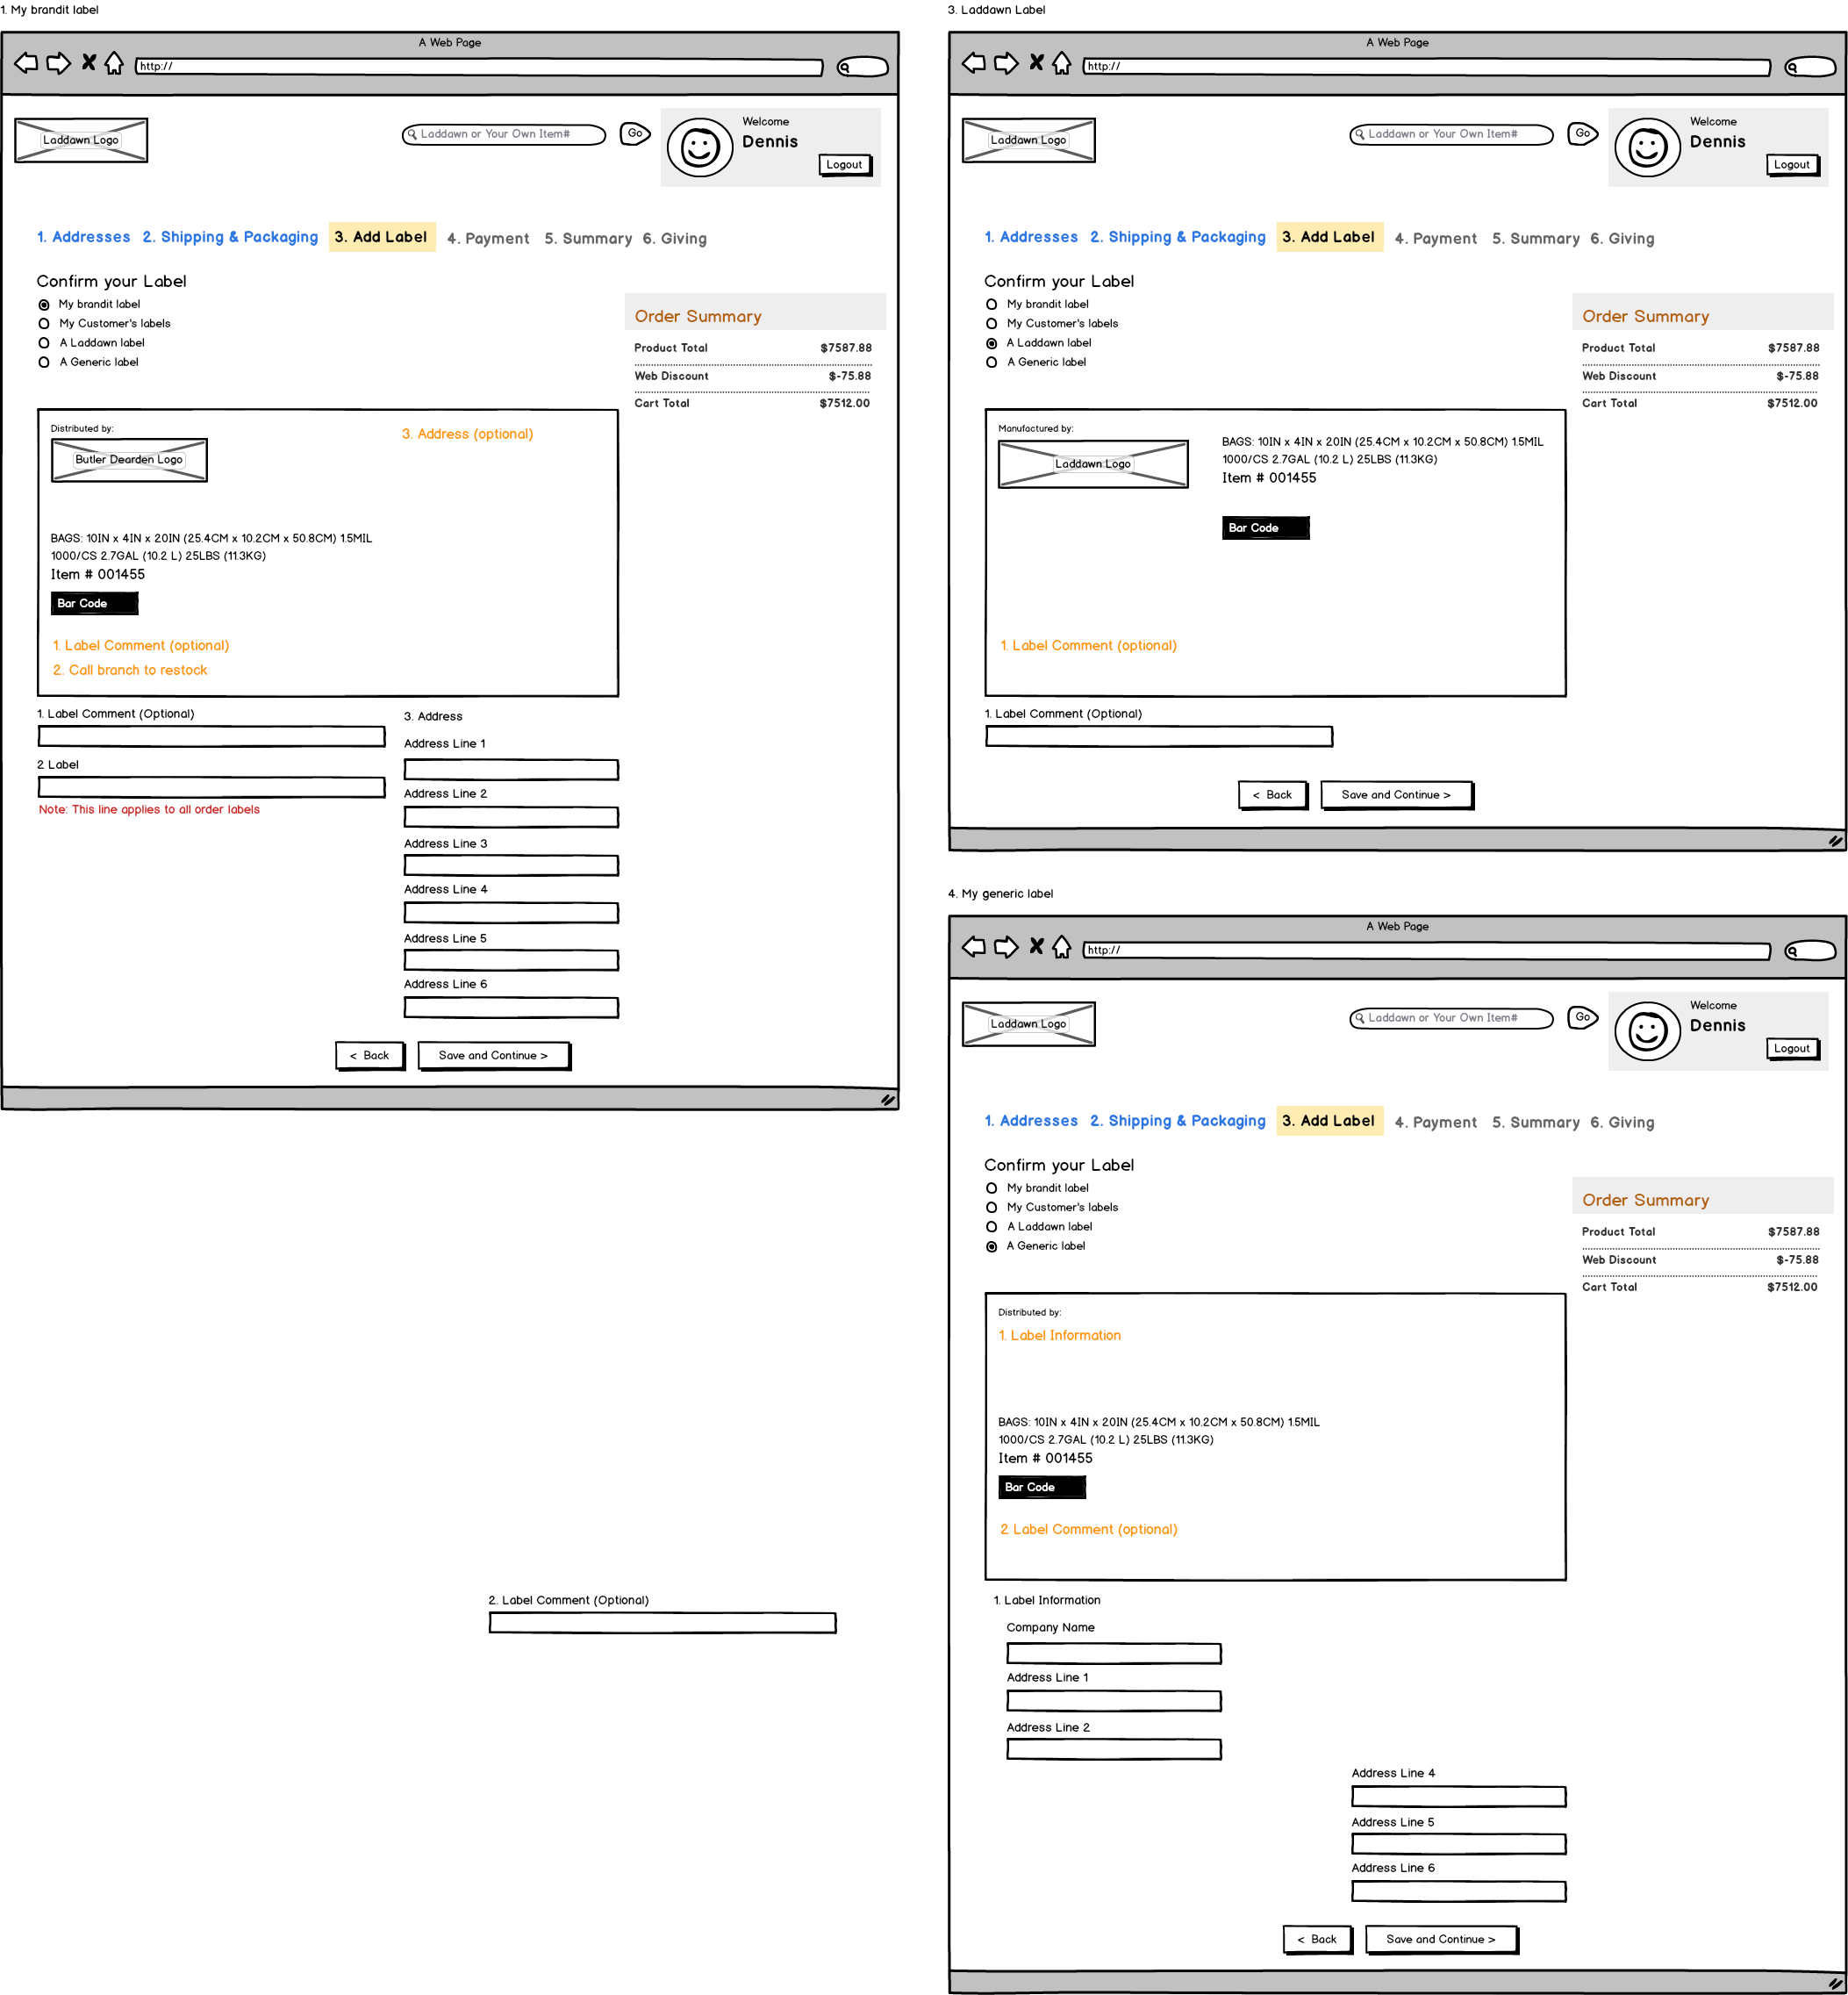
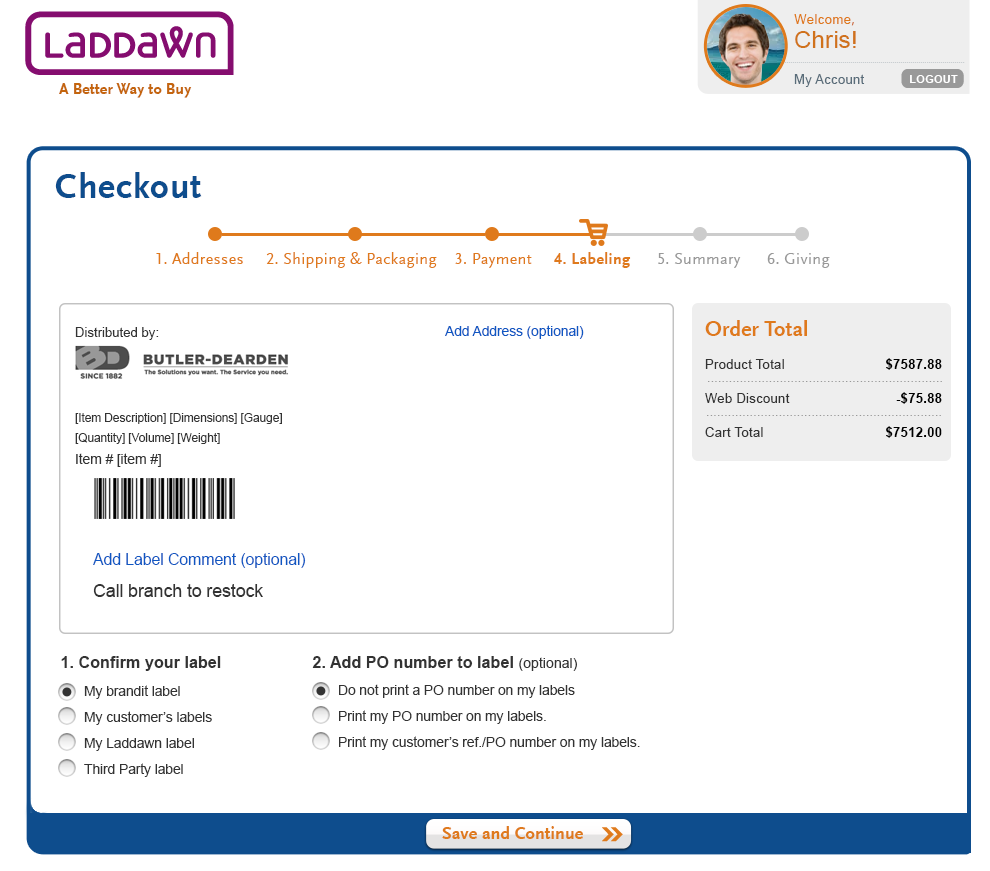
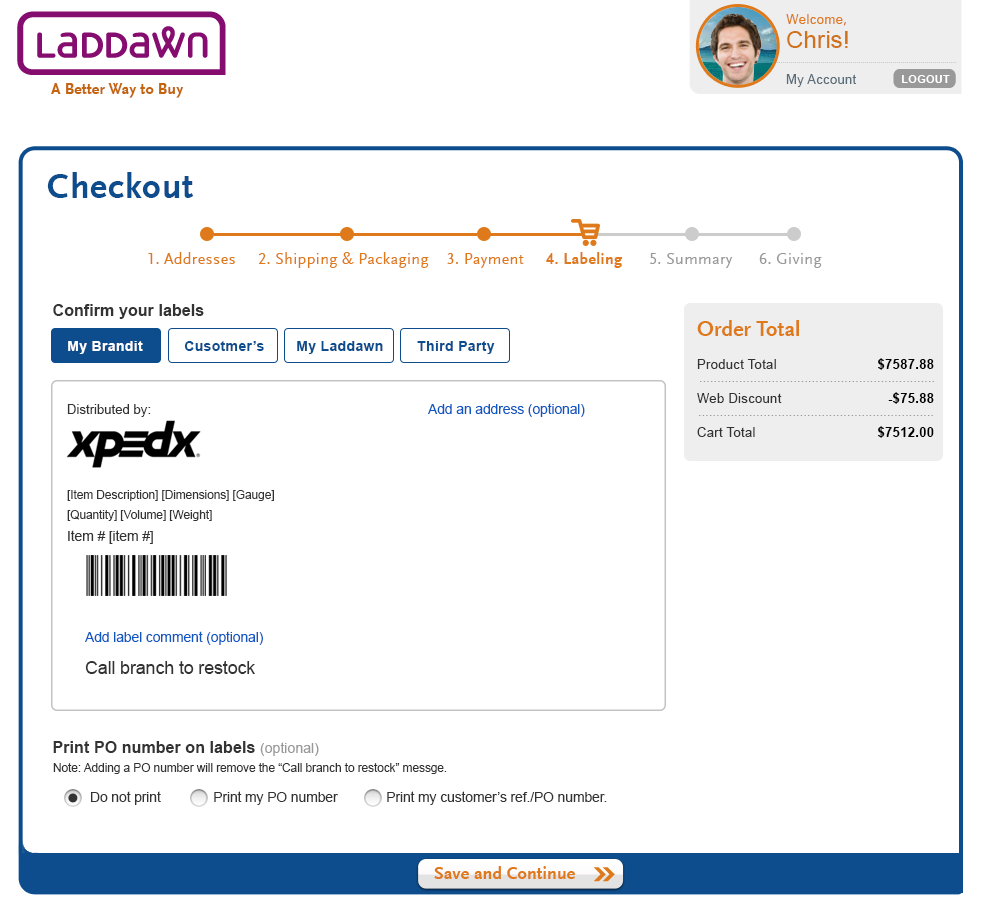
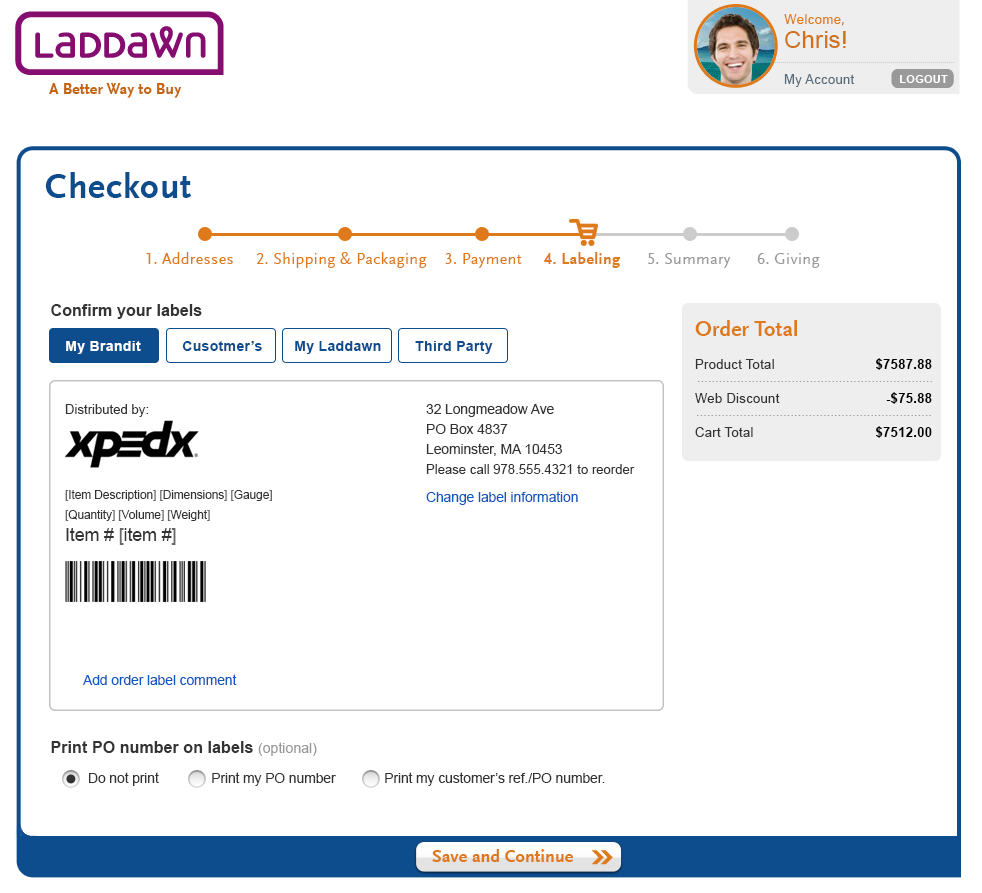
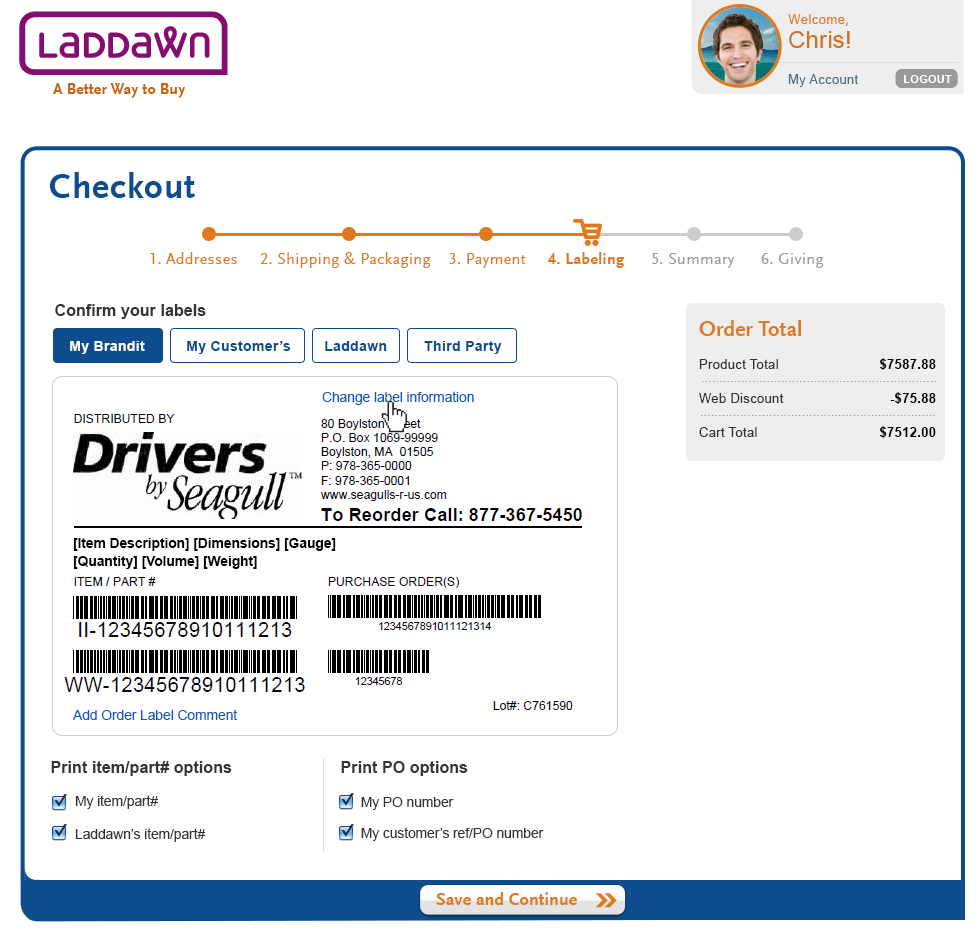
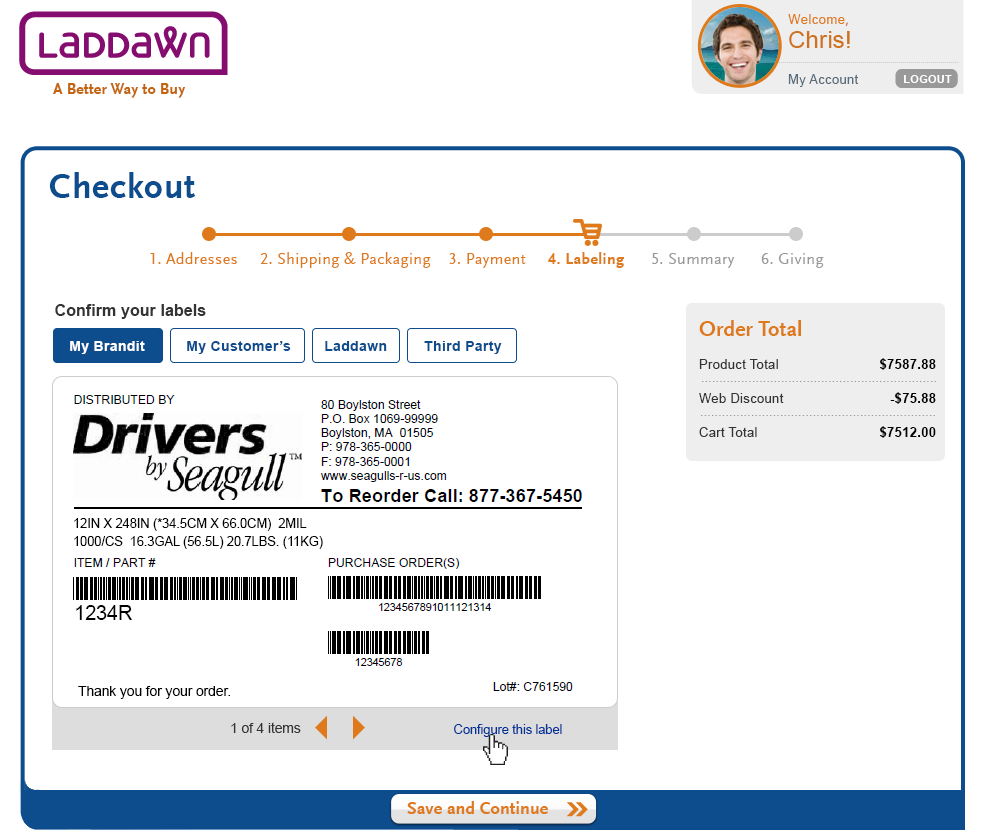
1. Distributor's brandit label (Design1)
Suppressed if not on brandit. Text above logo should say "Distributed By"
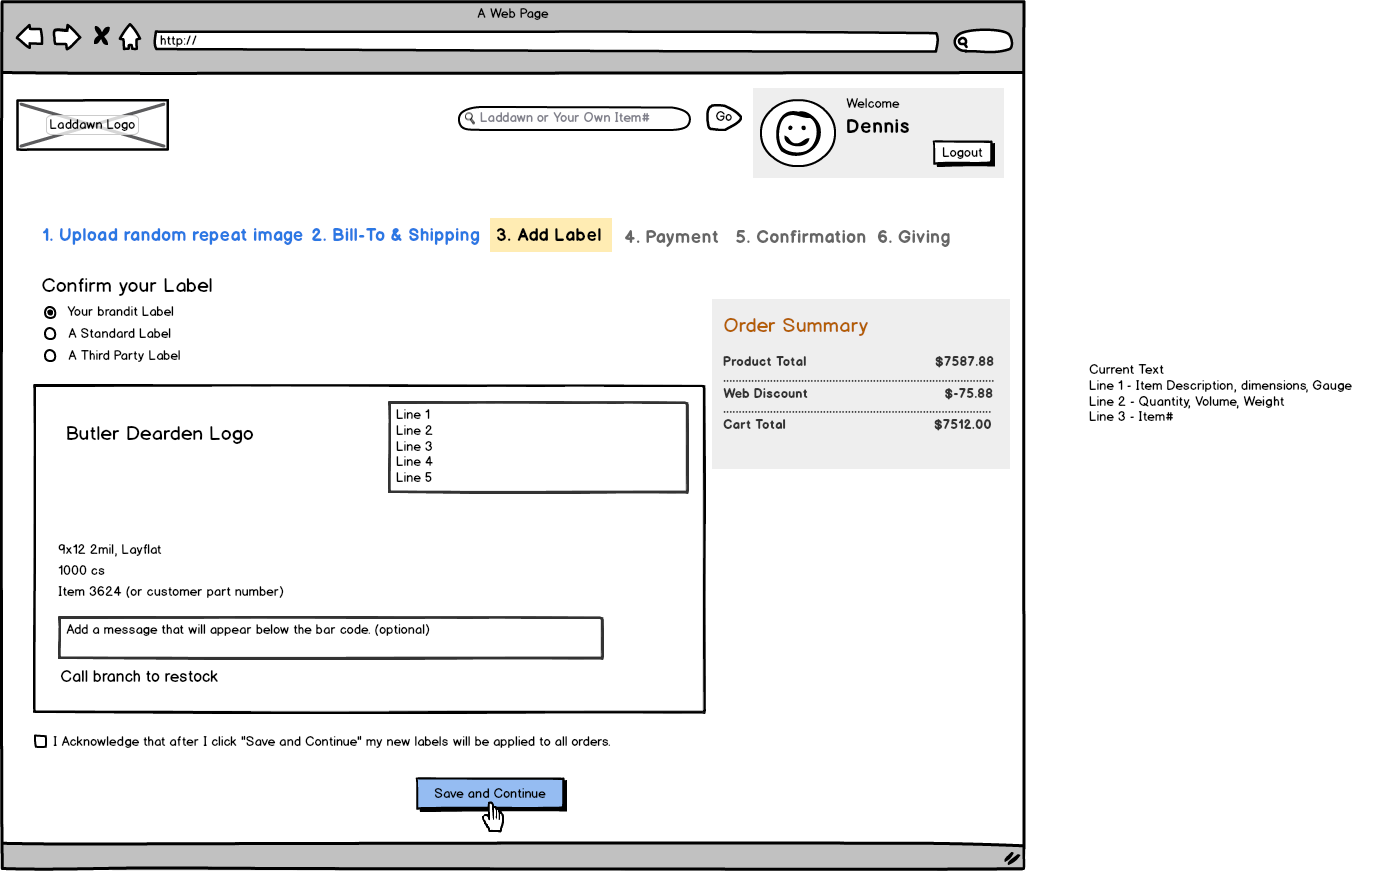
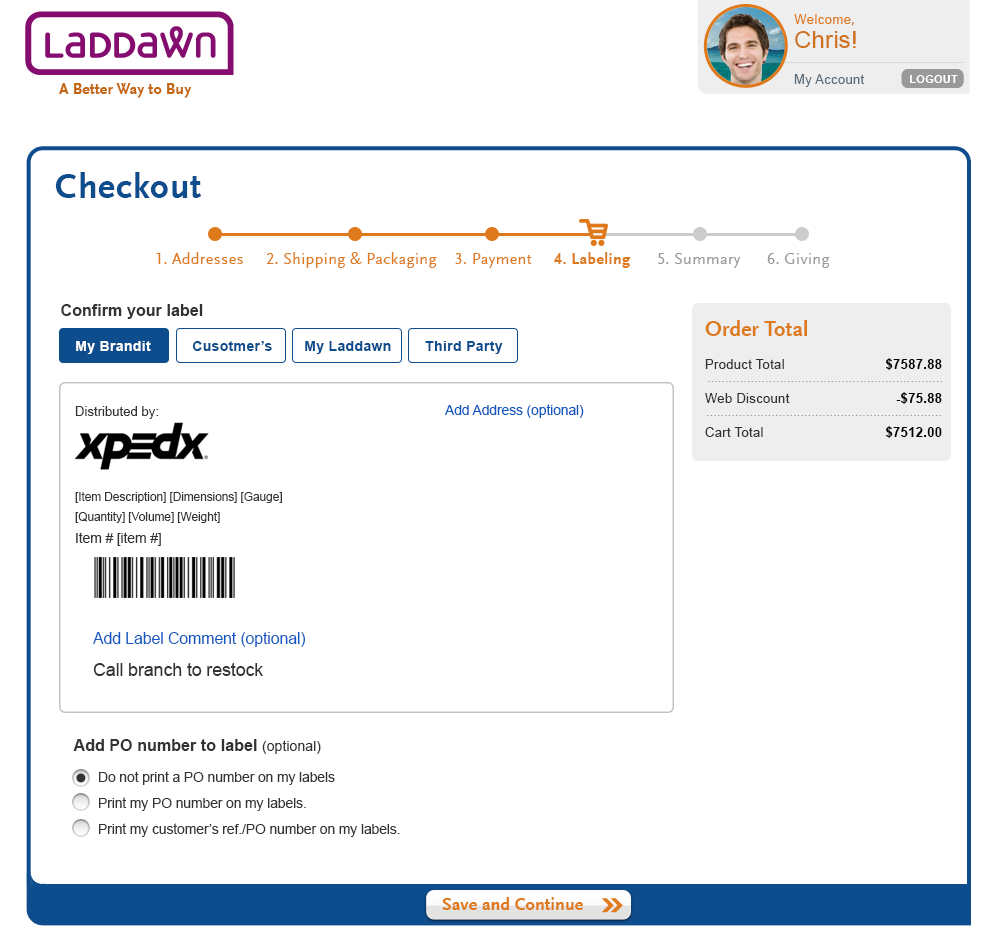
2. My customer's label (Design 2)
This should be suppressed if the ship-to customers associated with this order is not a brandit customer.
Selecting it will display the customer's logo and have 2 optional data fields, Address and label comment. The form fields are exact to My brandit (Design 1) above.
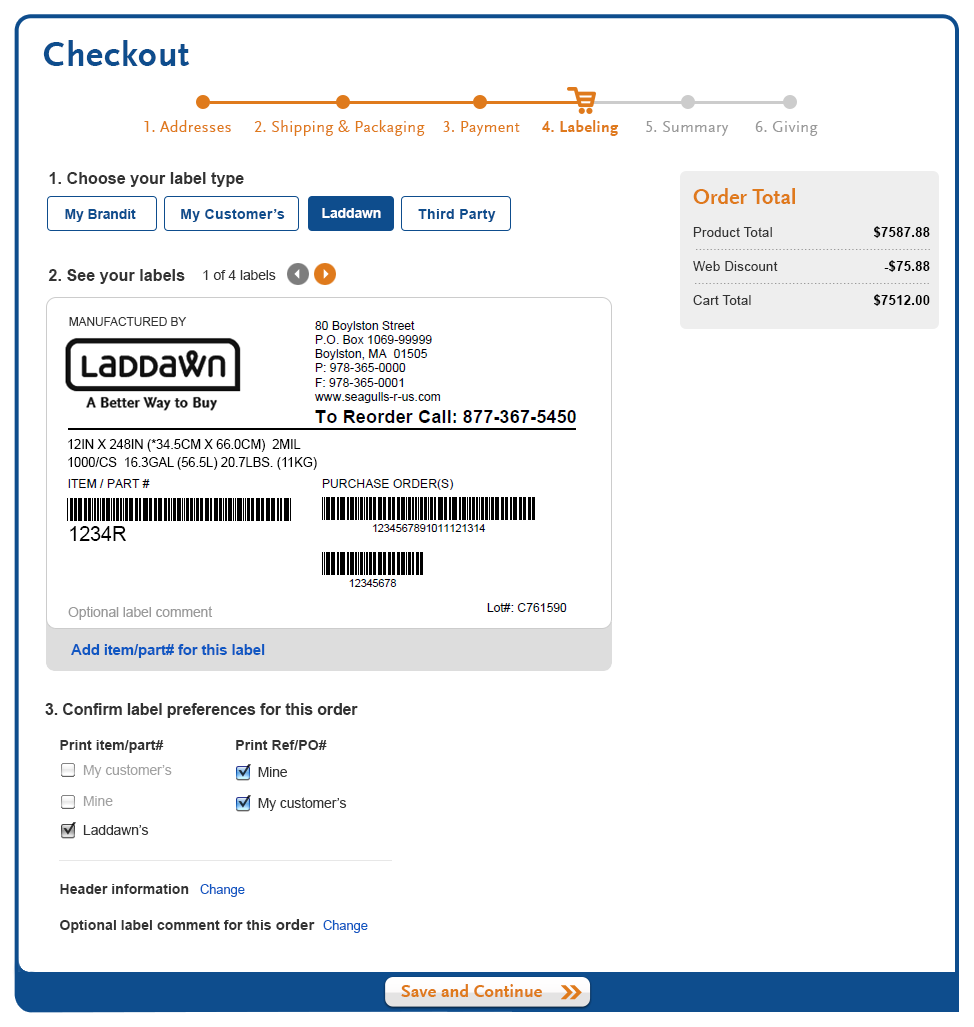
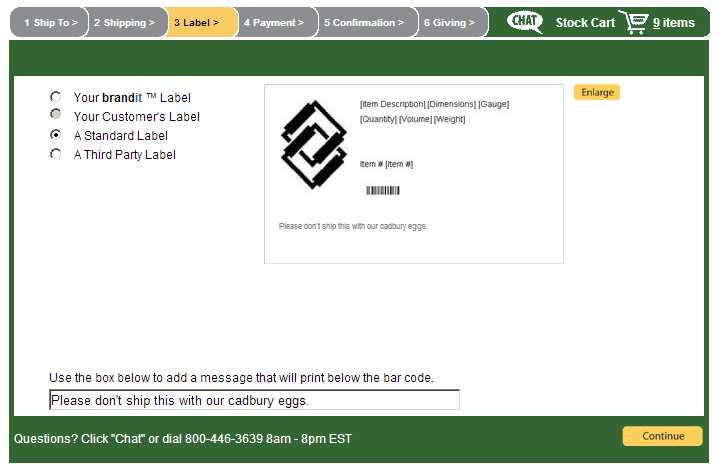
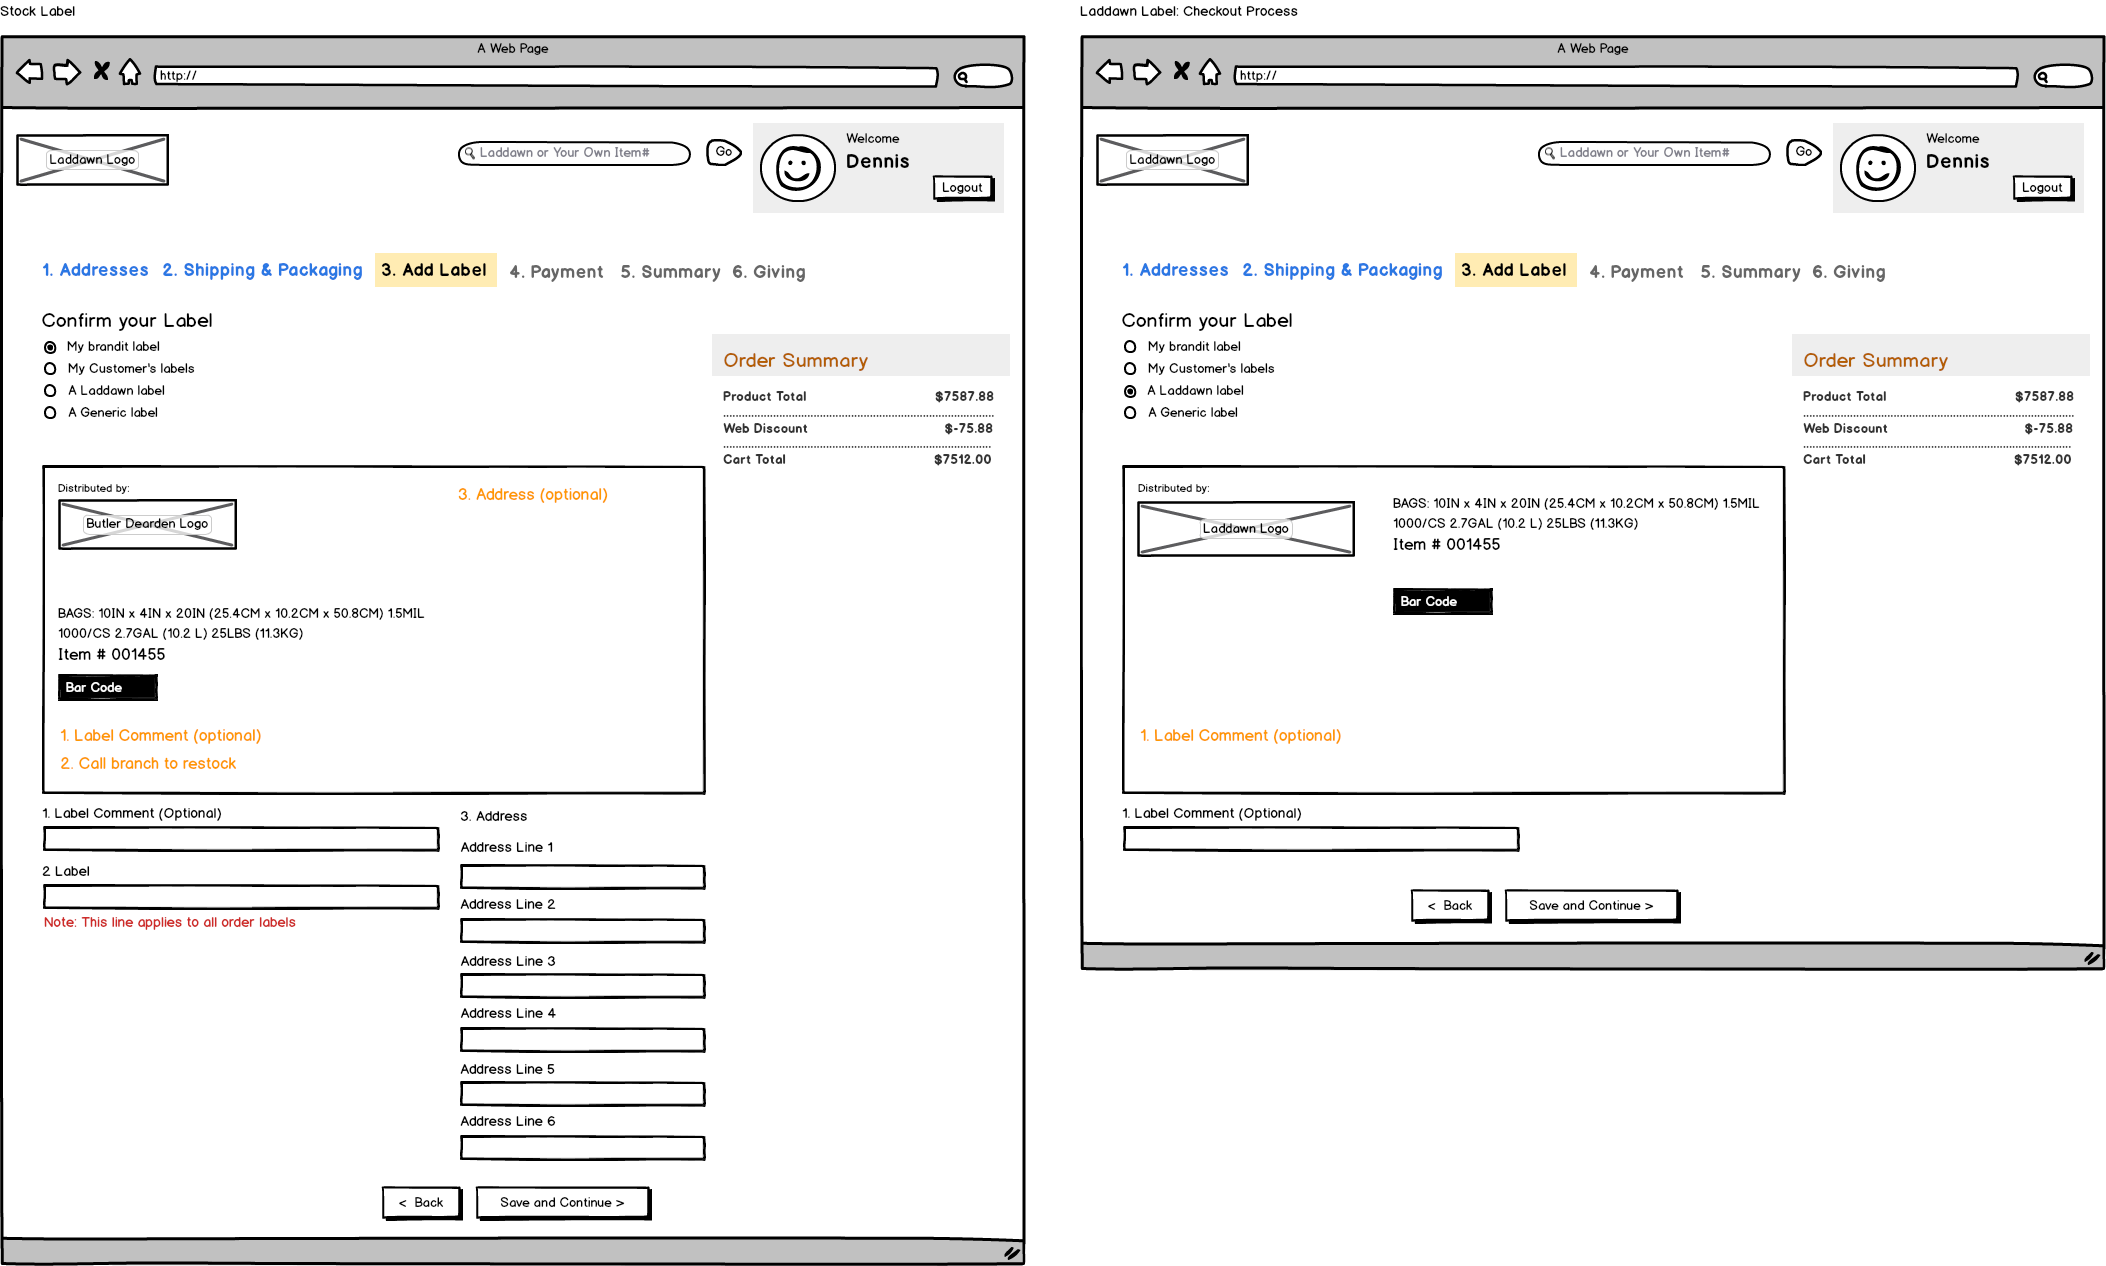
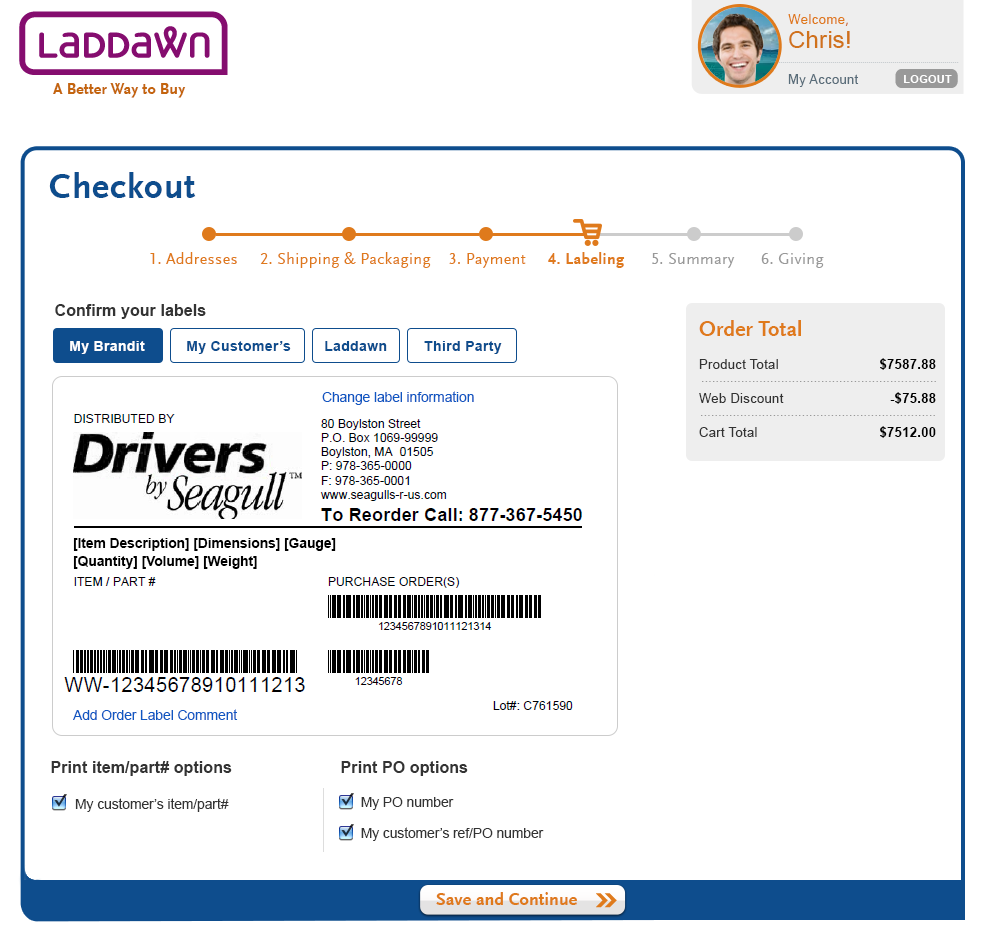
3 Laddawn label (Design 3)
This label shows the Laddawn logo along with Header info and one optional label field. The Laddawn part number/specs must be Laddawn's. The user can not use part numbers except for Laddawn's.
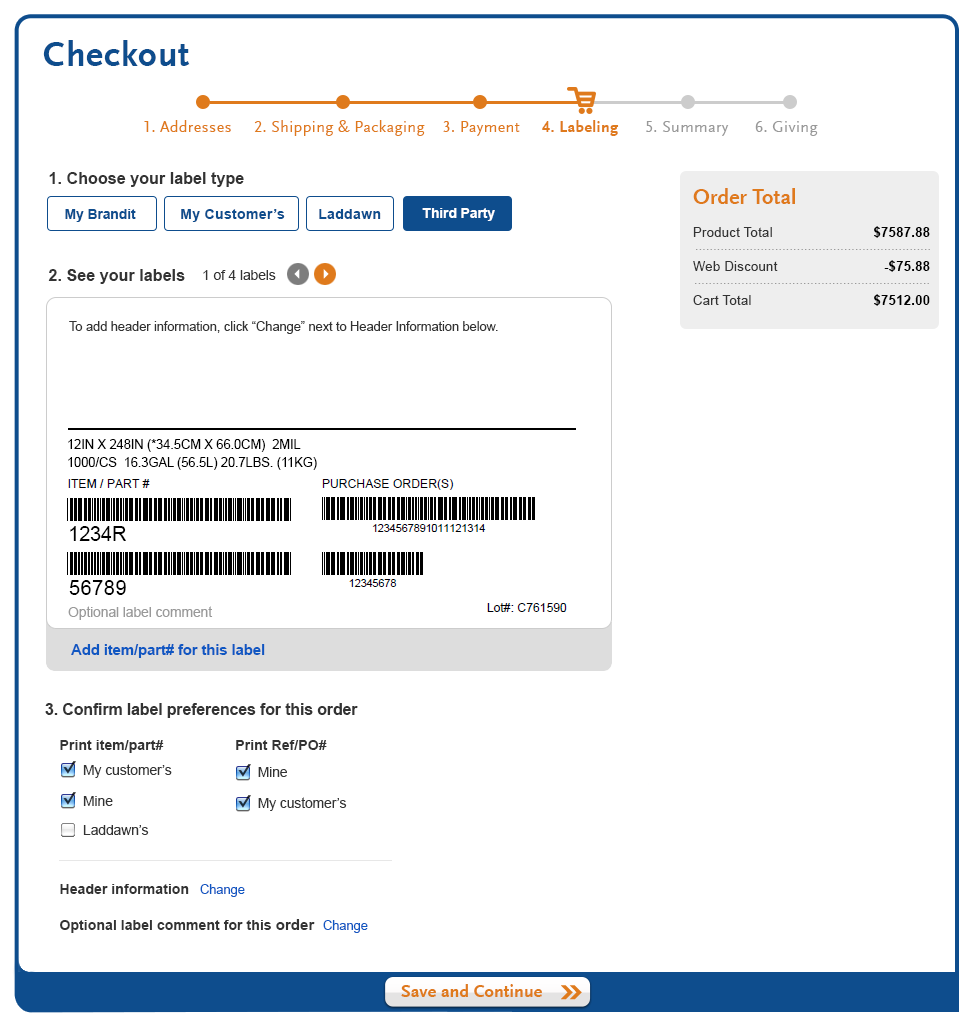
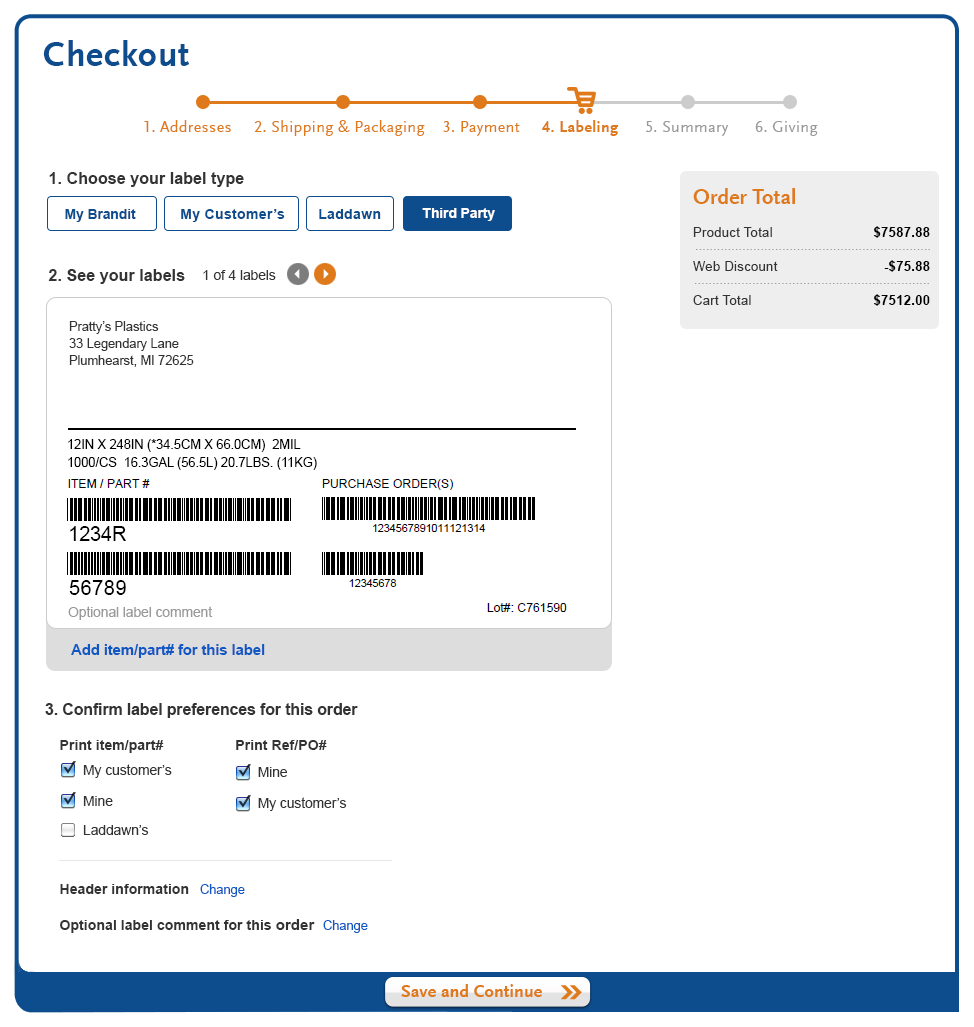
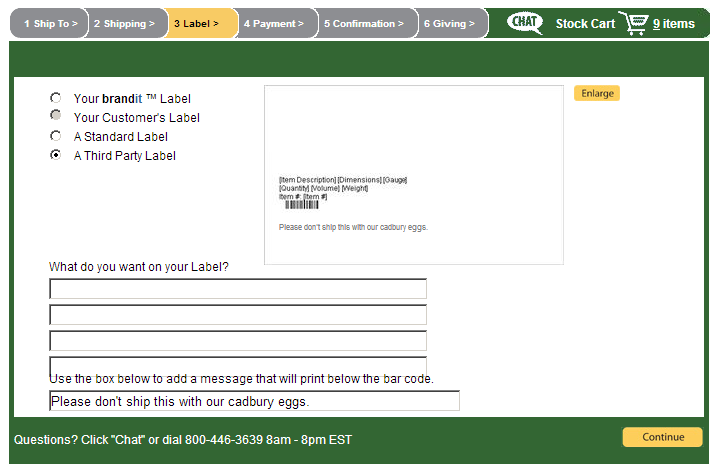
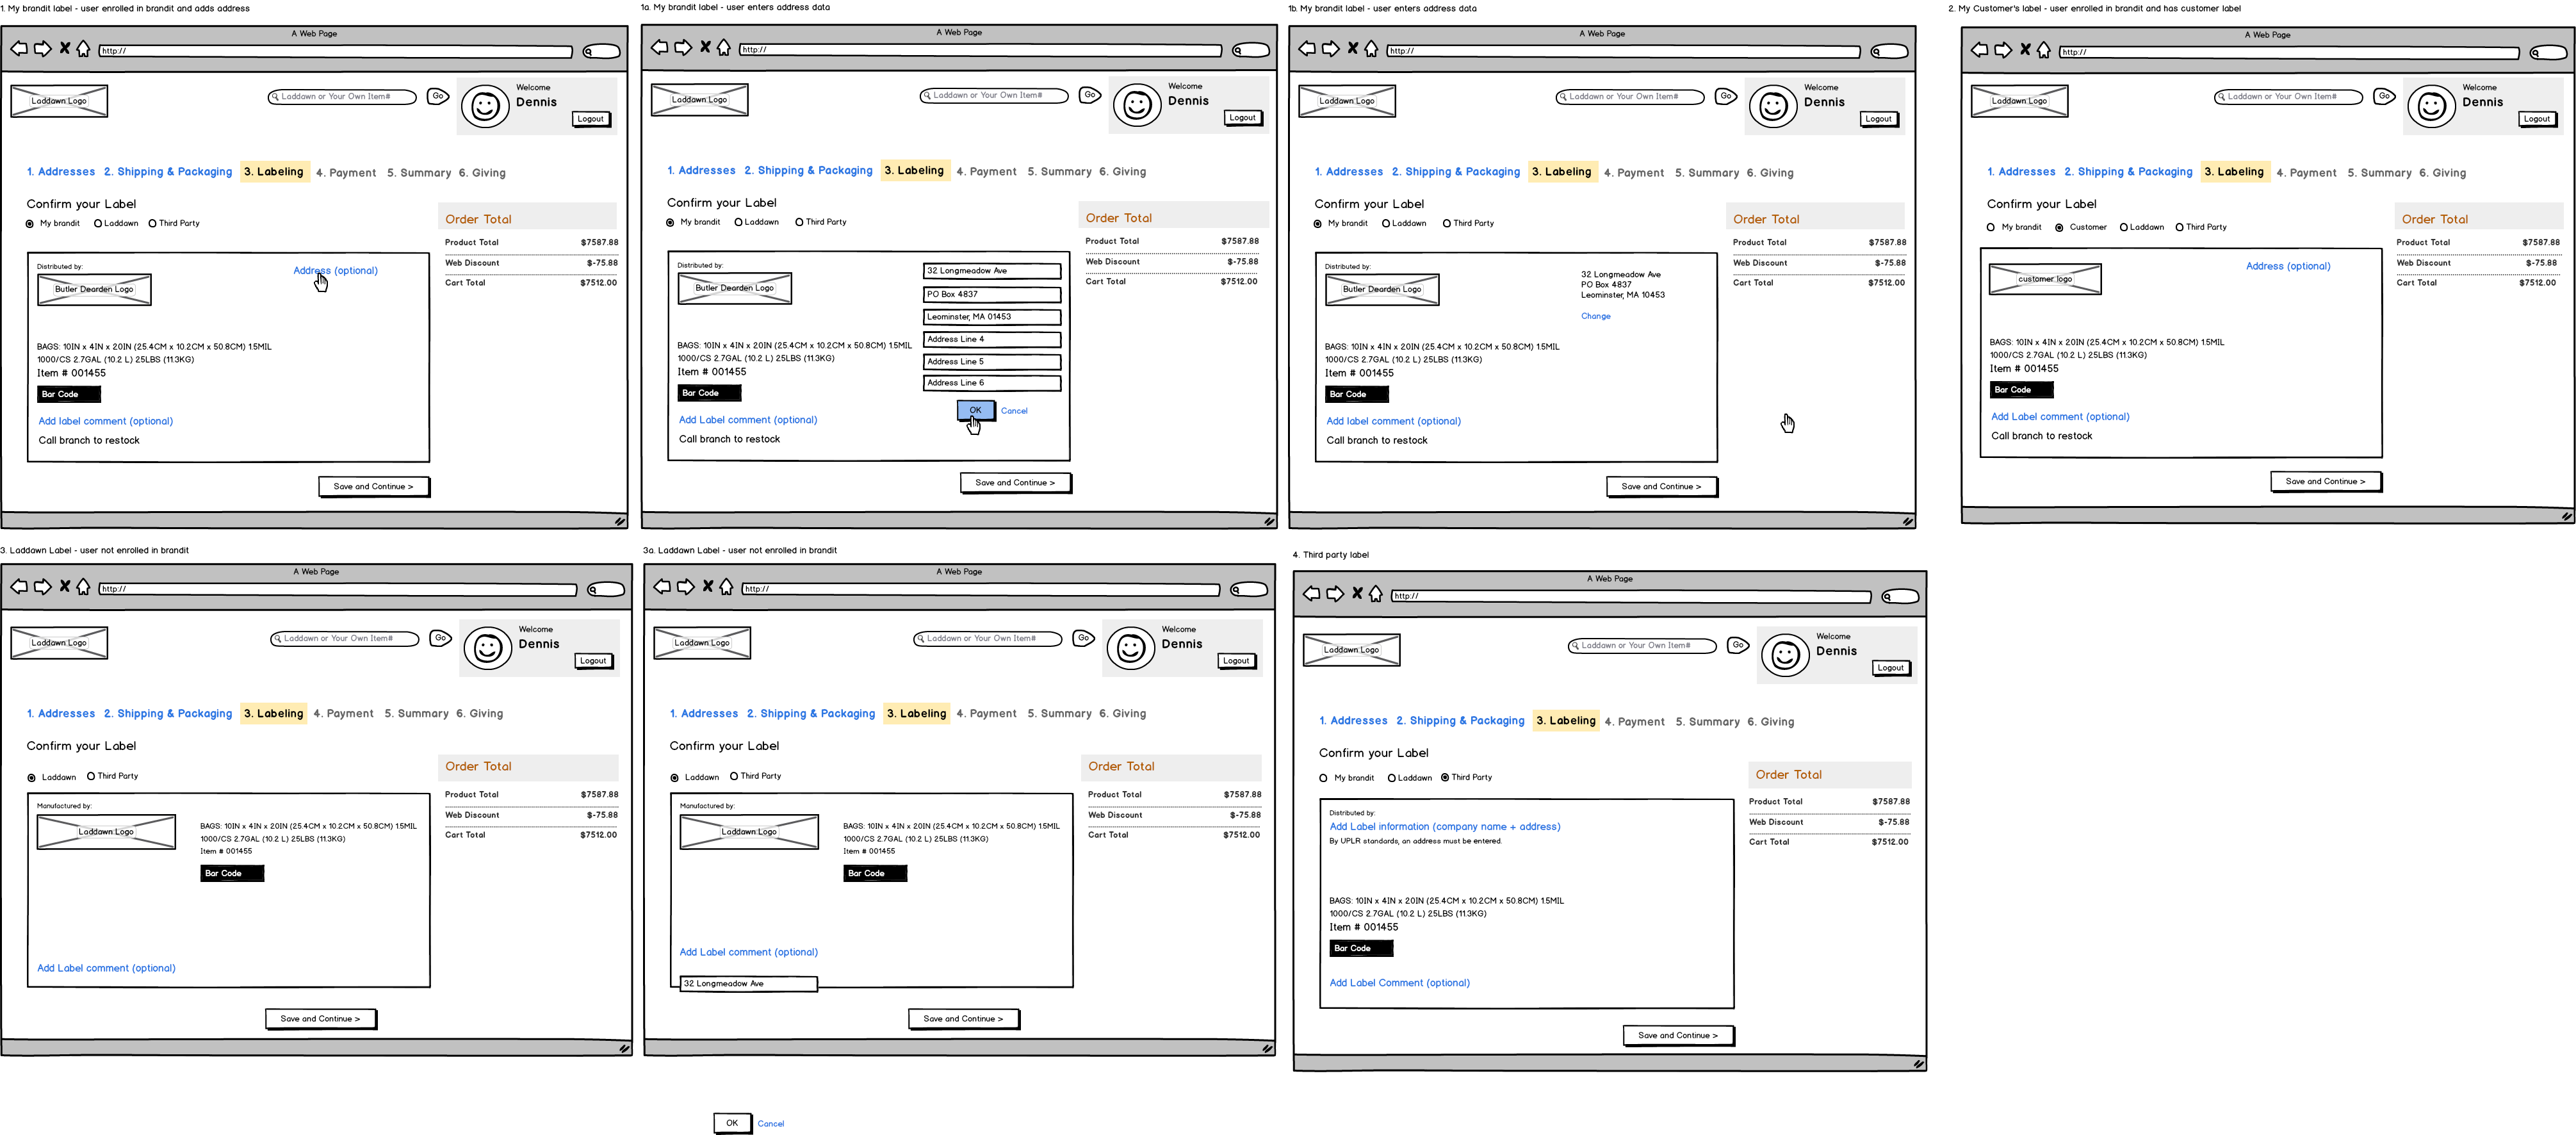
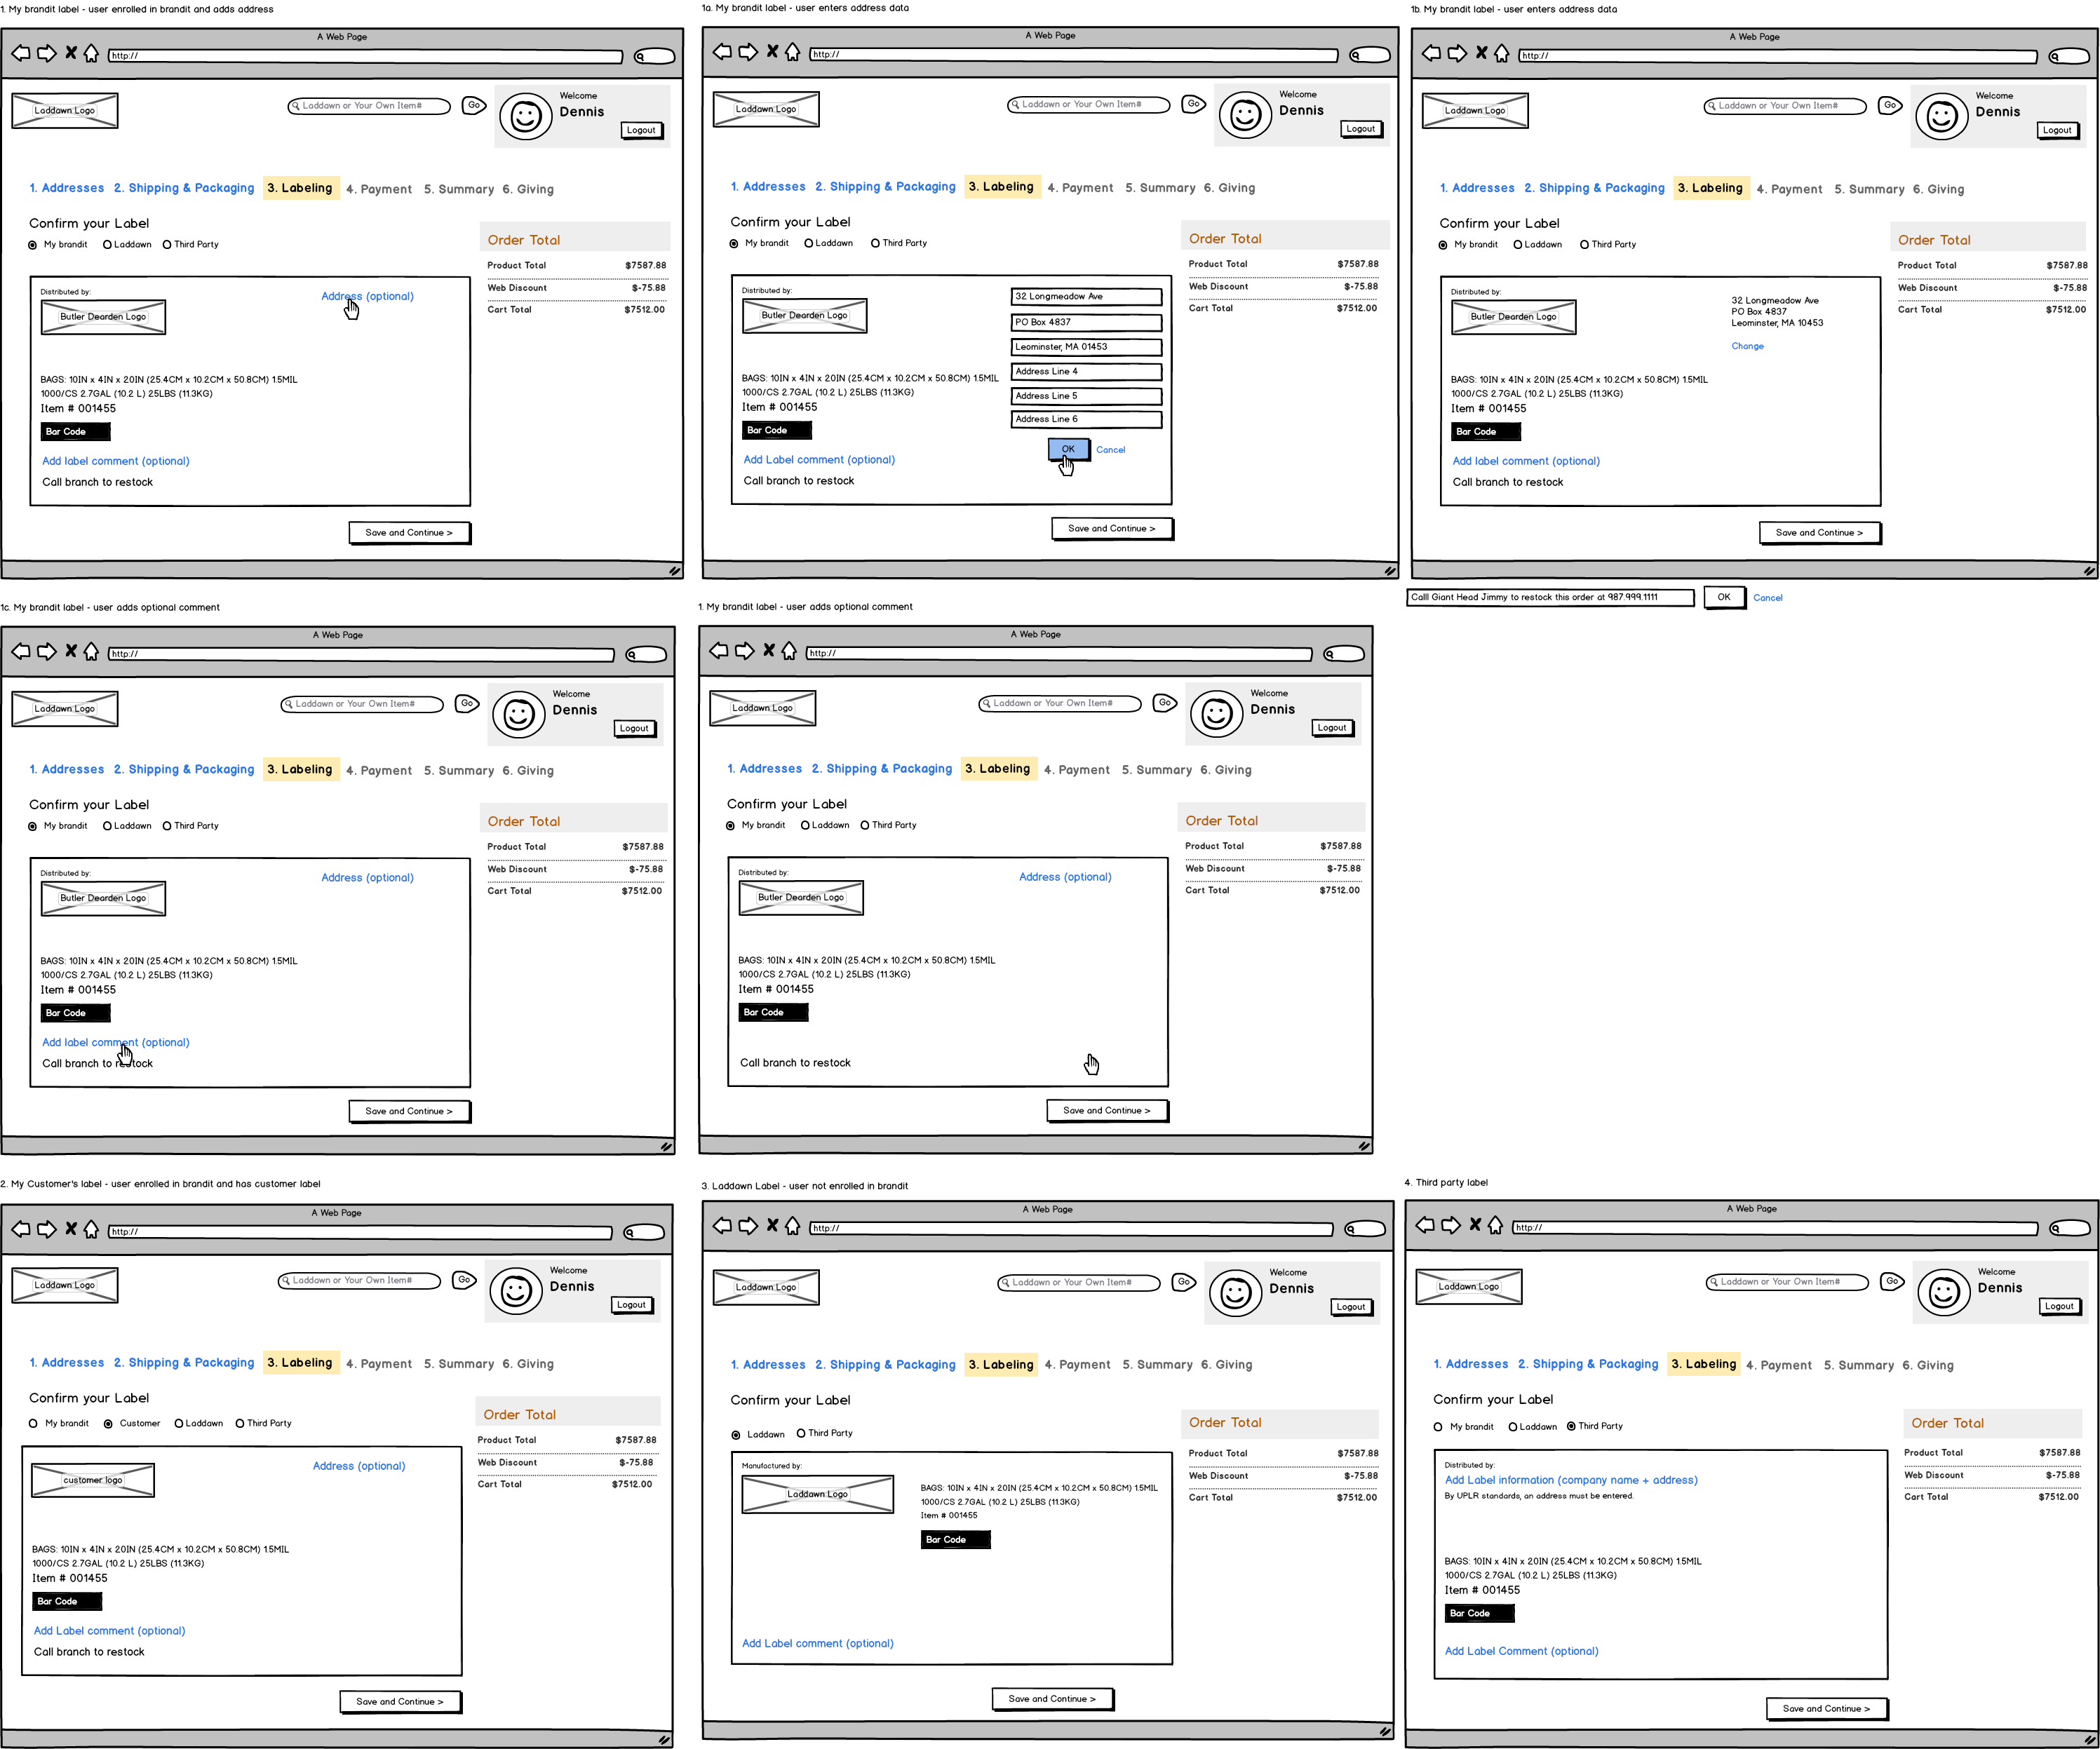
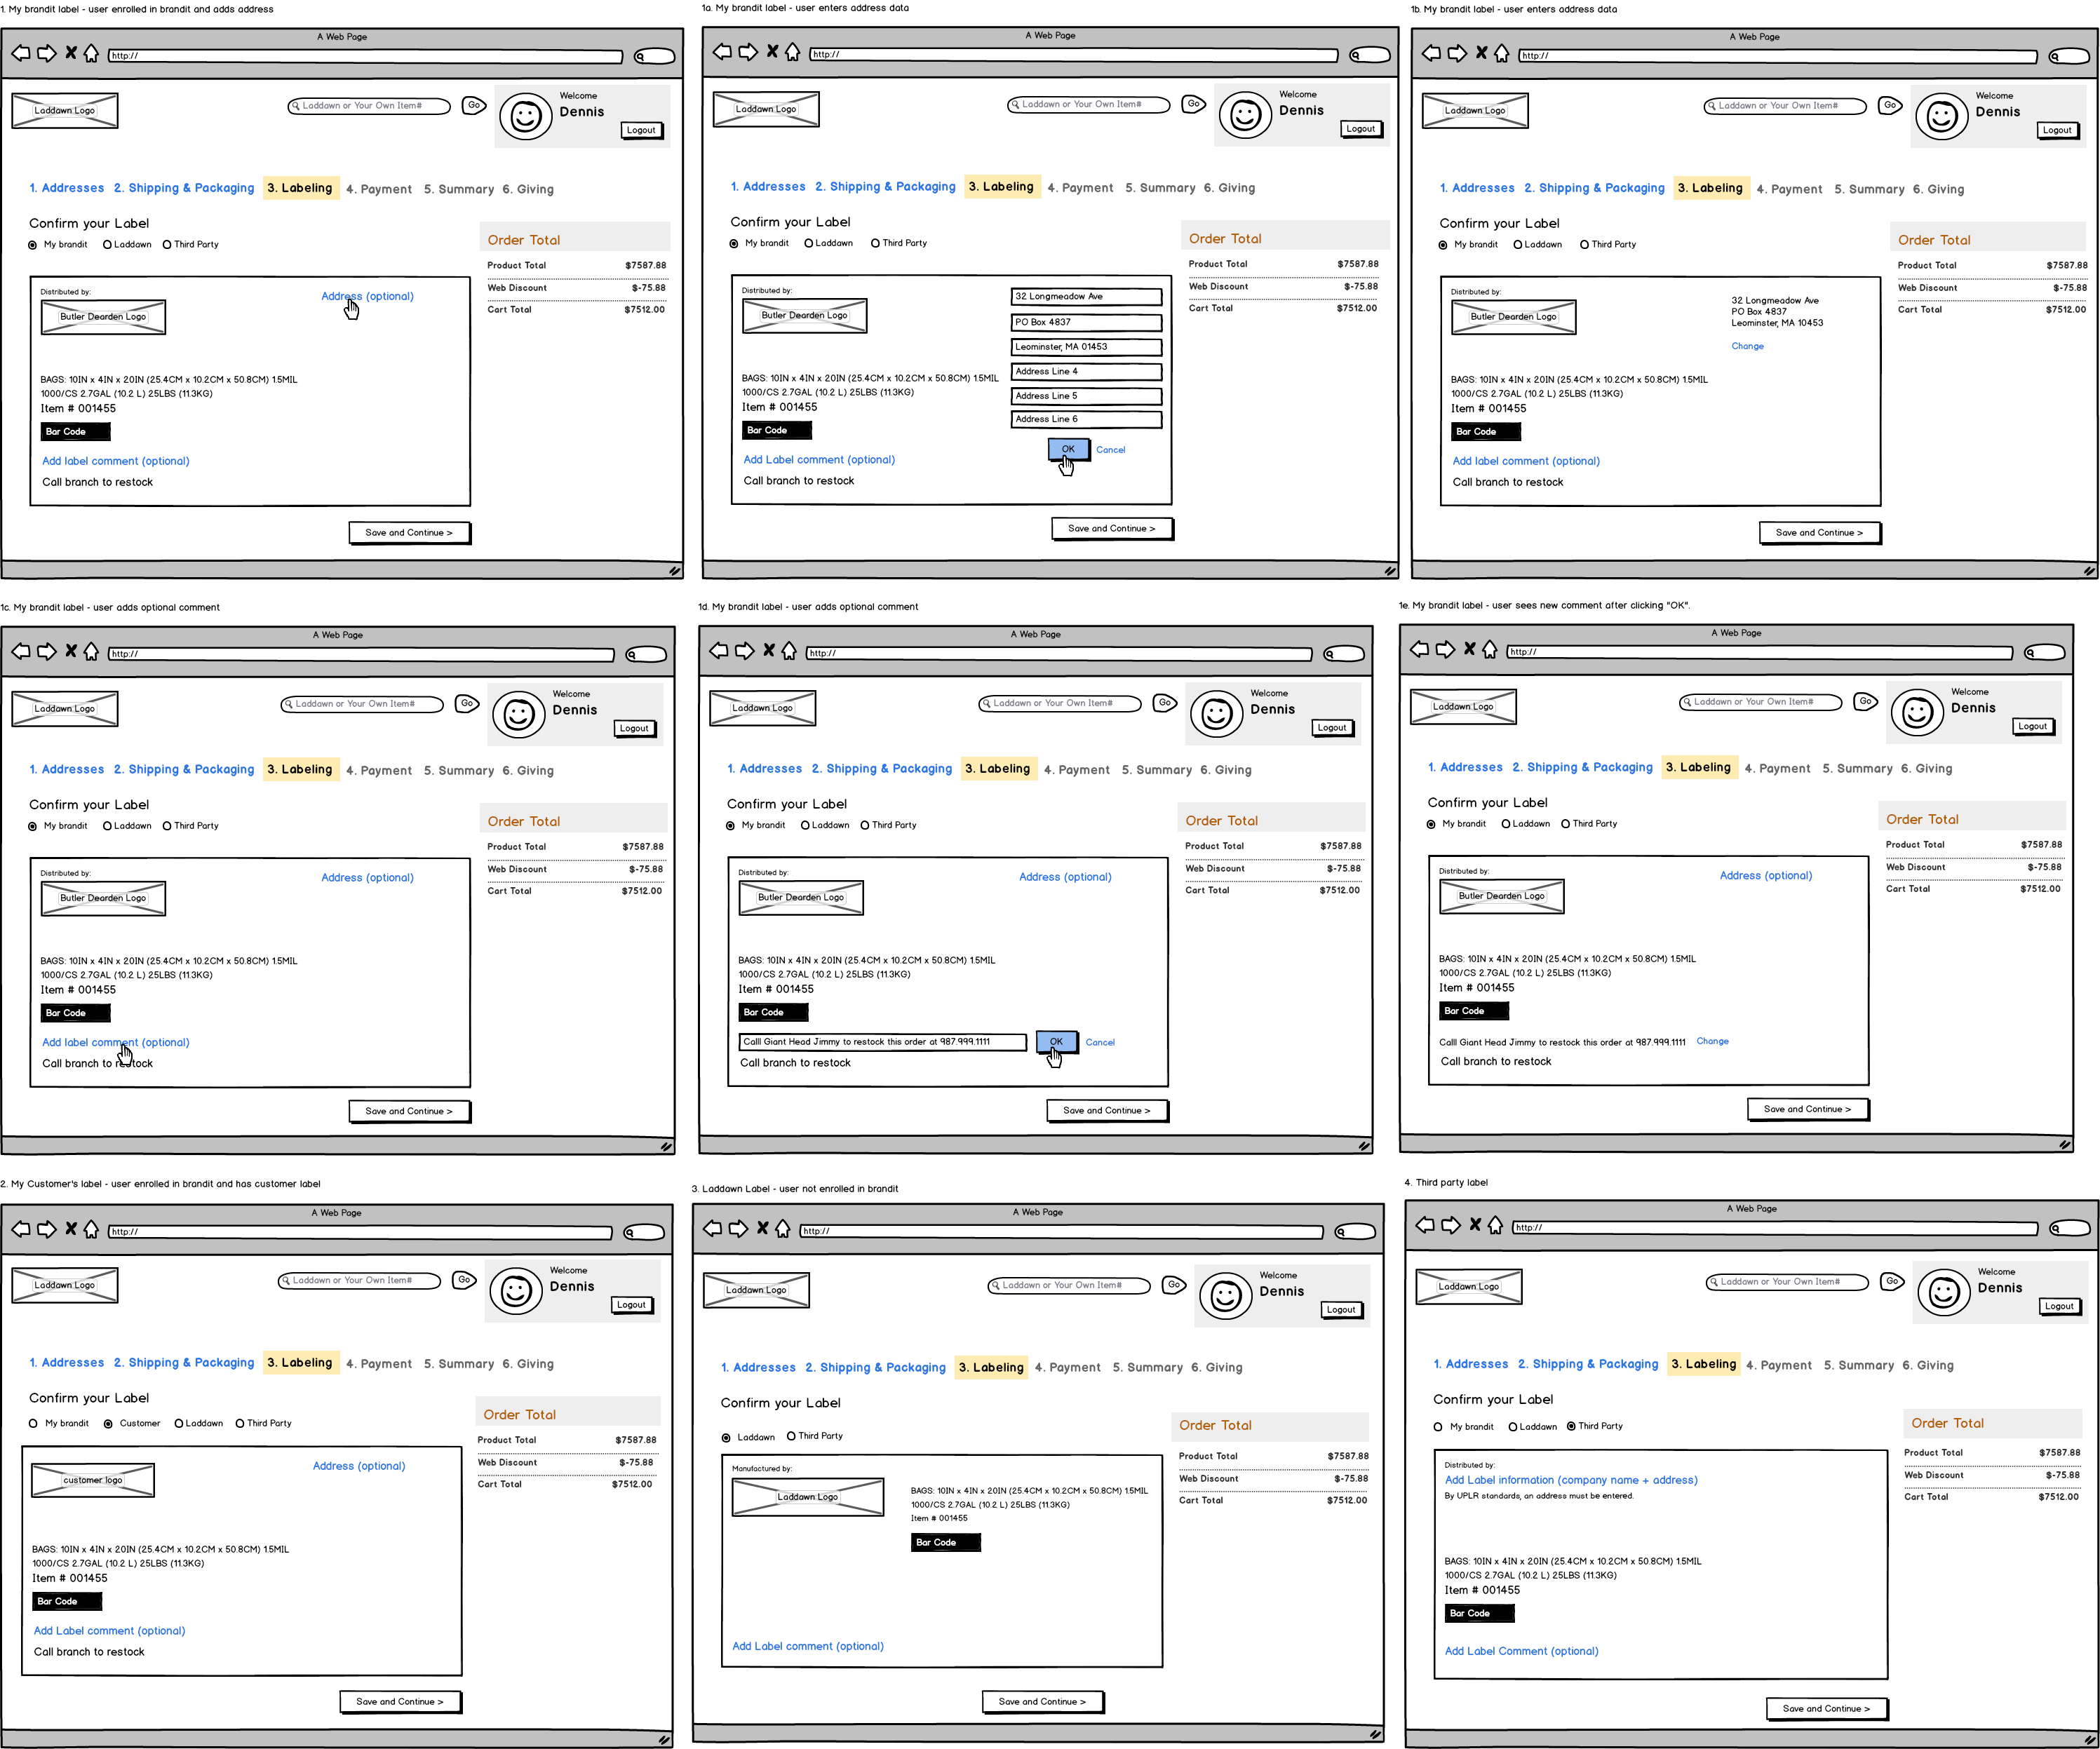
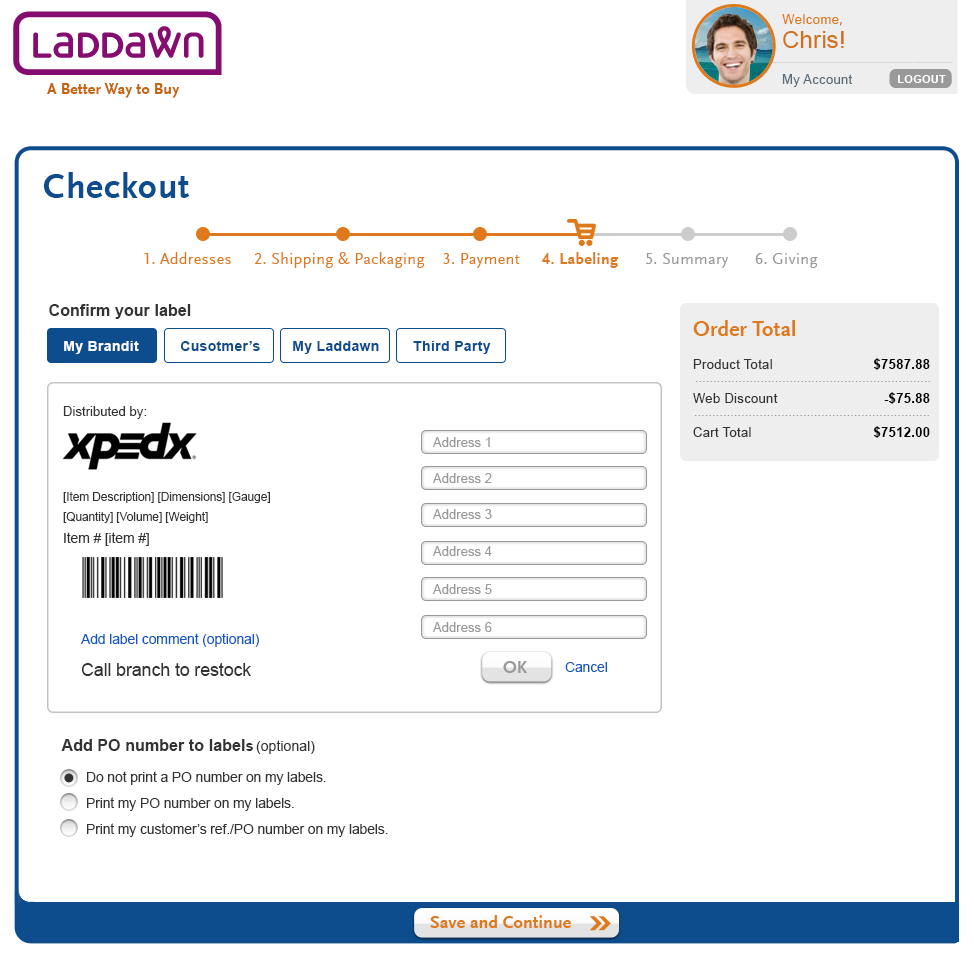
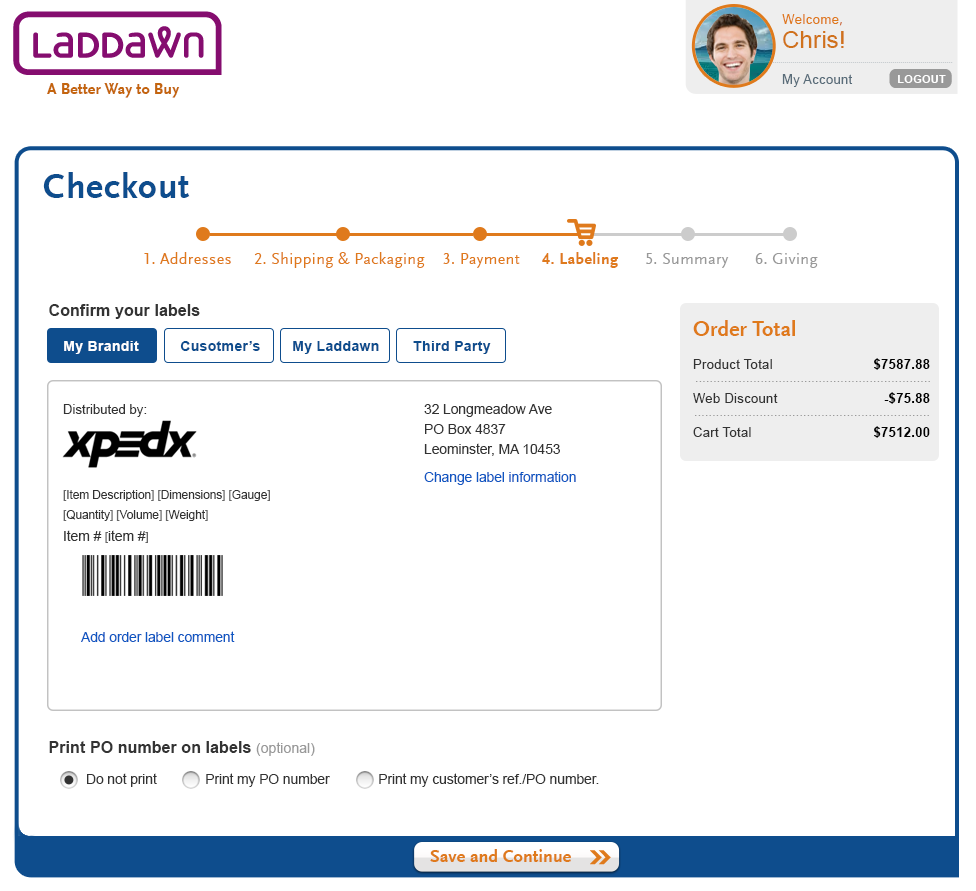
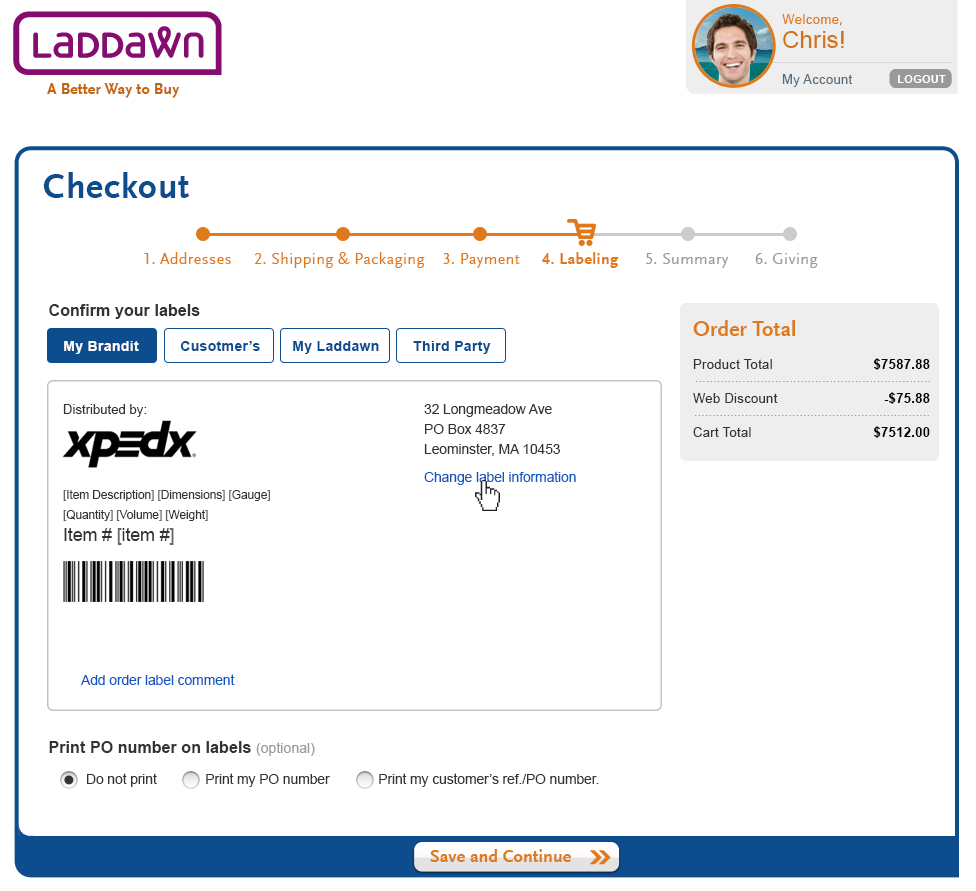
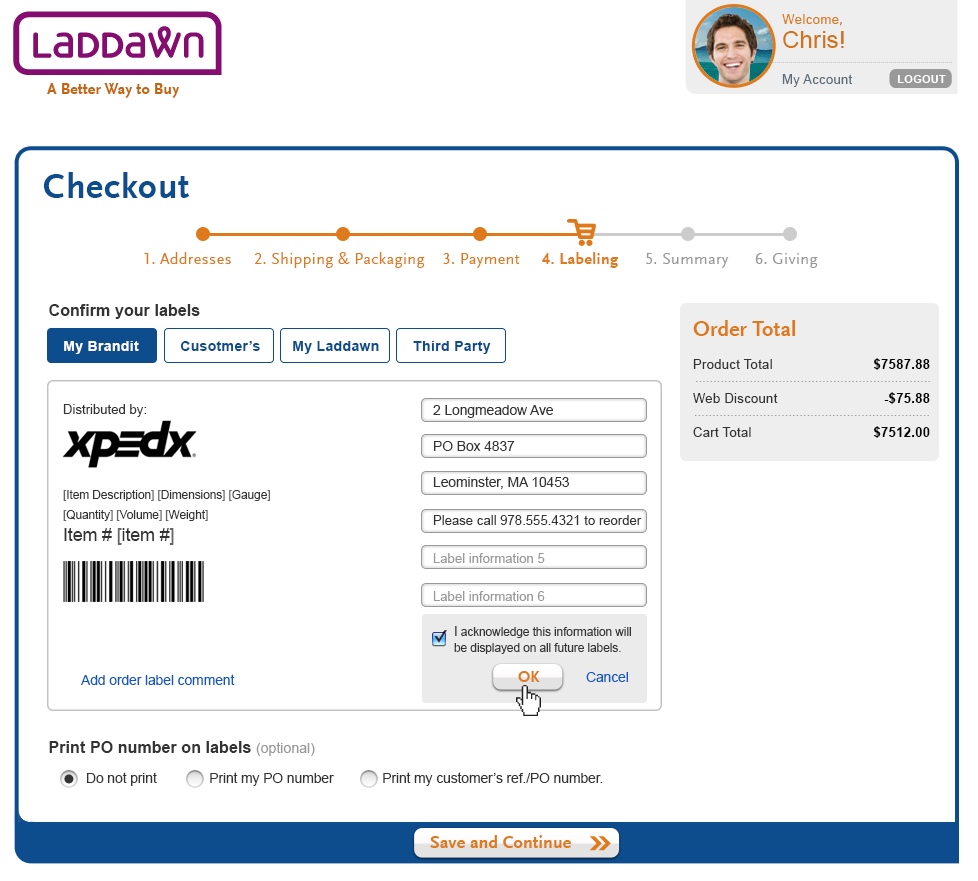
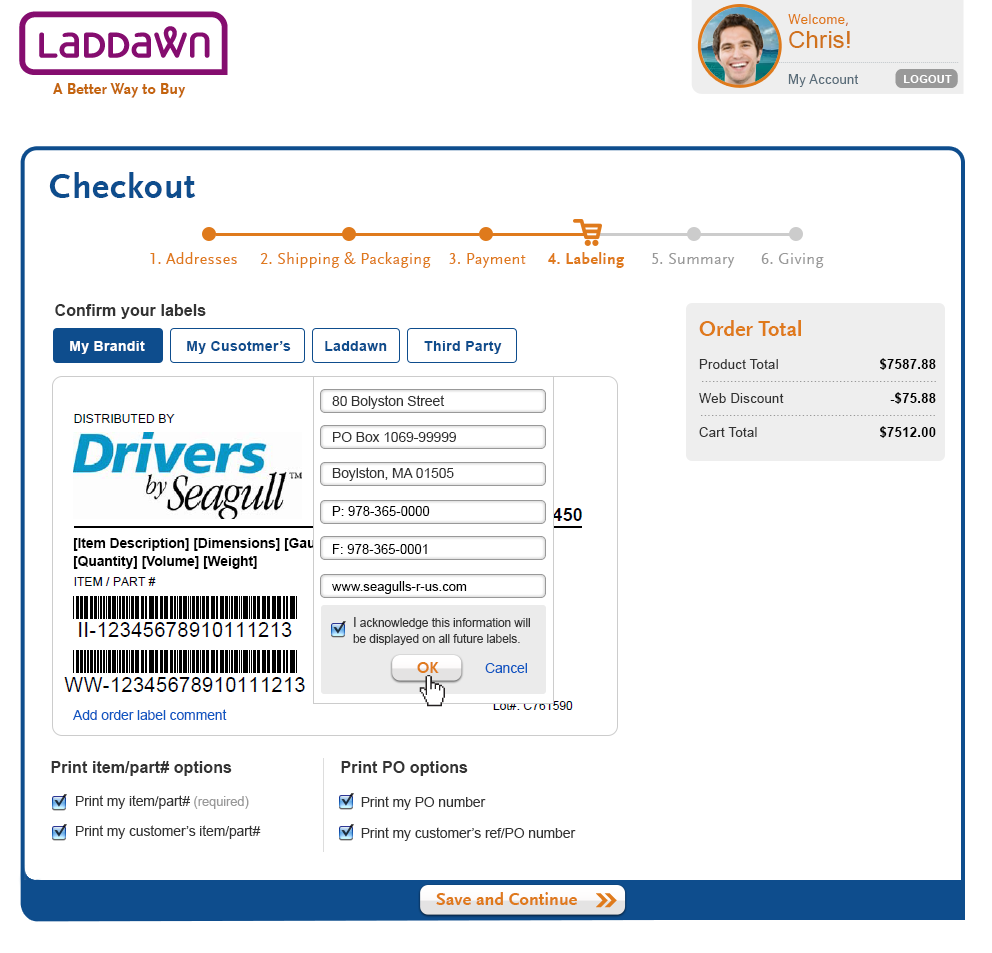
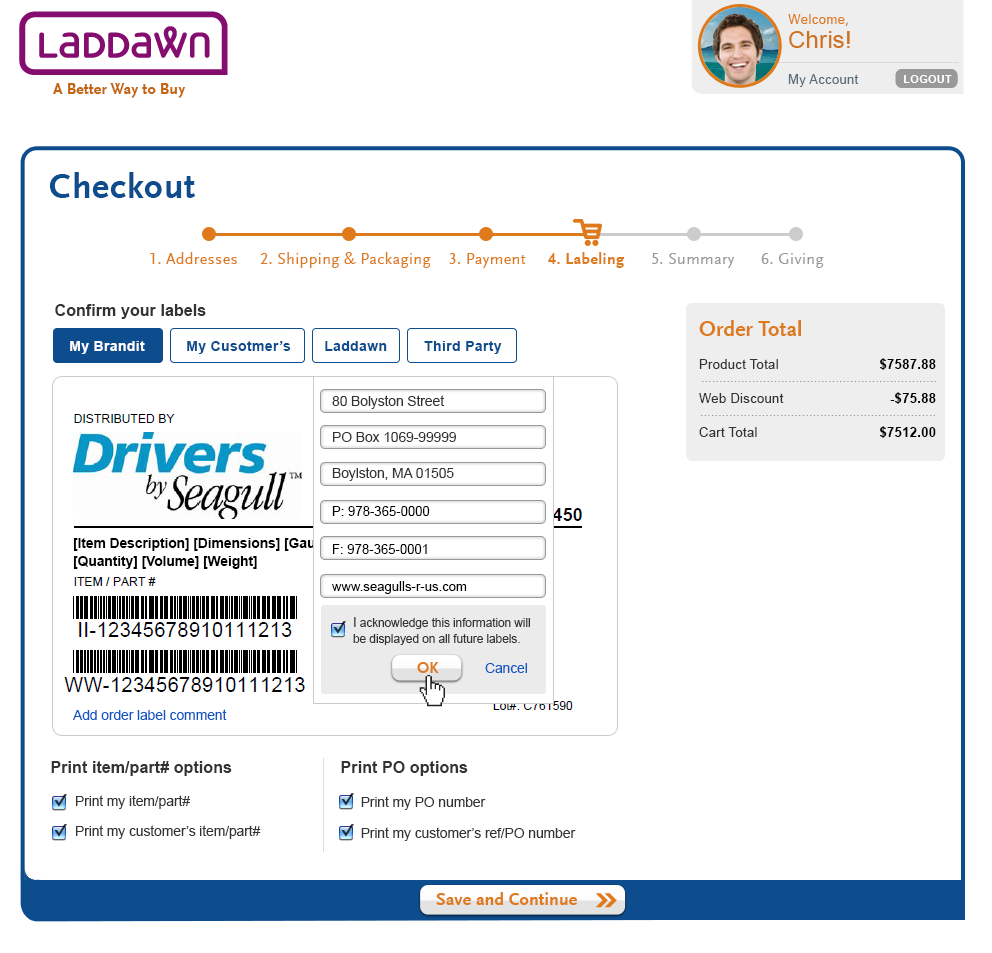
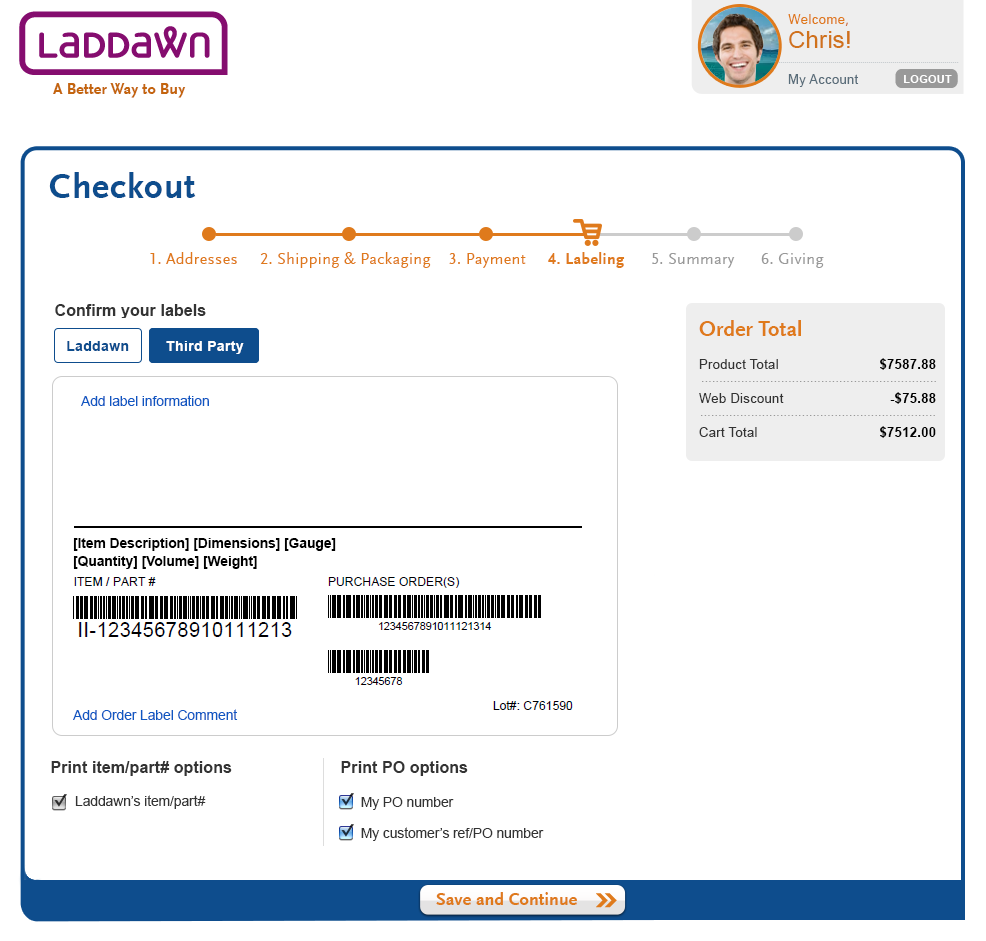
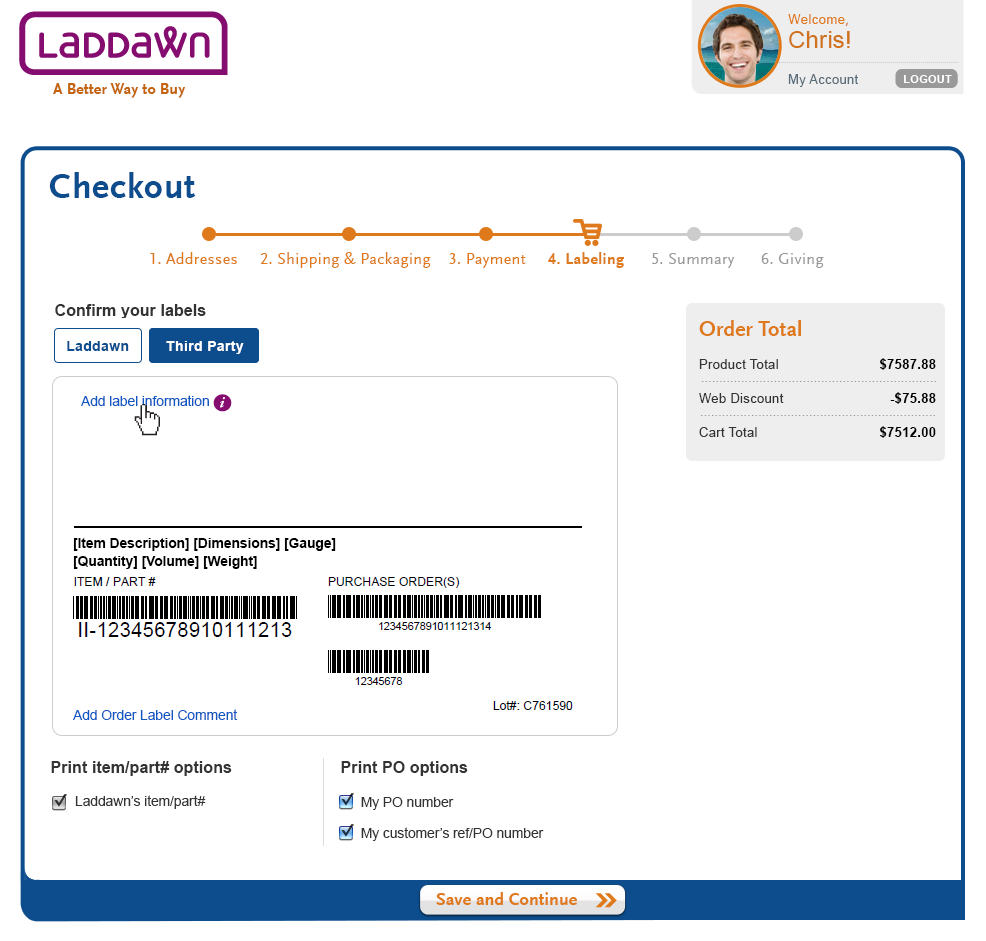
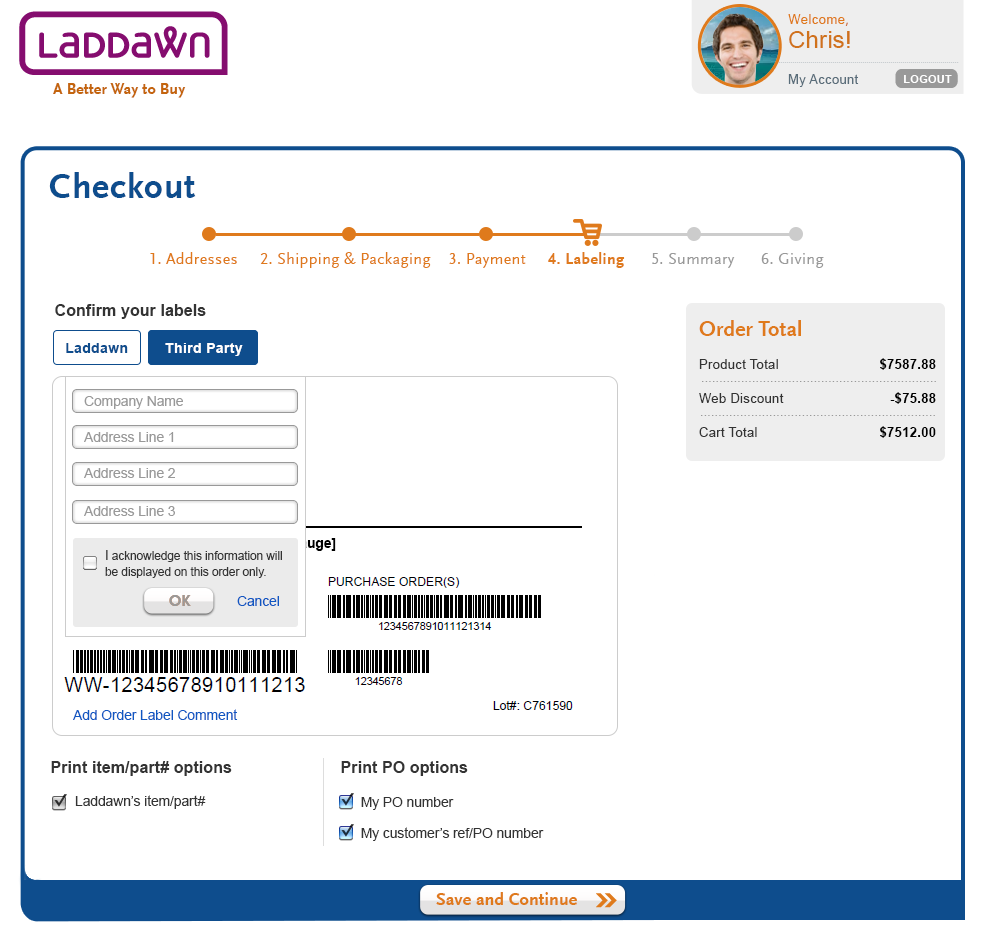
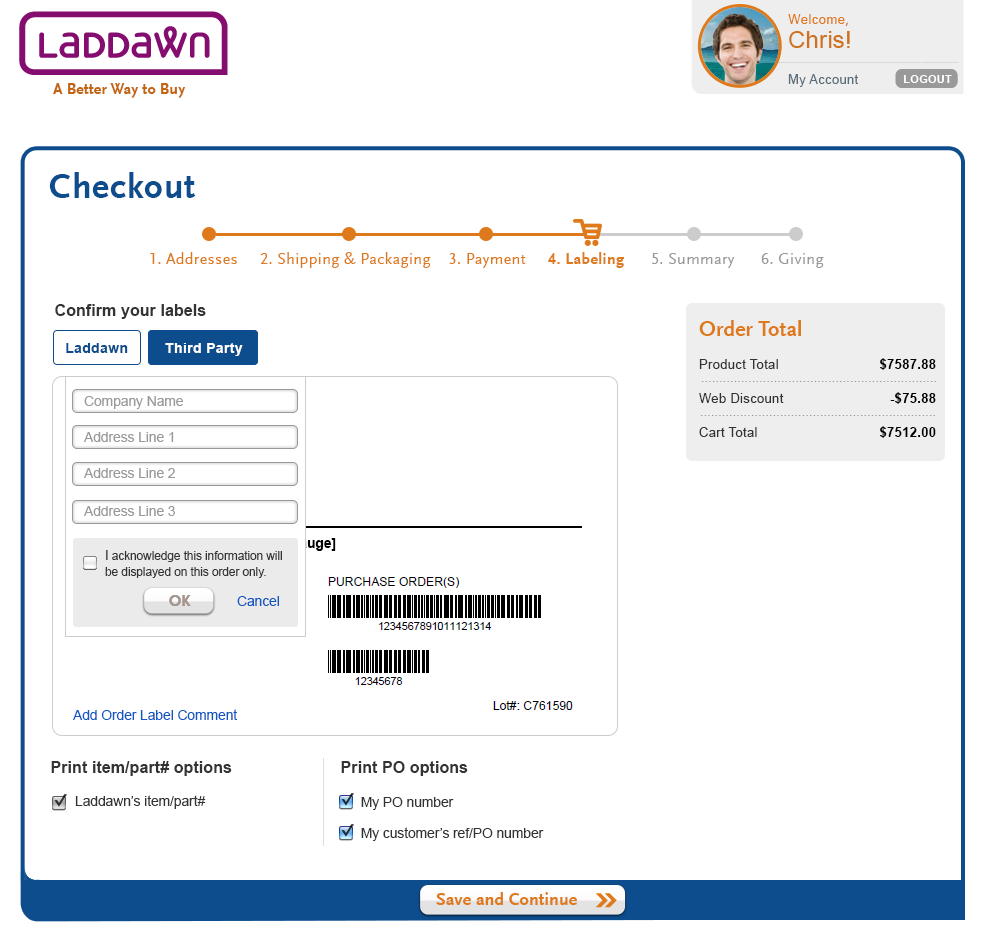
4 Third party label (Design 4, 4a, 4b, 4c,)
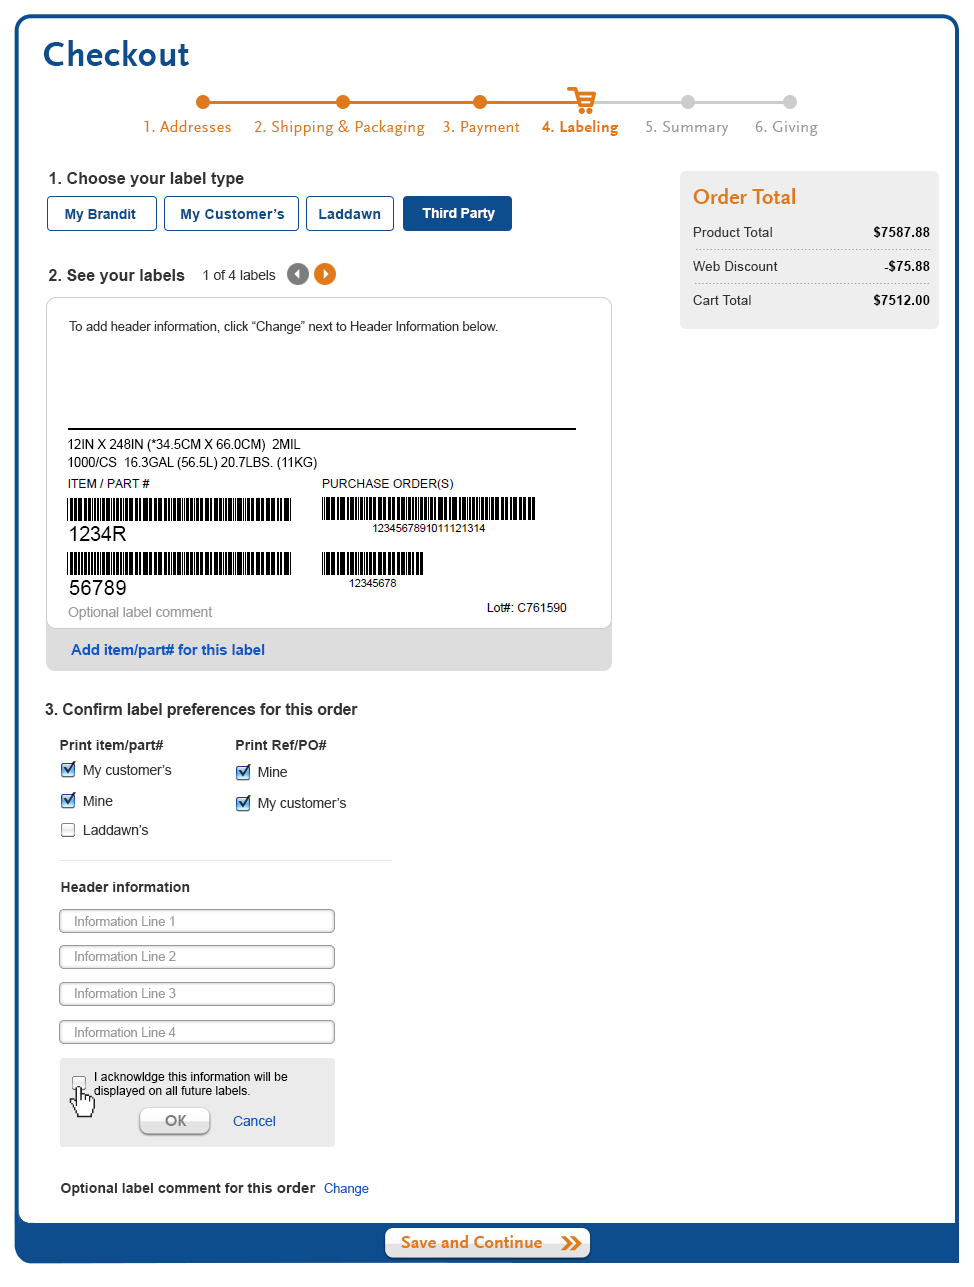
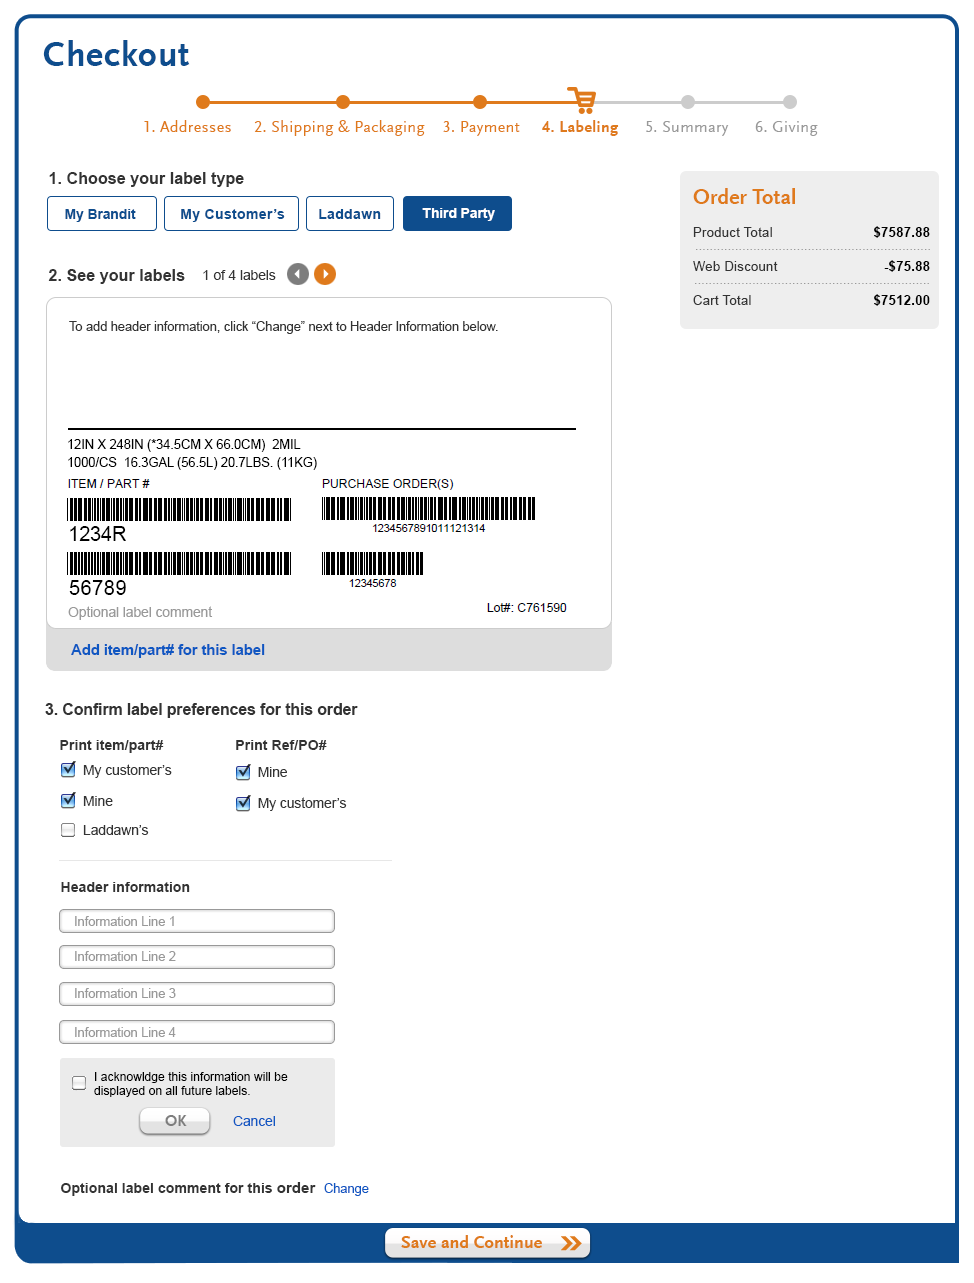
The third party label has no logo associated with it (Design 4). The distributor adds label information by clicking "Change" link next to Header Information. 4 entry fields slide down to replace the link (Design 4a). Once the user adds any data to any of the 4 entry fields, the user must acknowledge the information is for this order only and is not saved for future use (Note: change the header info in the other 3 label types will change the header info on all labels for that bill-to). The user must click the "OK" button (Design 4b) and the header info is displayed in the upper left-hand area of the label (Design 4c). The third party helper text is removed while there is header content.
Today there are 11 Brandit label formats available to customers. The format is chosen based on the size and shape of the customer logo and the information that is embedded in the logo (ie header info).
| Design 1 - Distributor's brandit | Design 2 - My Customer's label | Design 3 - Laddawn Label |
|---|---|---|
 |  |  |
| Design 4 - Third Party 1 | Design 4a - Third Party | Design 4b - Third Party |
 |  |  |
| Design 4c - Third Party | ||
 |
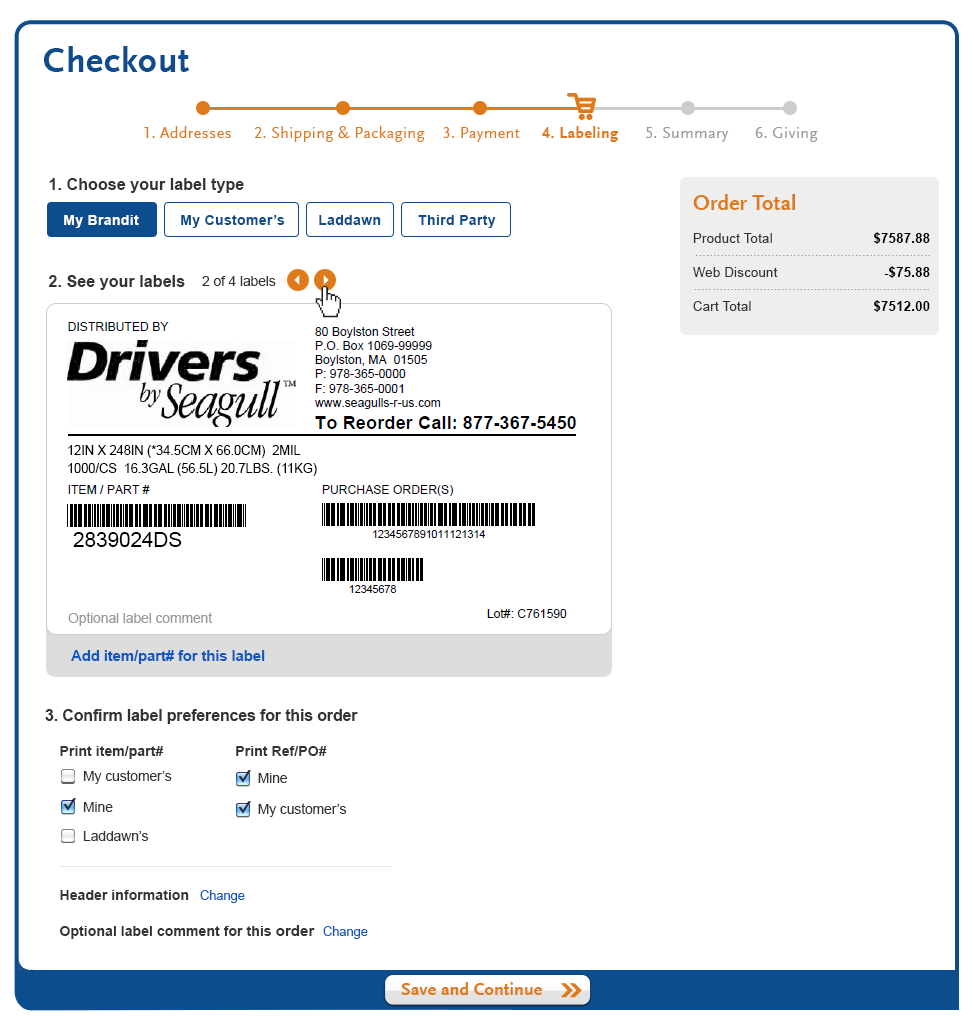
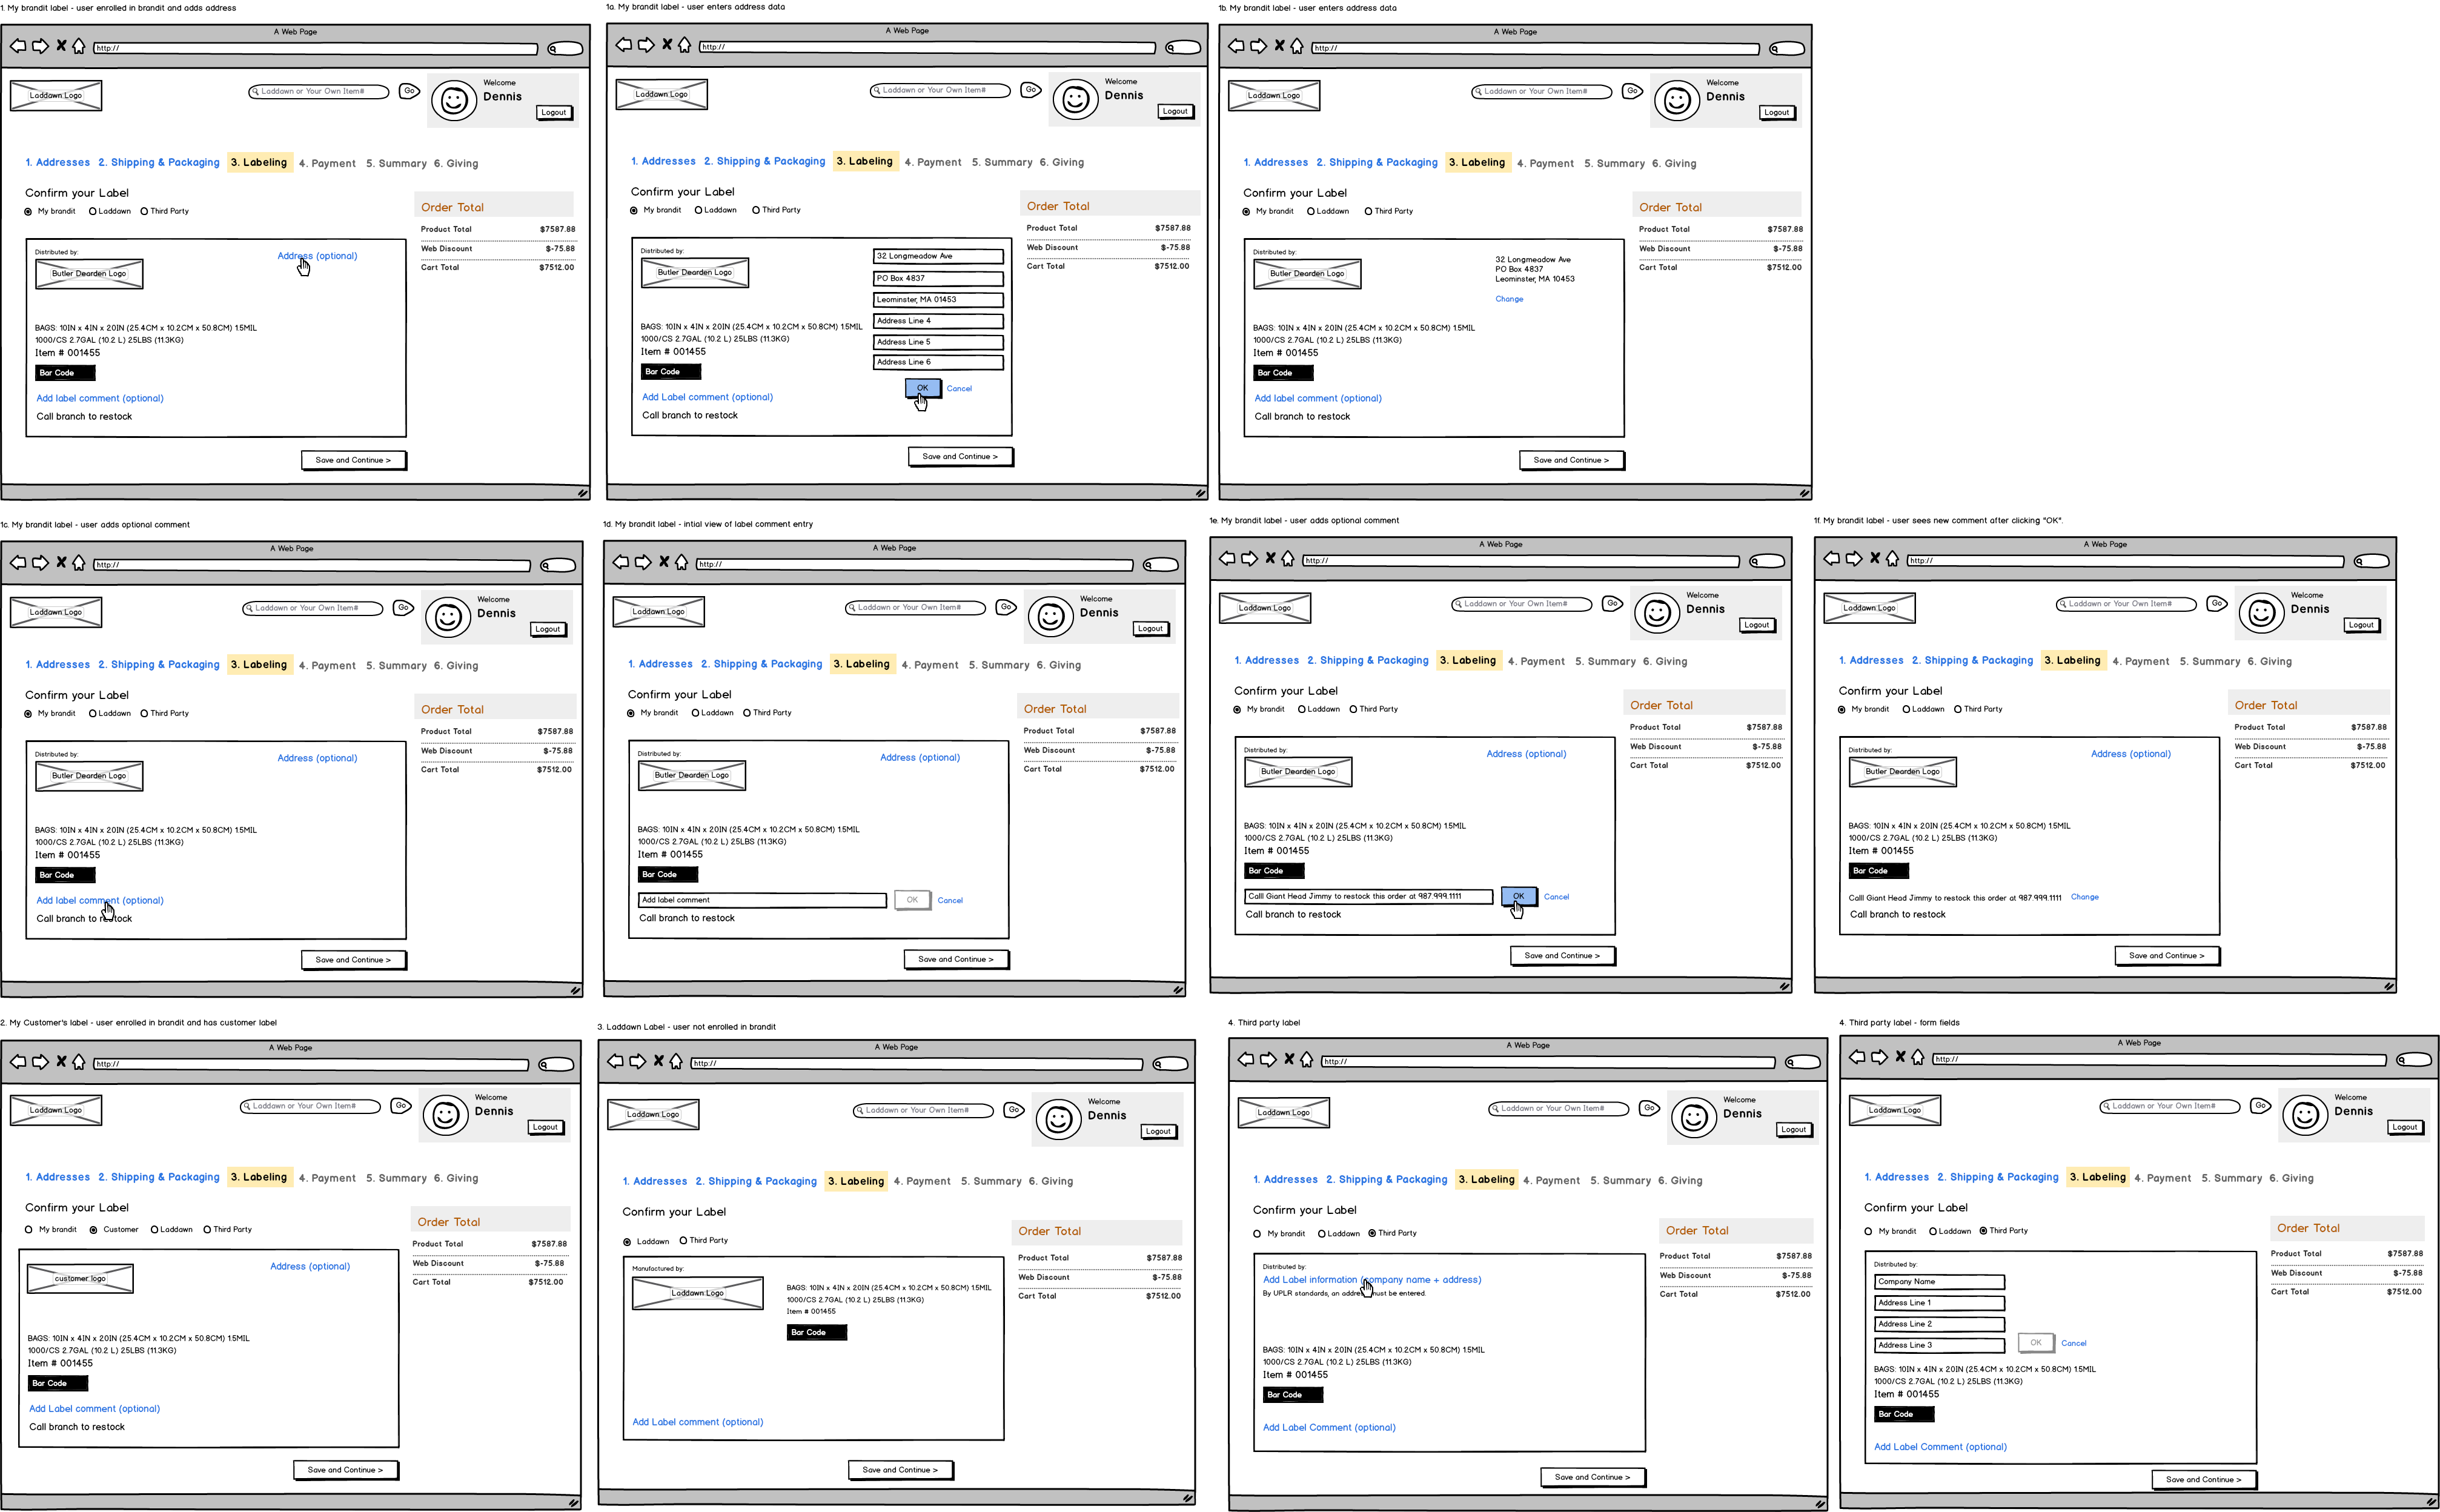
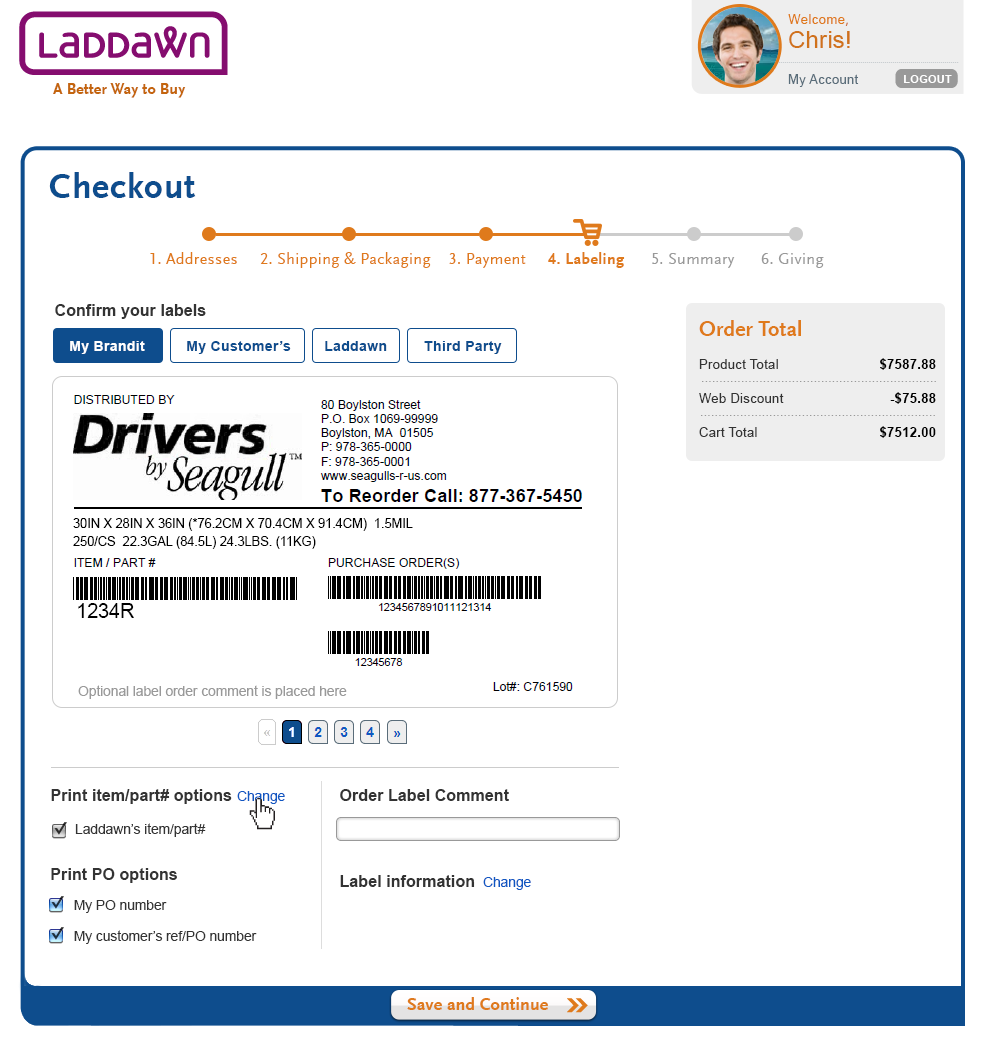
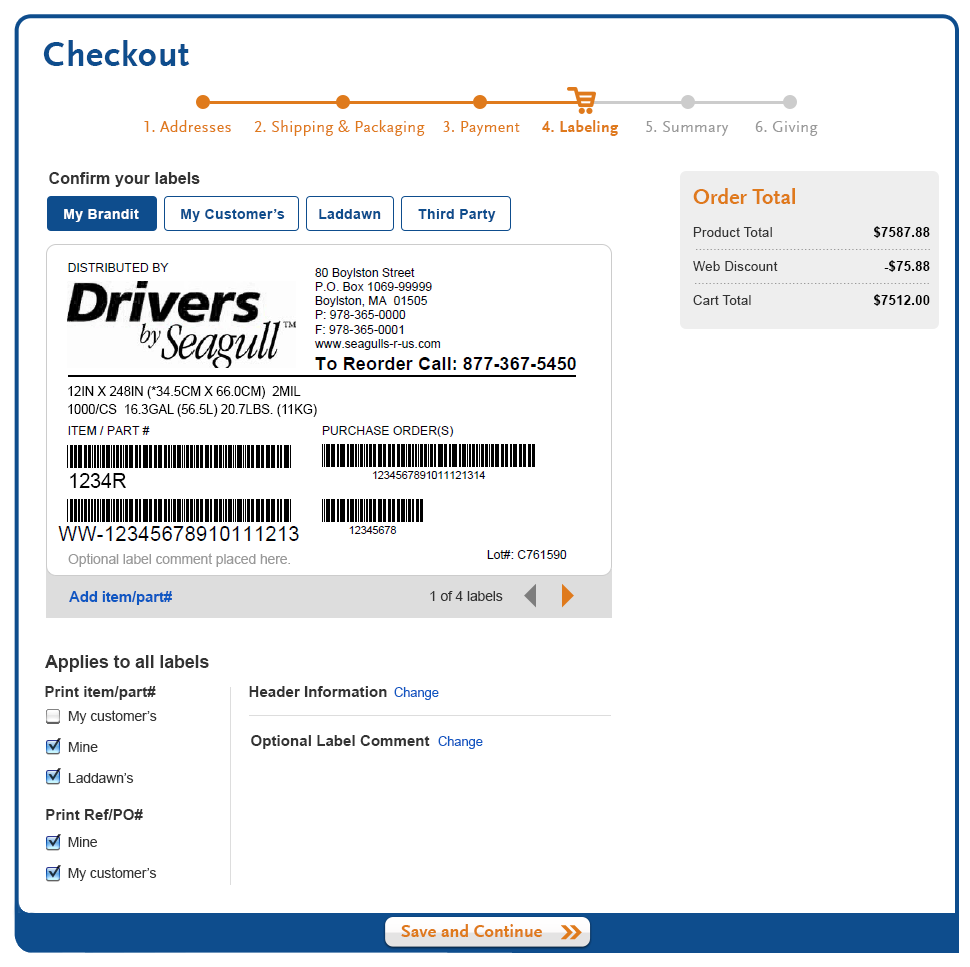
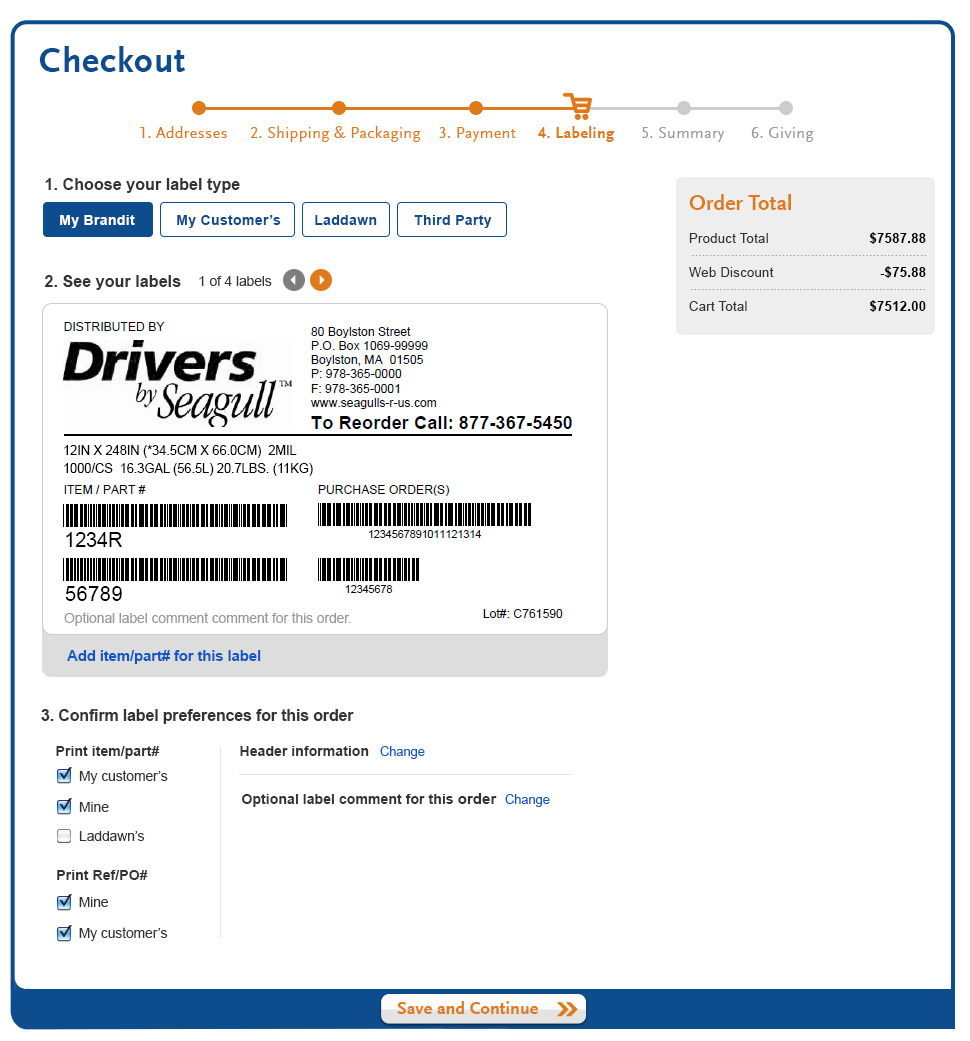
Section 2 - See your labels
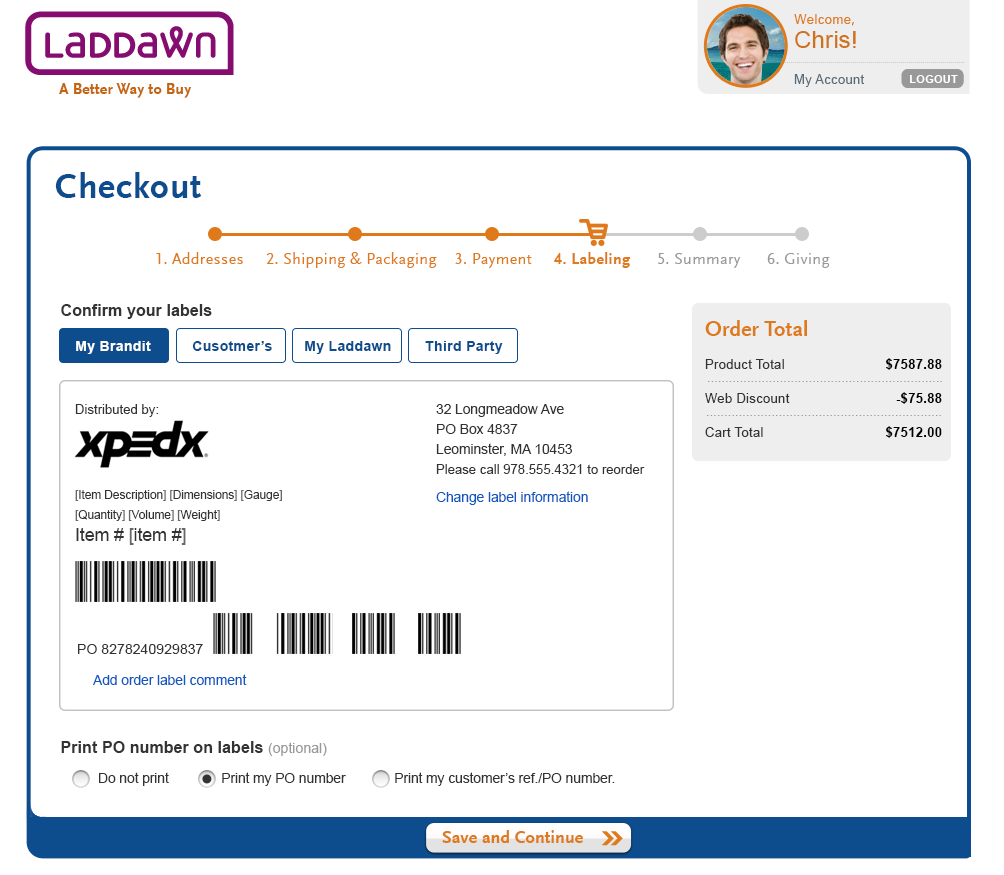
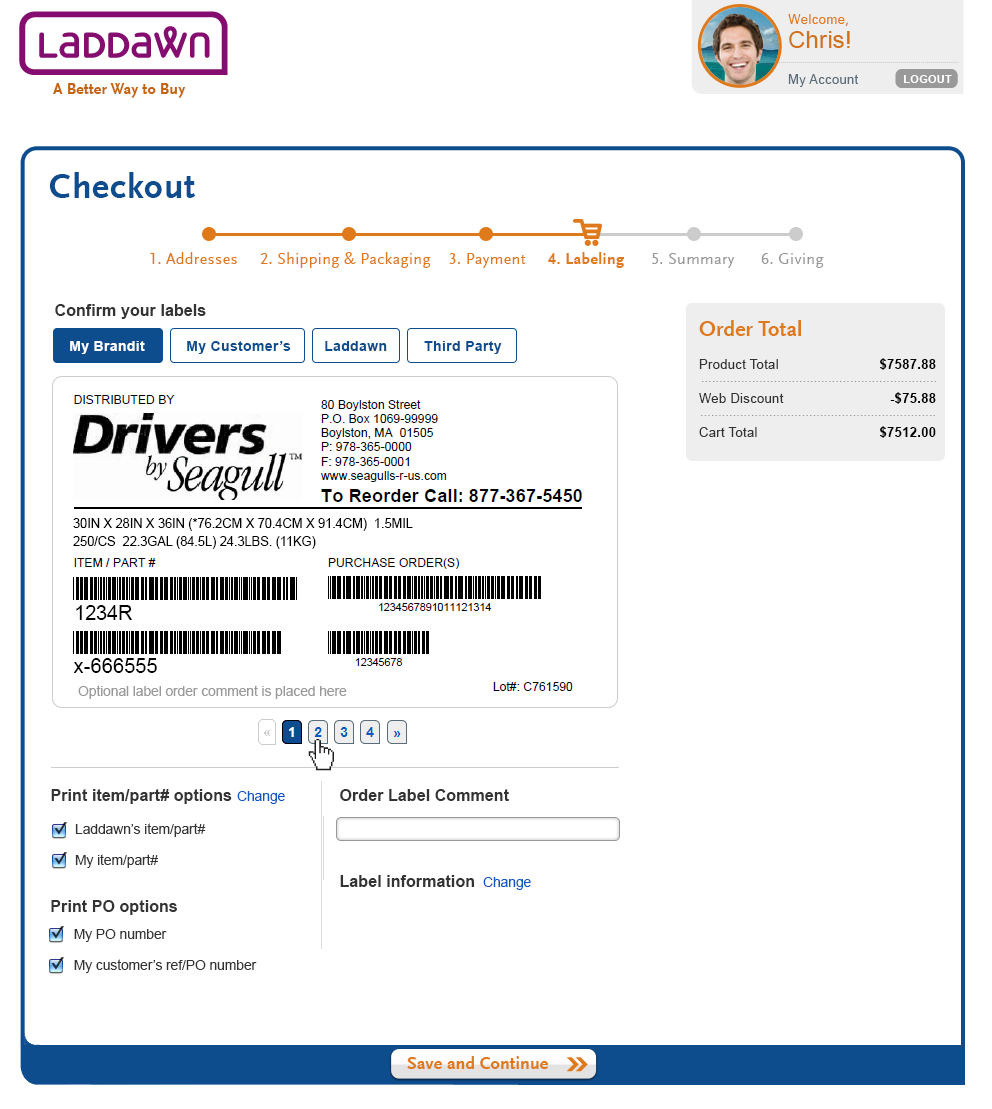
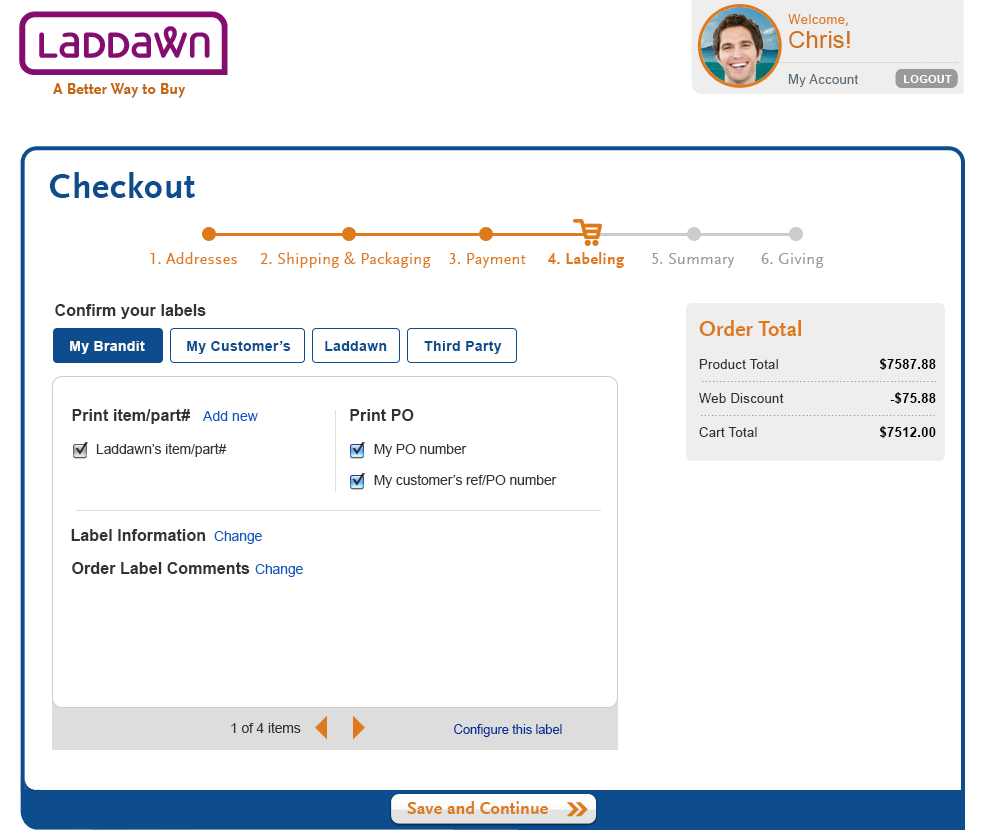
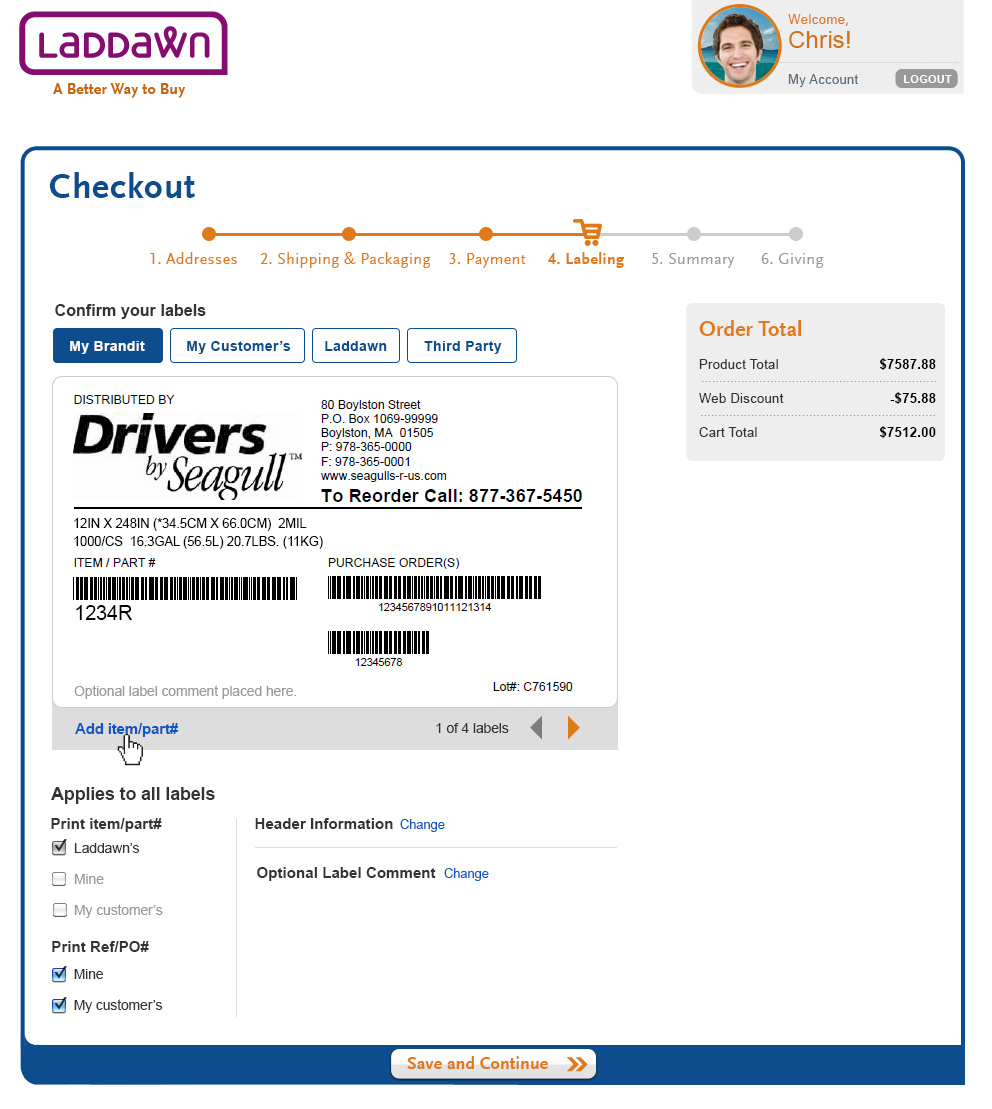
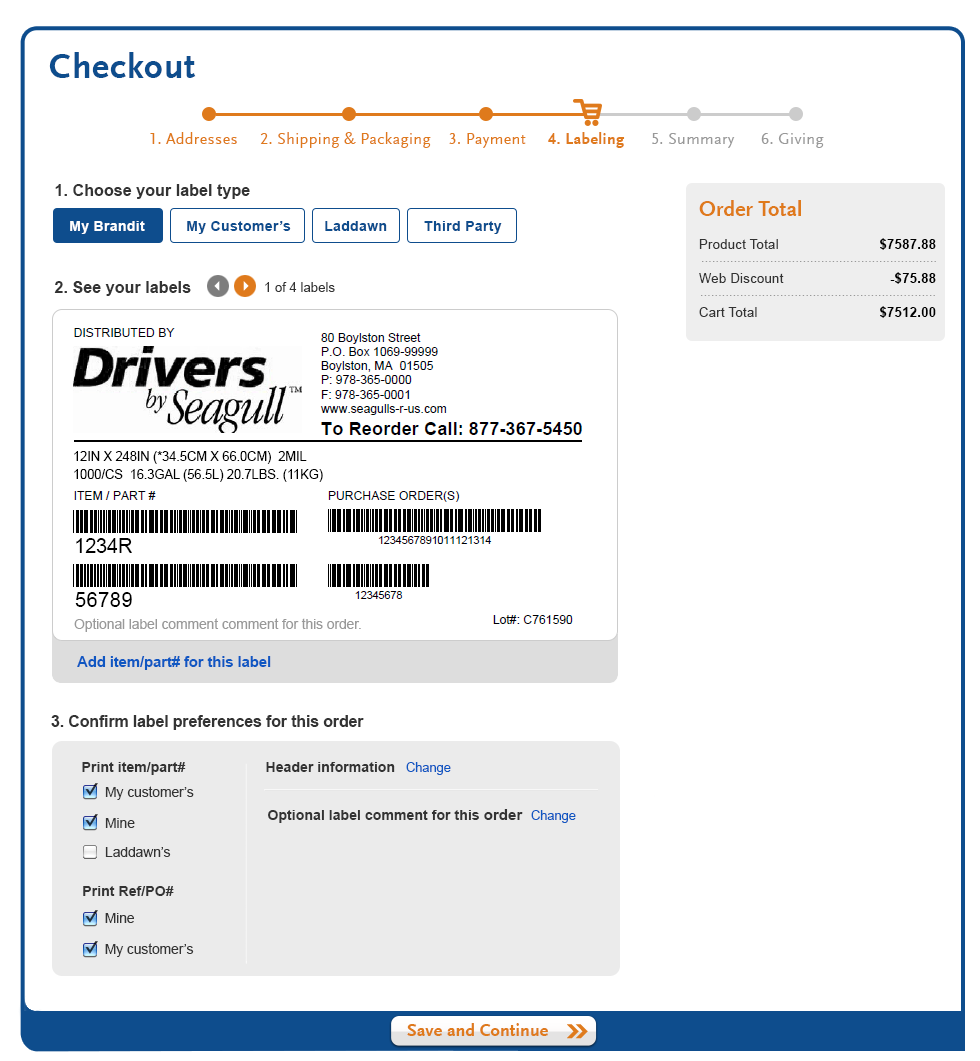
The label(s) will display exactly as it is printed in this new world. The user will be able to cycle through multiple labels in an order for review. On an order level basis, the user be able to turn on/off item # and PO #s.
Label carousel
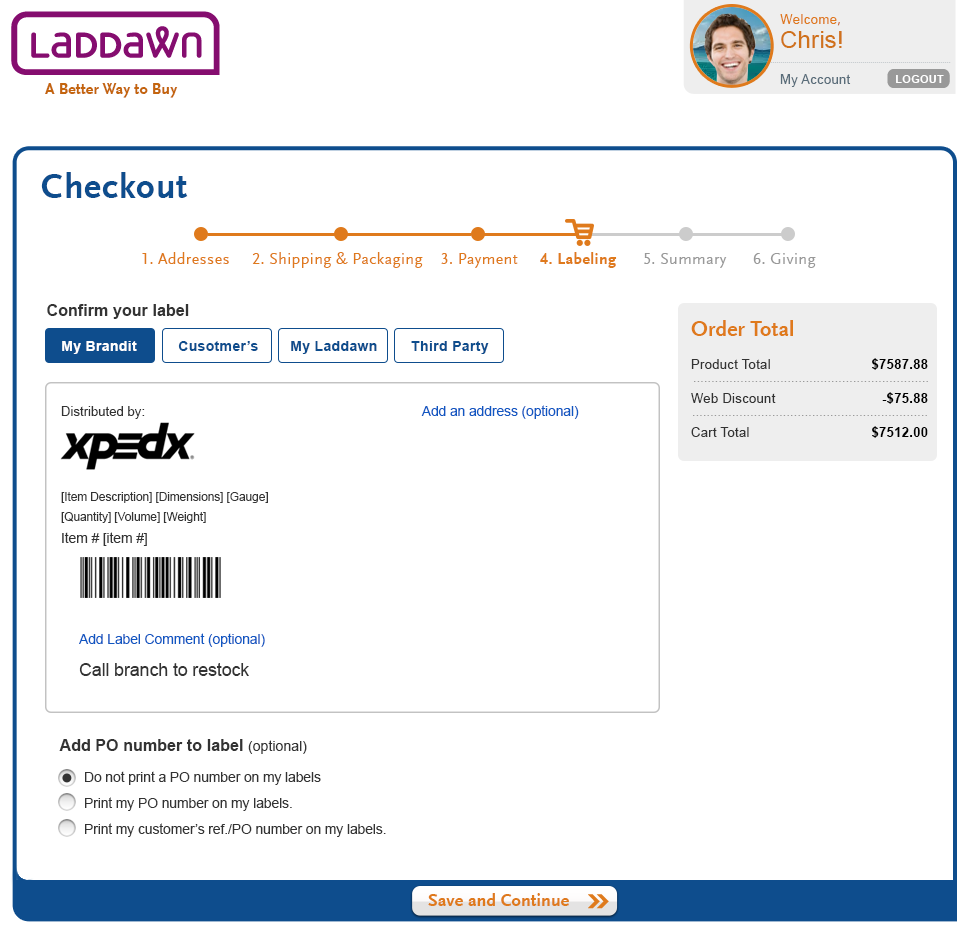
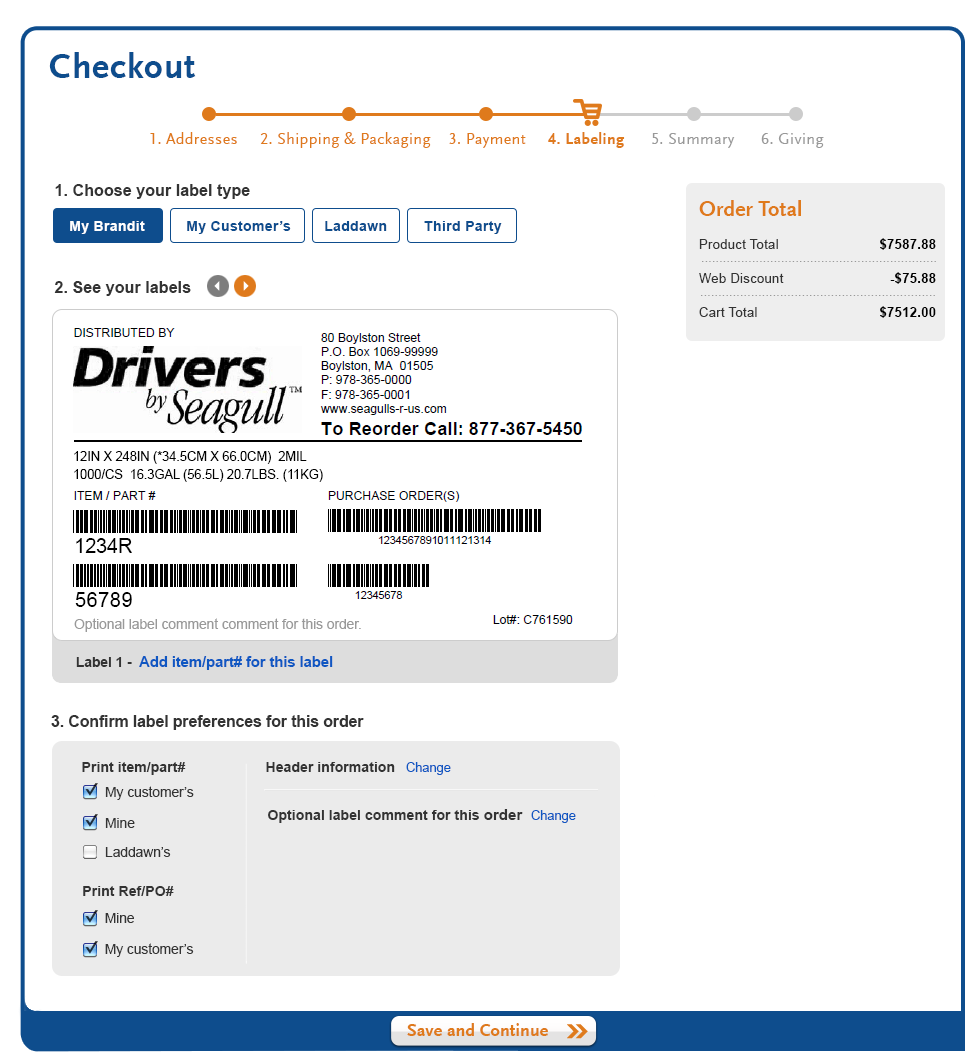
- If only 1 item order exists, the carousel should be removed. (Design 2)
- Multiple items in an order activates the carousel and displays a small counter to the left of the arrow buttons.
| Design 2 - one item in order | Design 2a - one item in order |
|---|---|
 |  |
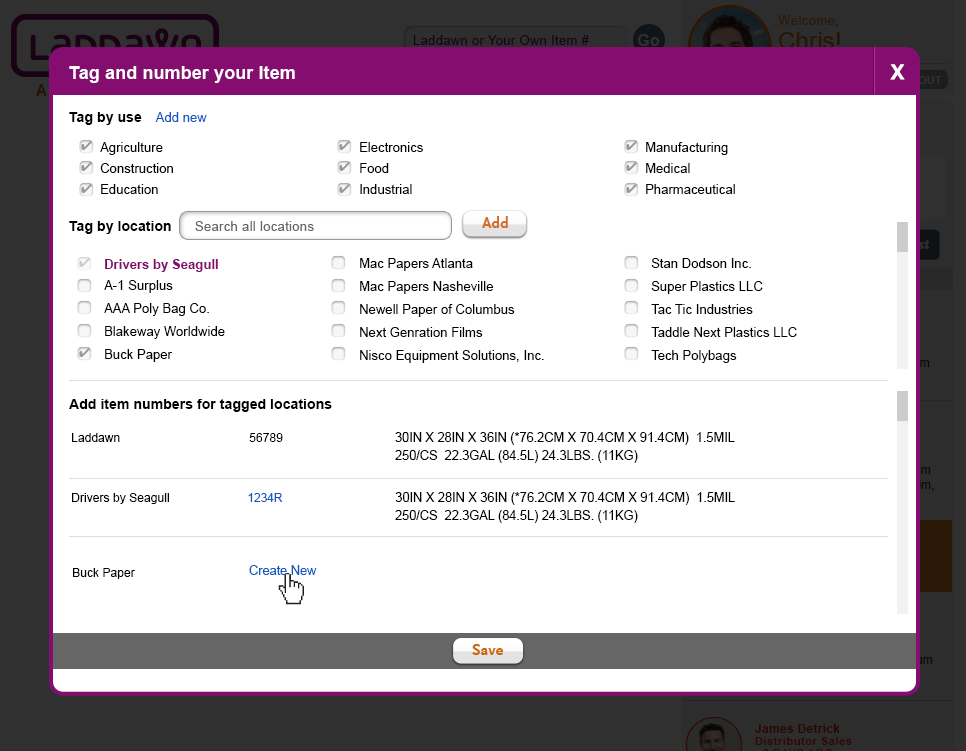
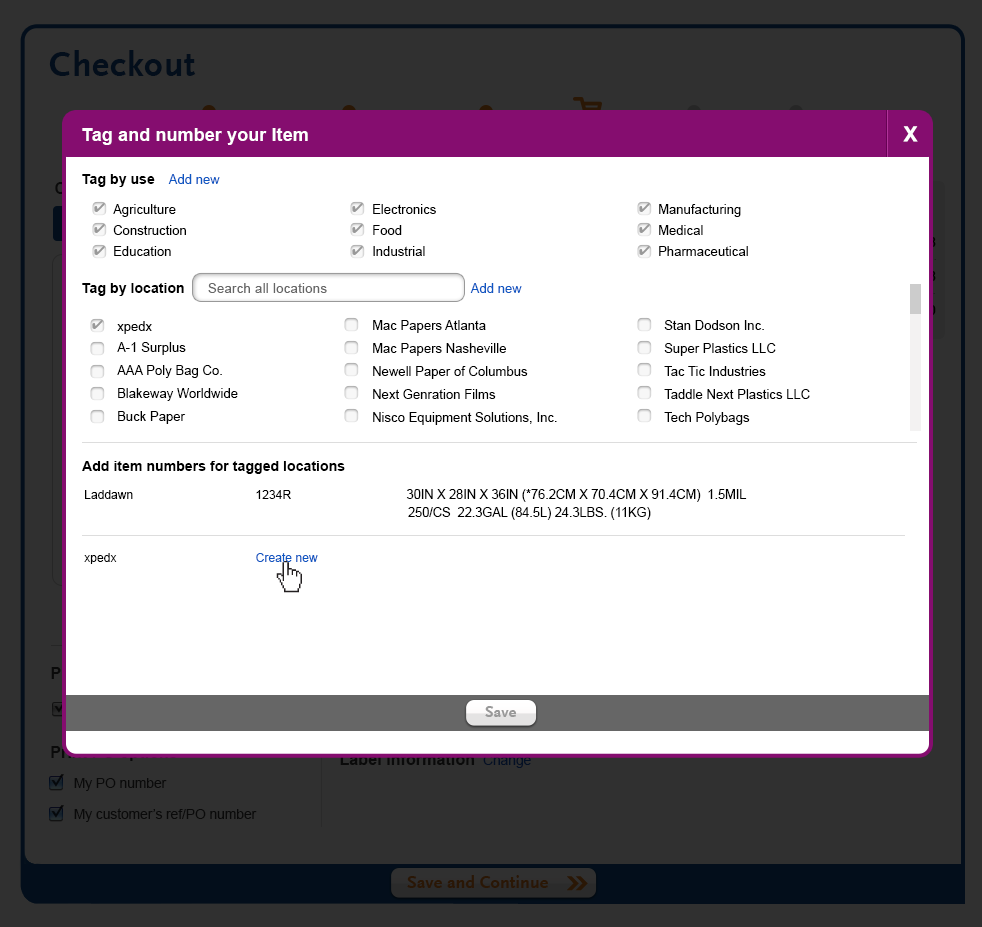
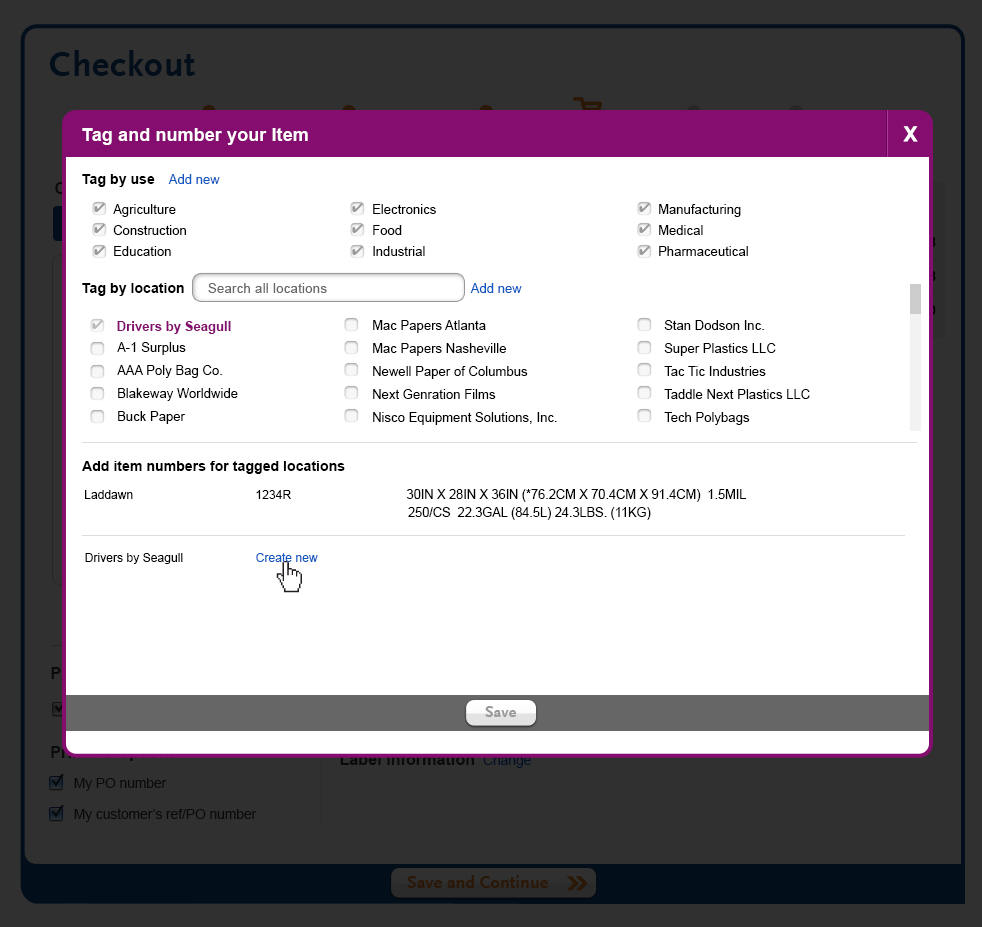
Adding item/part# and description to a label (Design 2c, 2d, 2e, 2f, 2g, 2h)
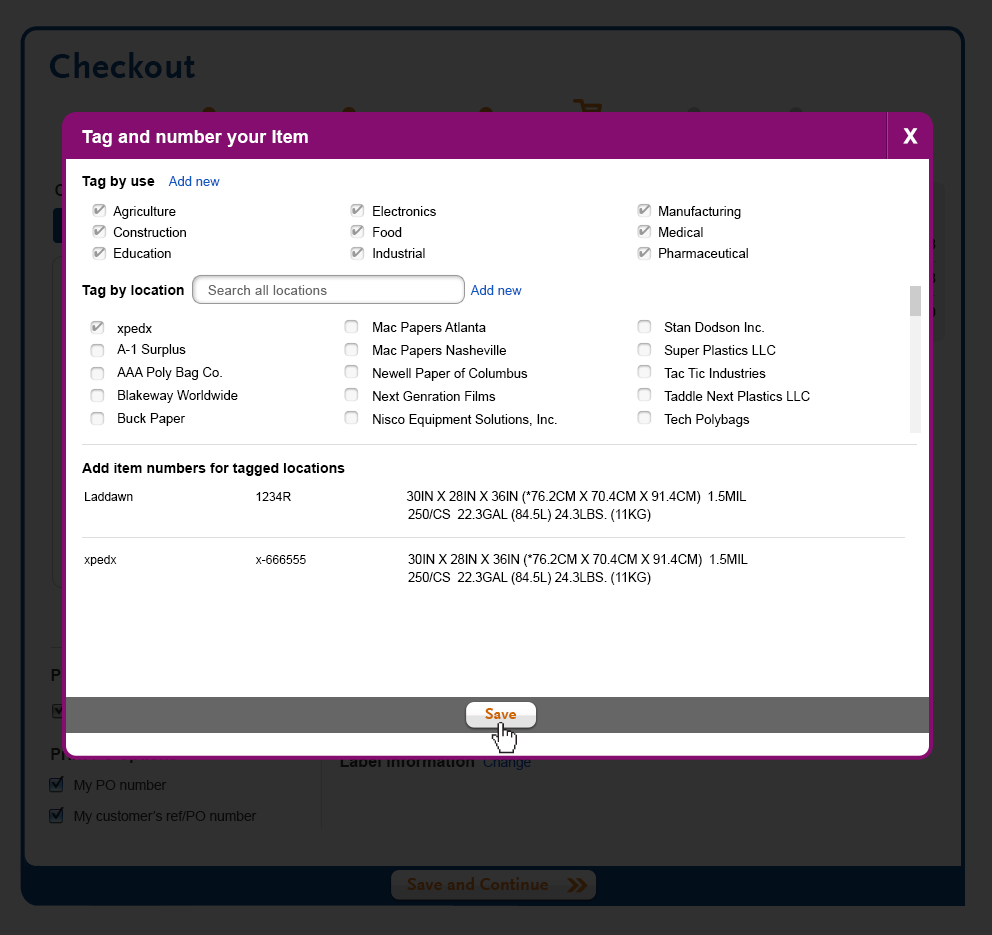
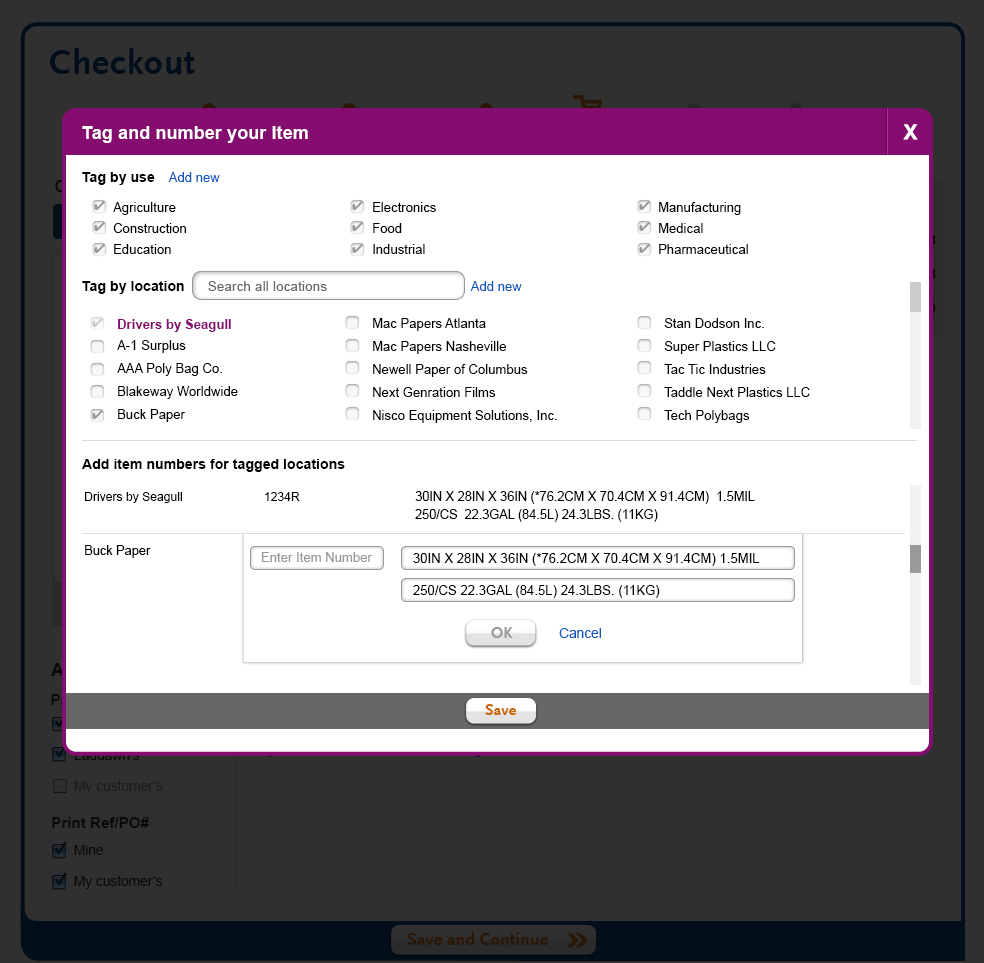
The user can add/edit item/part#'s on the fly by clicking the "Add item/part number for this label" link (Design 2c). Please note: The "My customer's" check box is disabled because no item number is on file.
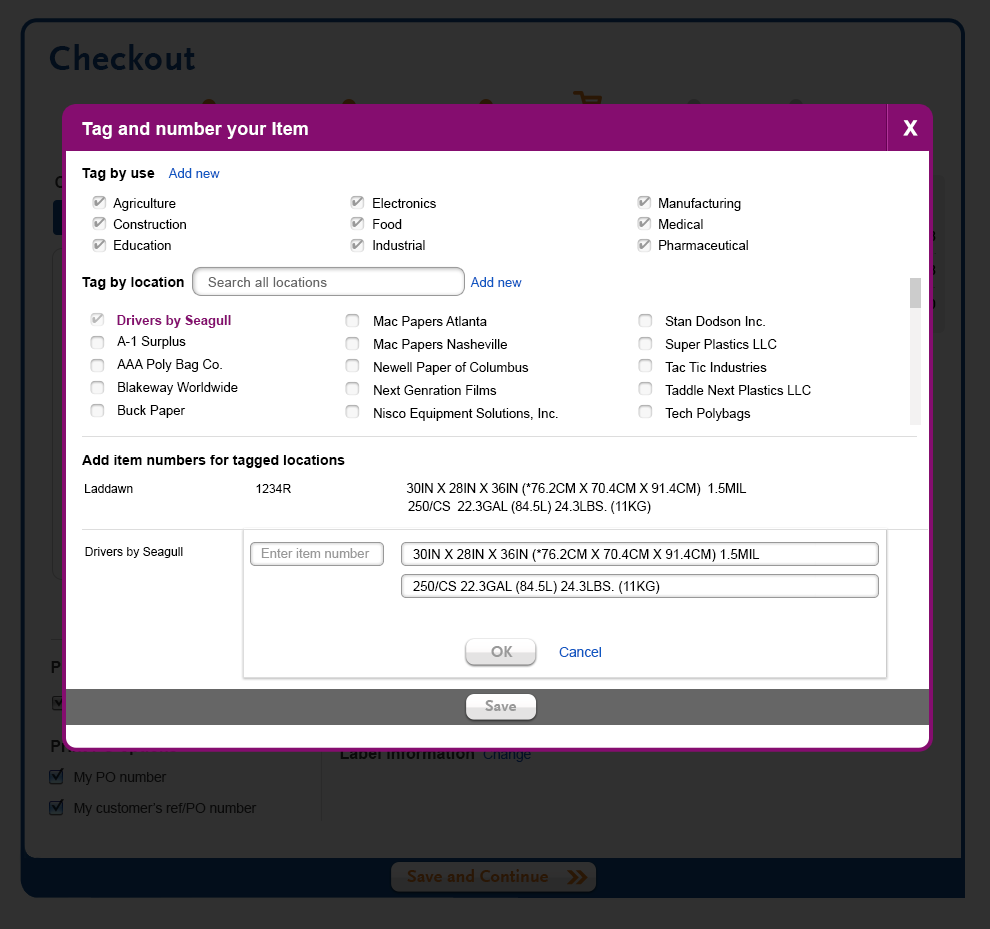
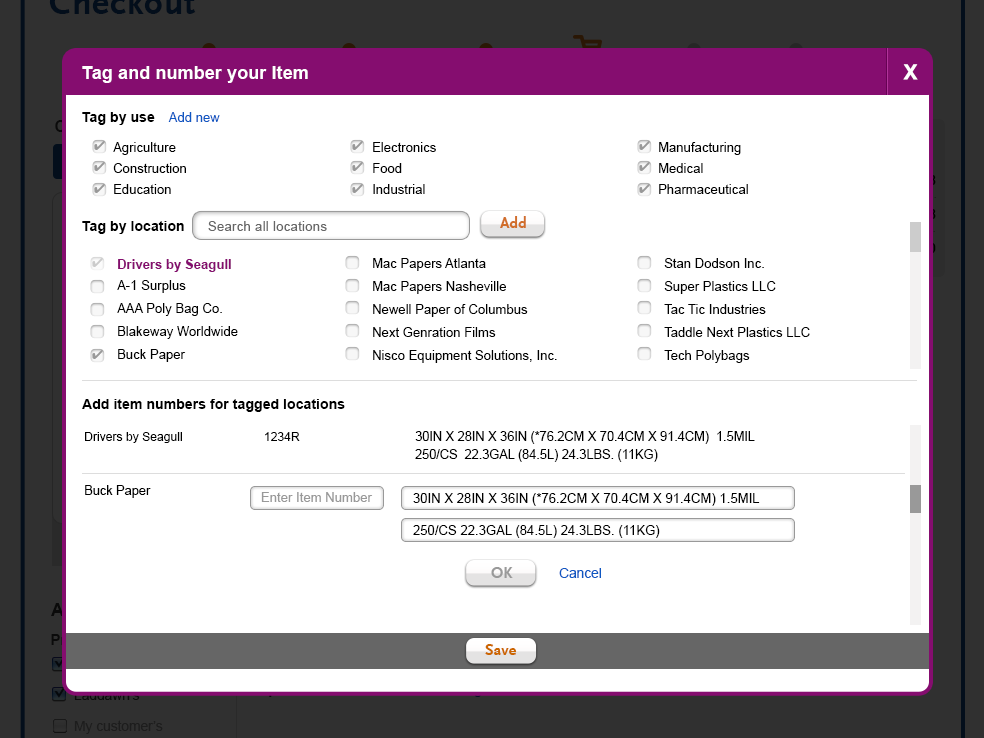
This will open the Save Item shadowbox (Design 2d, note: this is the exact shadowbox you get when saving an item from results and cart areas of the site.) the difference when adding a part number while in checkout is that we know who the drop-ship customer is. So this scenario, Buck paper is pre-checked in Tag by location. This would automatically display "Buck Paper" in the "Add item numbers for tagged location" section.
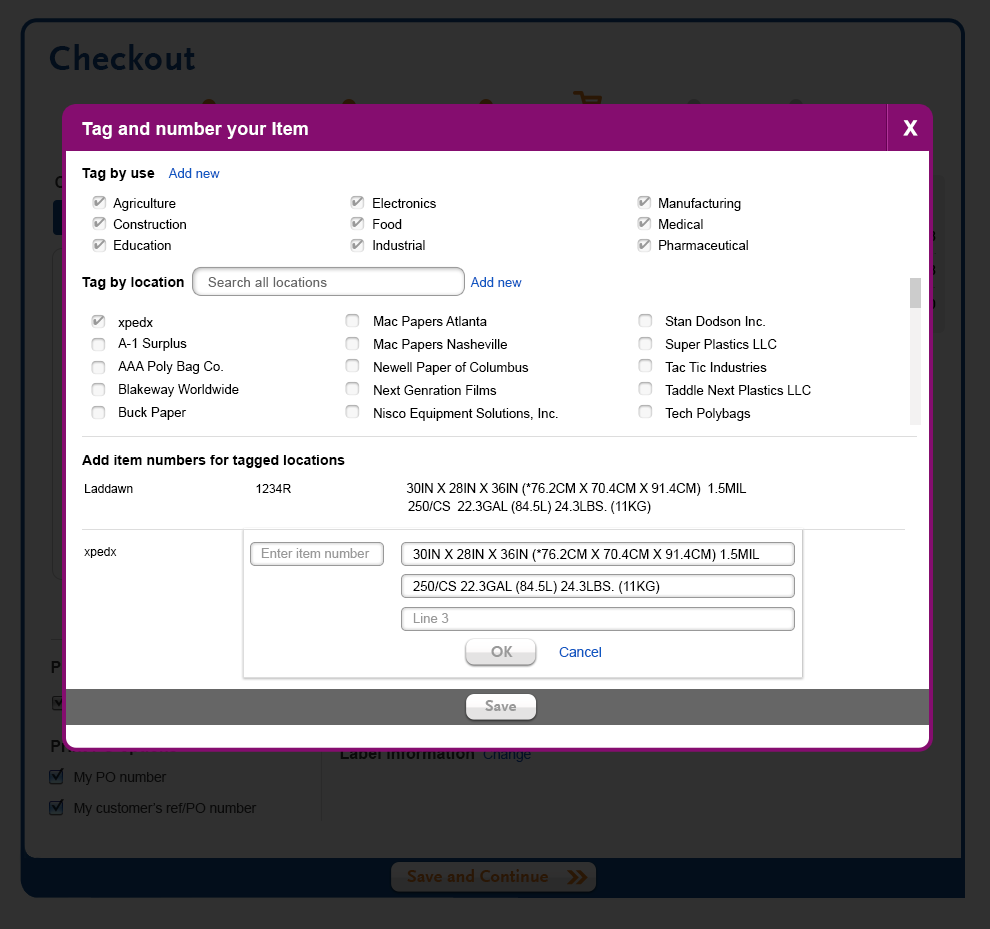
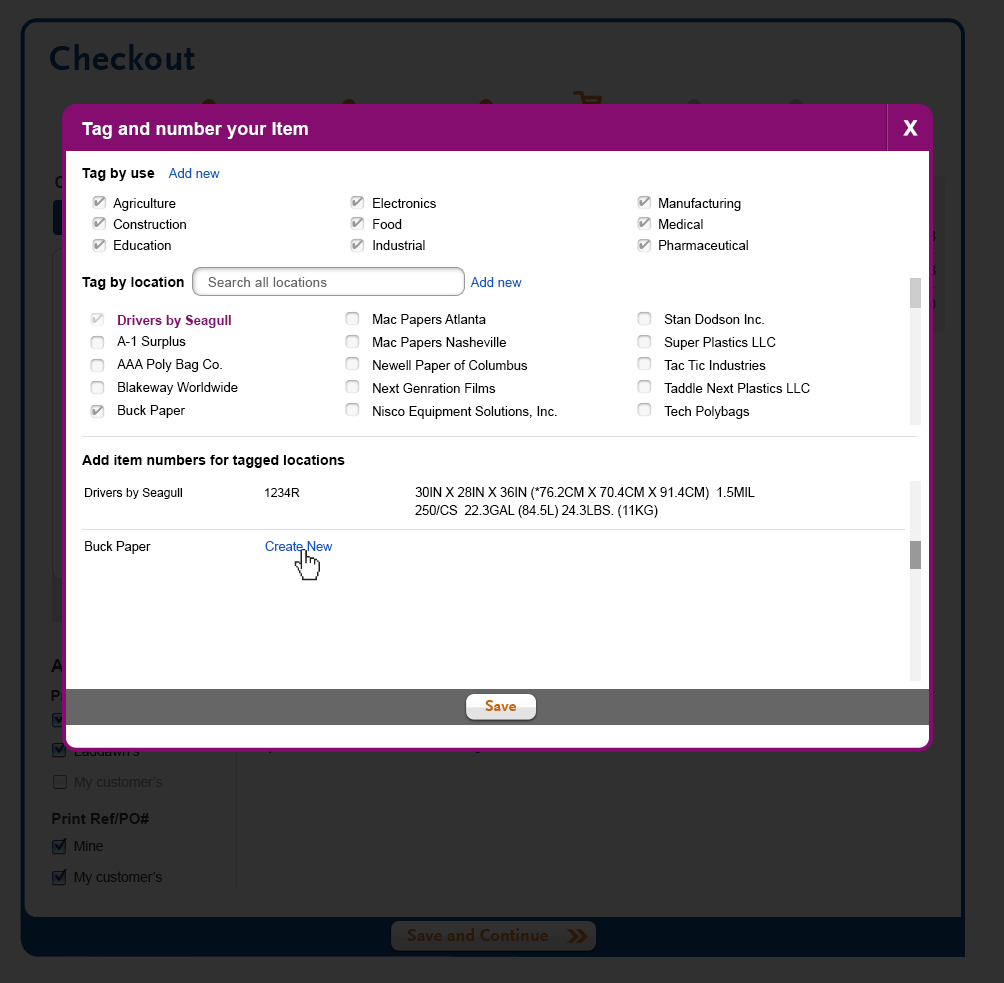
The user clicks "Create New" to start adding the drop-ship part#/description (design 2d). A window slides down with an "OK" button disabled (Design 2e). Both part/item# and a description need to be validated with data for the "OK" button to become enabled. The description is copied from the the most current description on file (in this case it is the distributor's description) to be used a s a starting point. The user can edit this as needed.
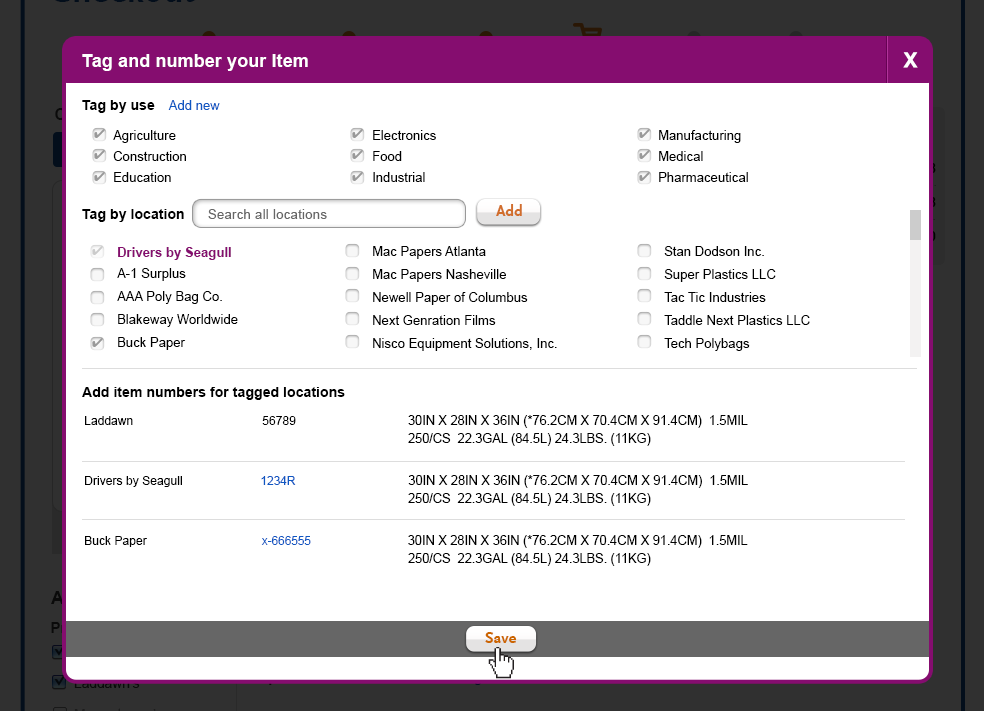
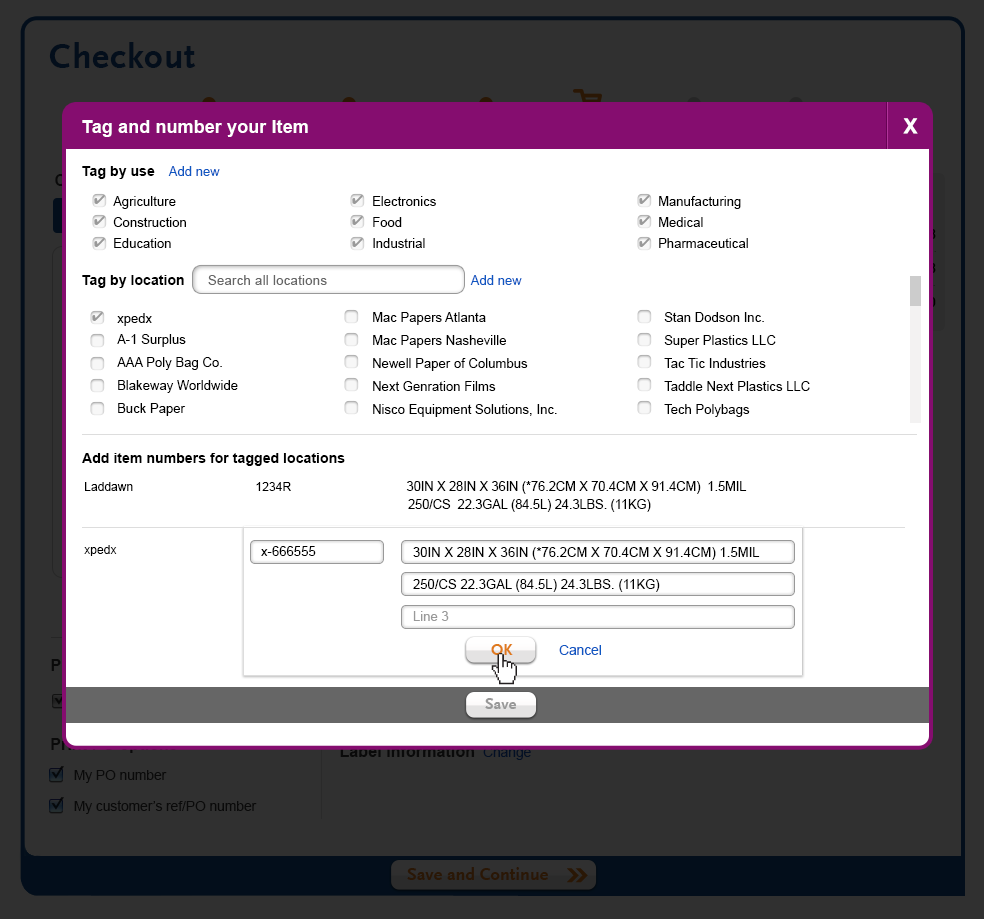
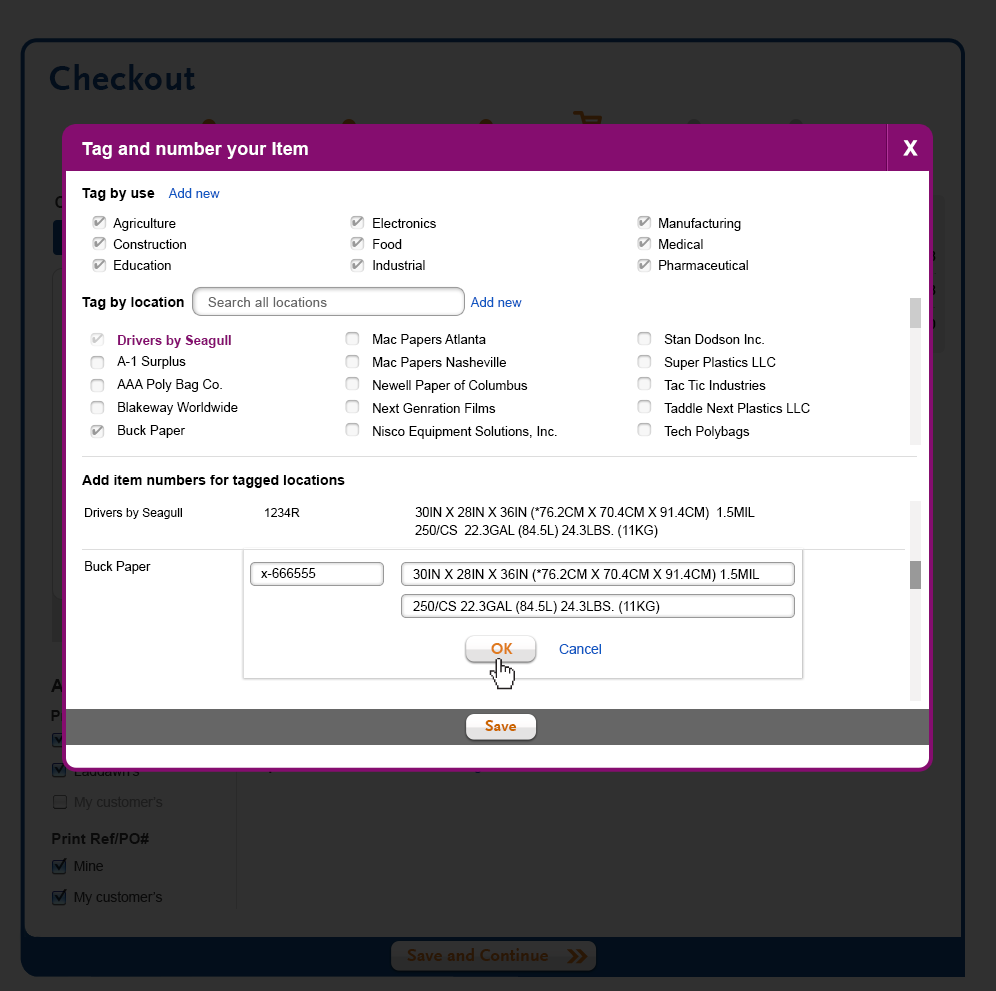
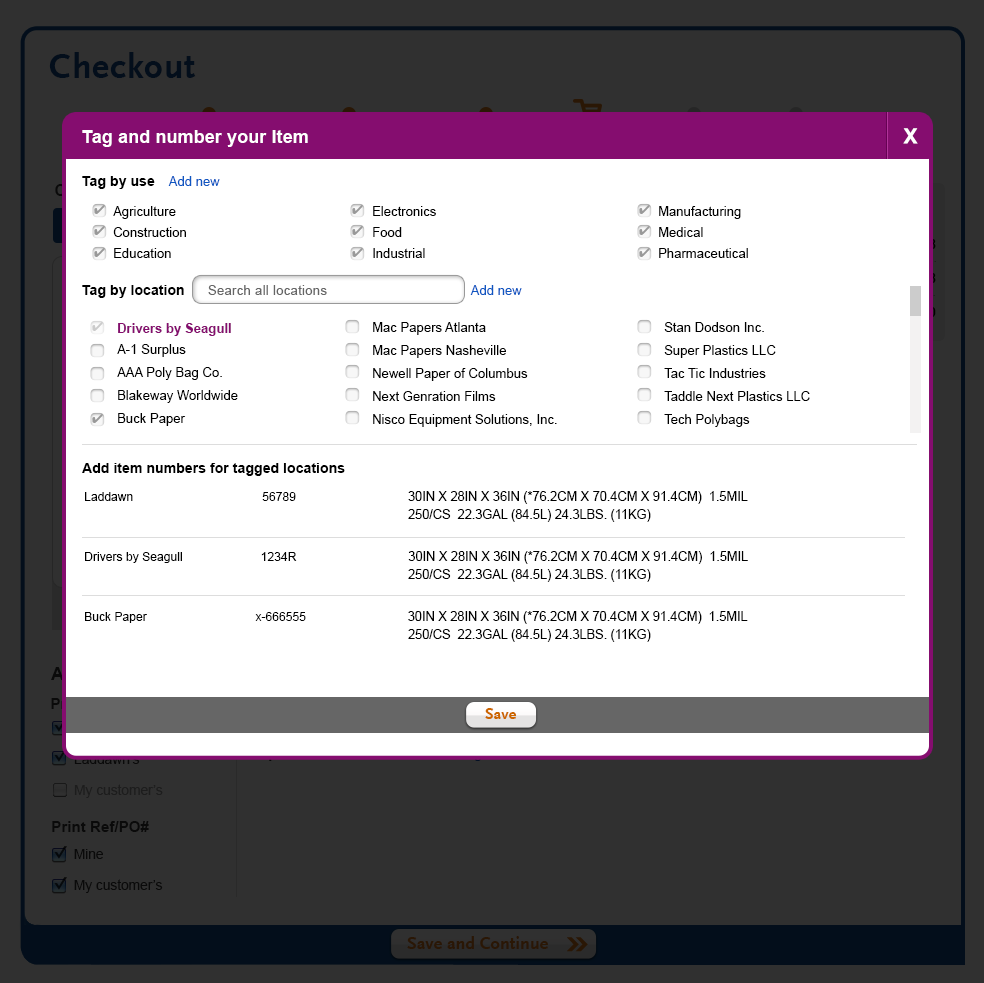
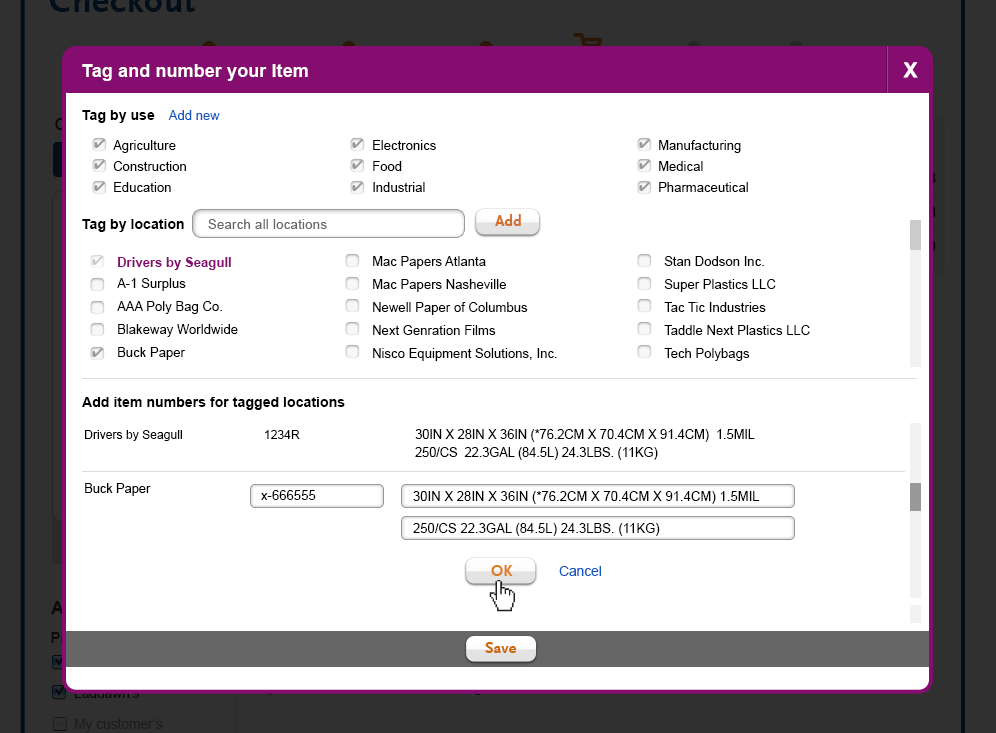
Once data has been entered for both an Item/part# and description the "OK" button becomes enabled (Design 2f). Clicking the "OK" button will cause the entry fields to slide up and fade out. Clicking the "Cancel" lick will close the window and is always enabled.The user now must click the "Save" button to save this new label part#.
The new part# is now enabled for this item (Design 2h).
| Design 2c - Adding a part/item# | 2d | 2e |
|---|---|---|
 |  |  |
| 2f | 2g | 2h |
 |  |  |
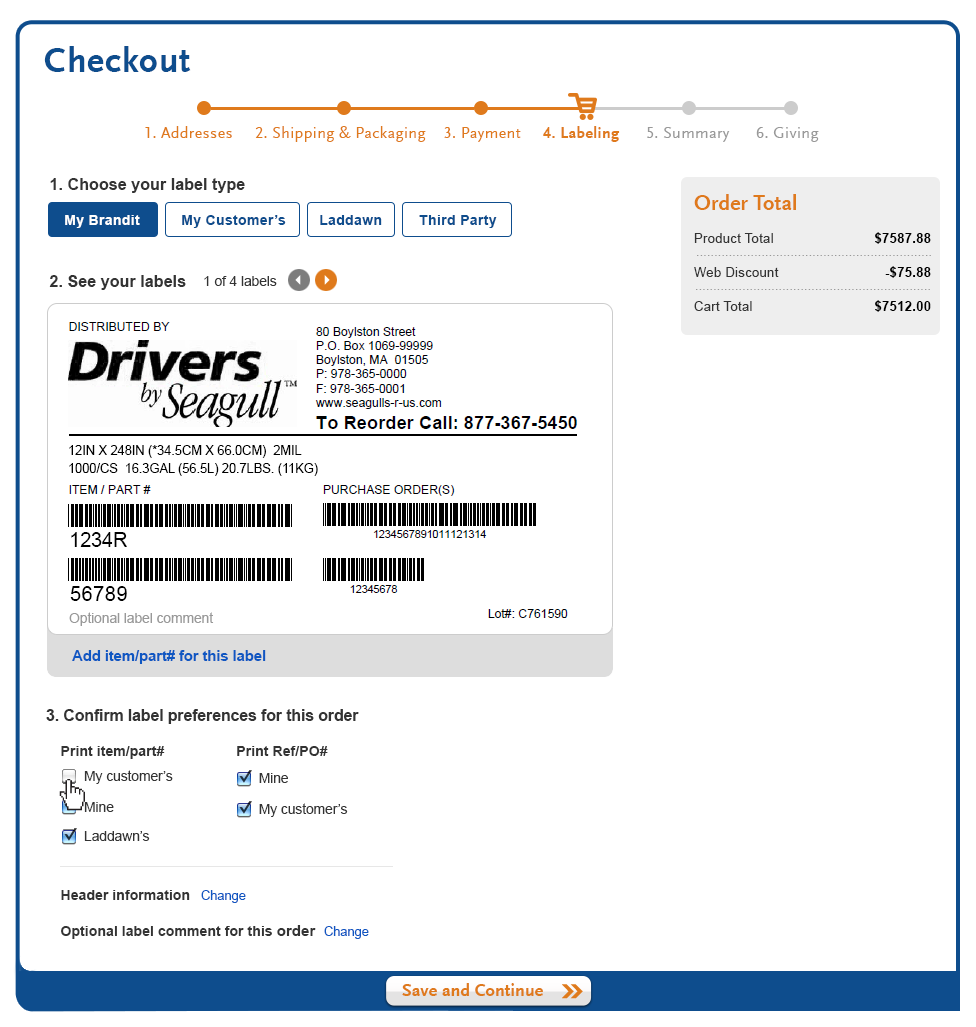
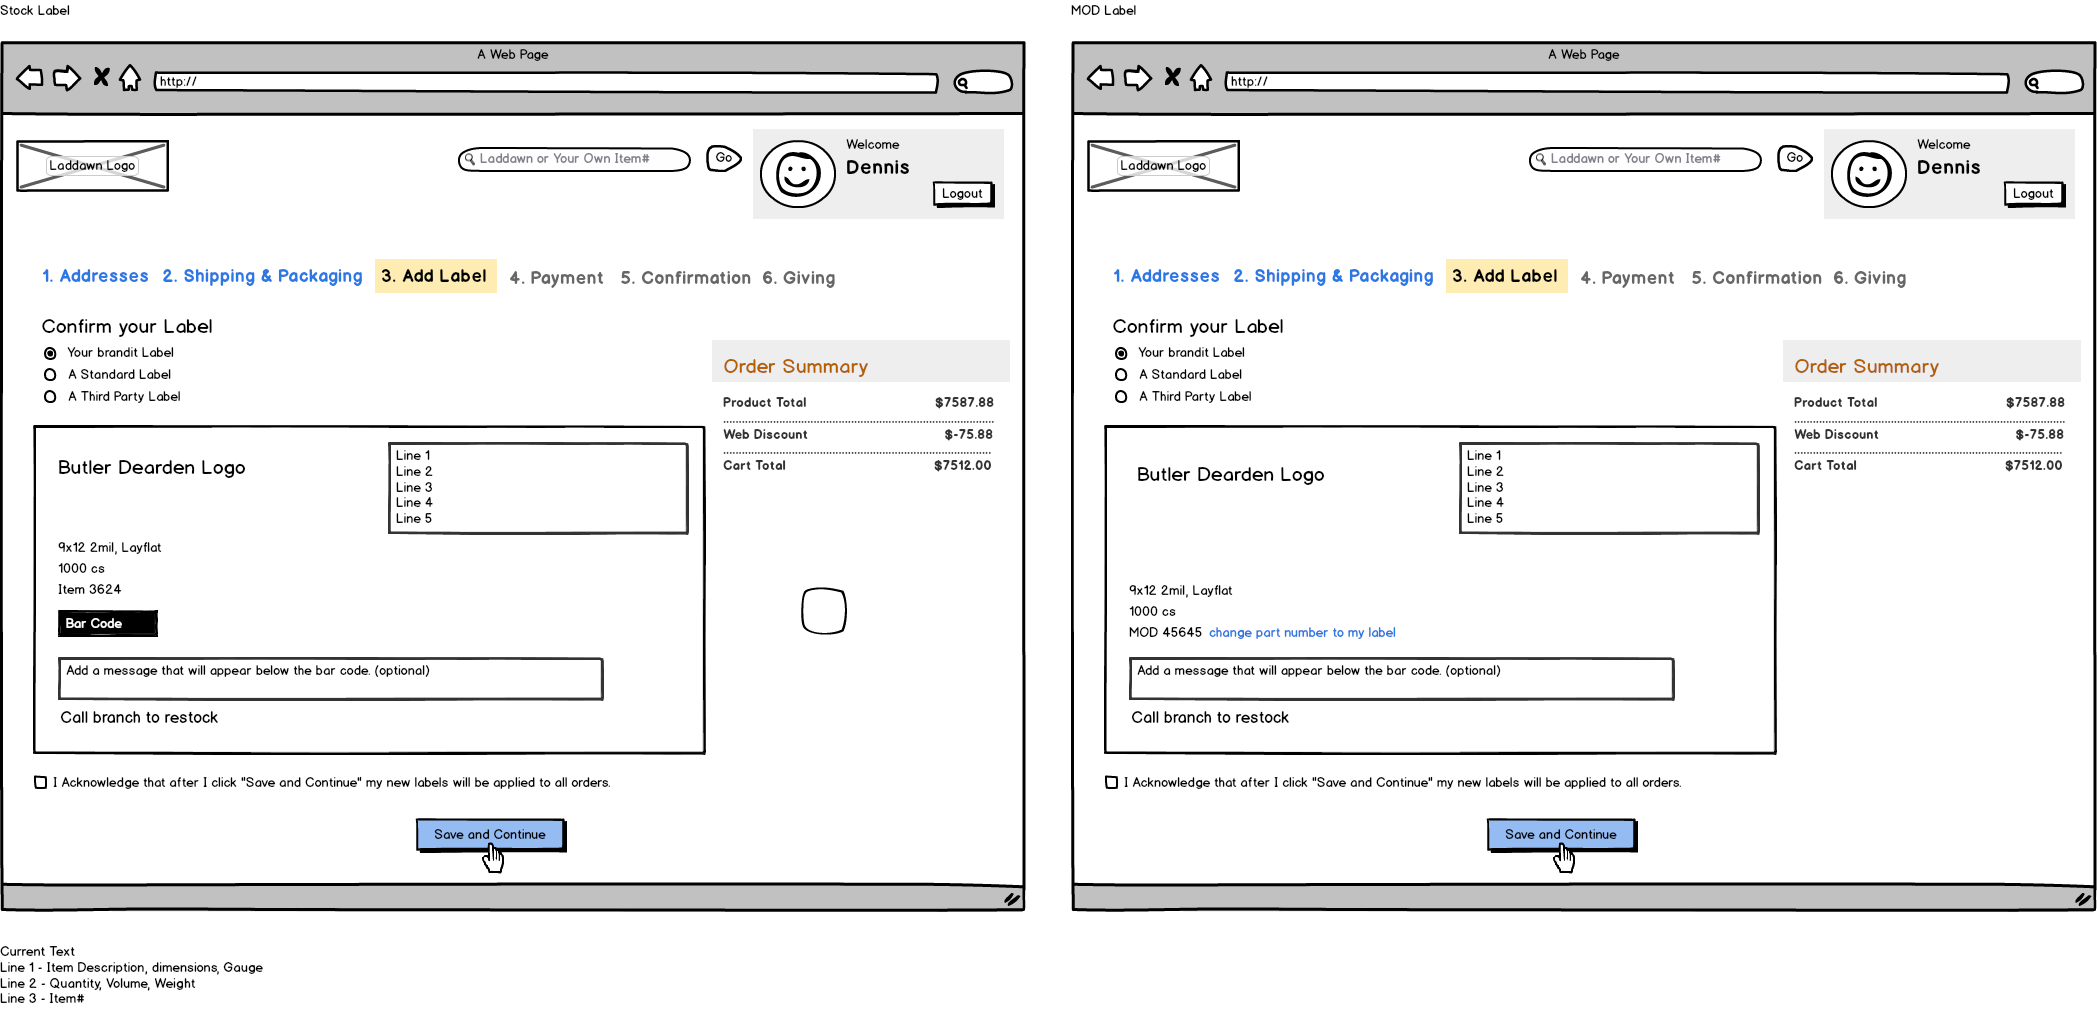
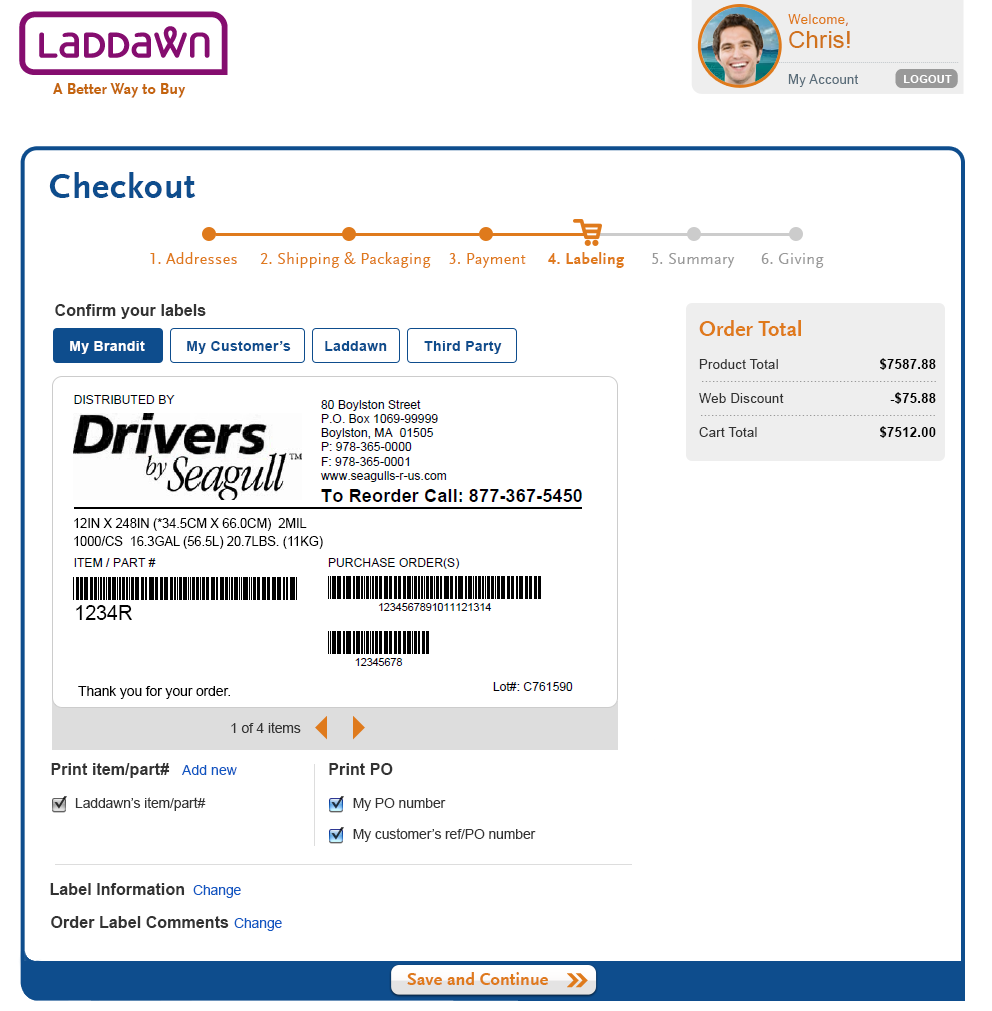
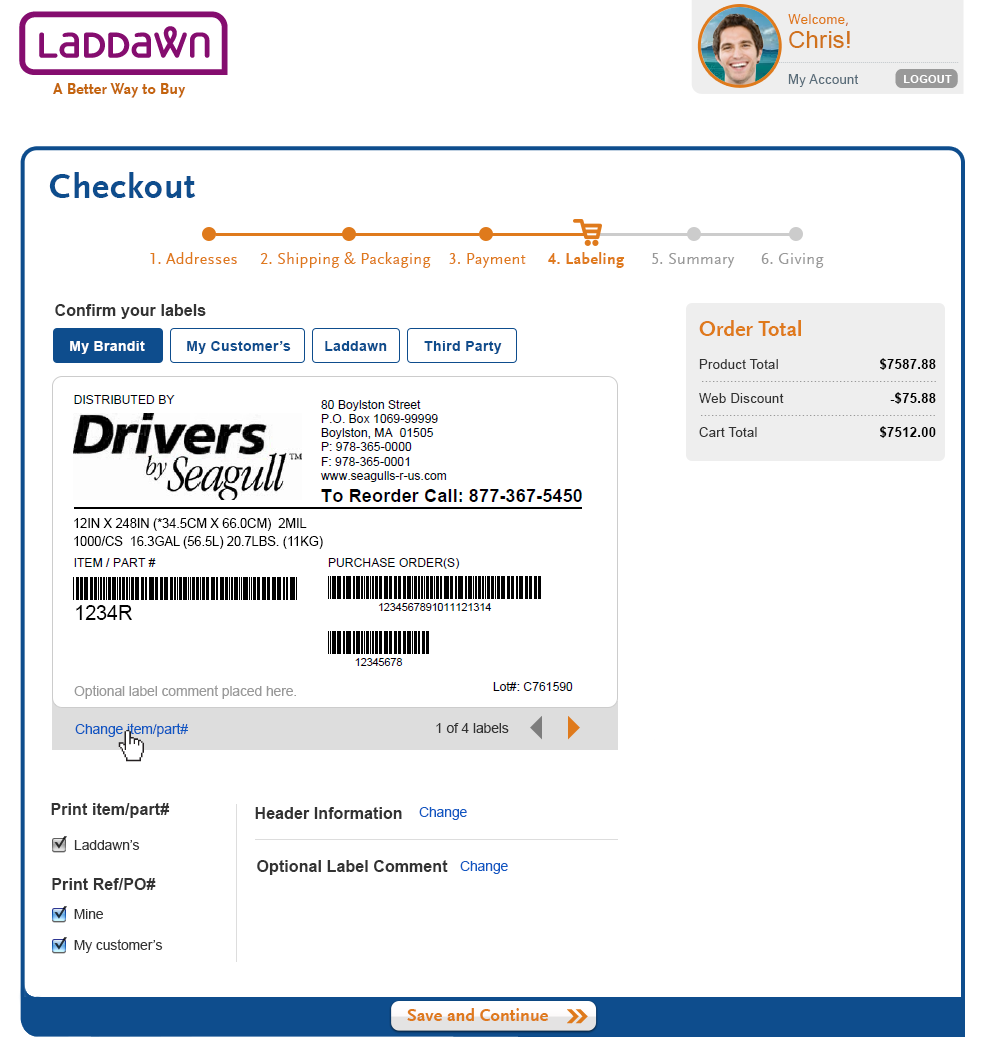
Section 3 - Confirm label preferences for this order
This section allows you to make changes to specific places on a label:
- Part number (make viewable/not viewable)
- Header info (edit/add data)
- Add optional label comment (add data)
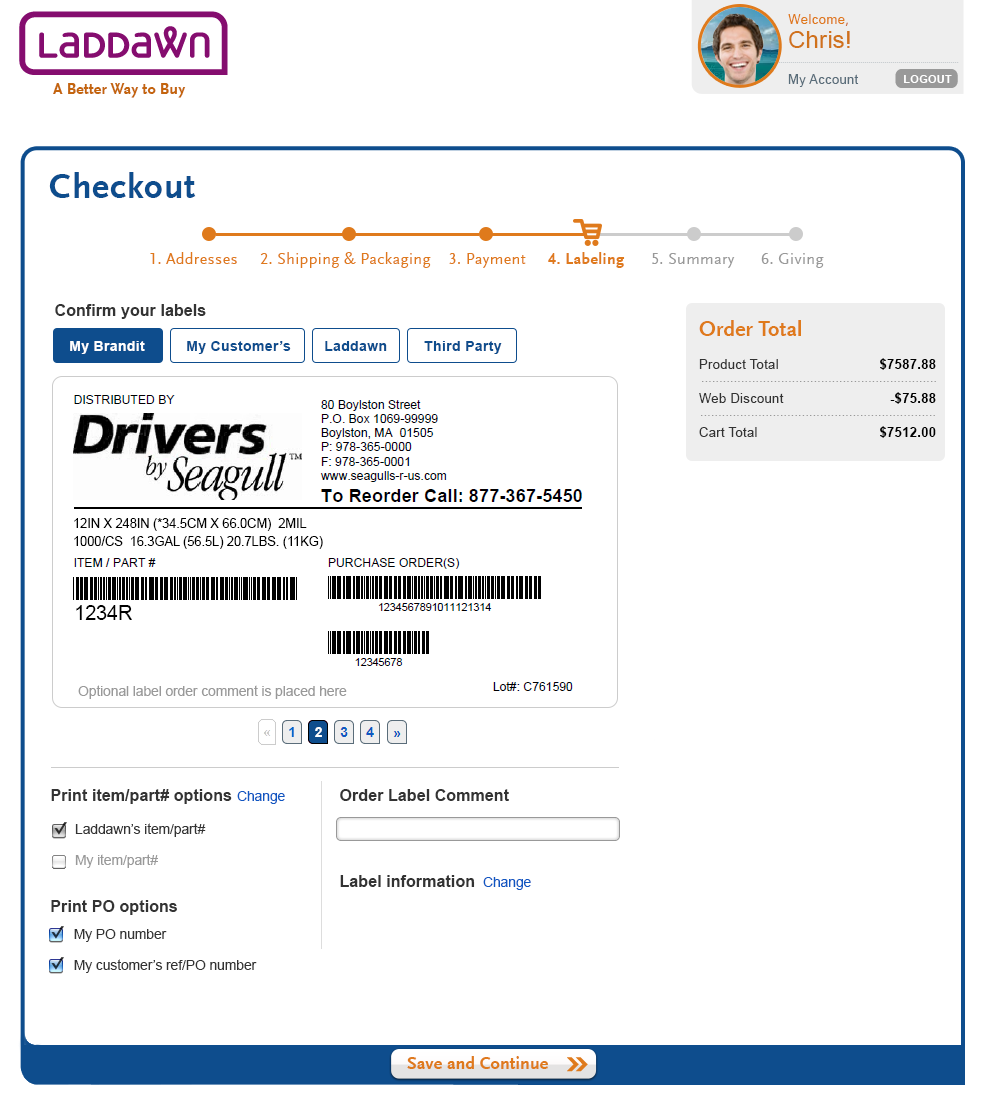
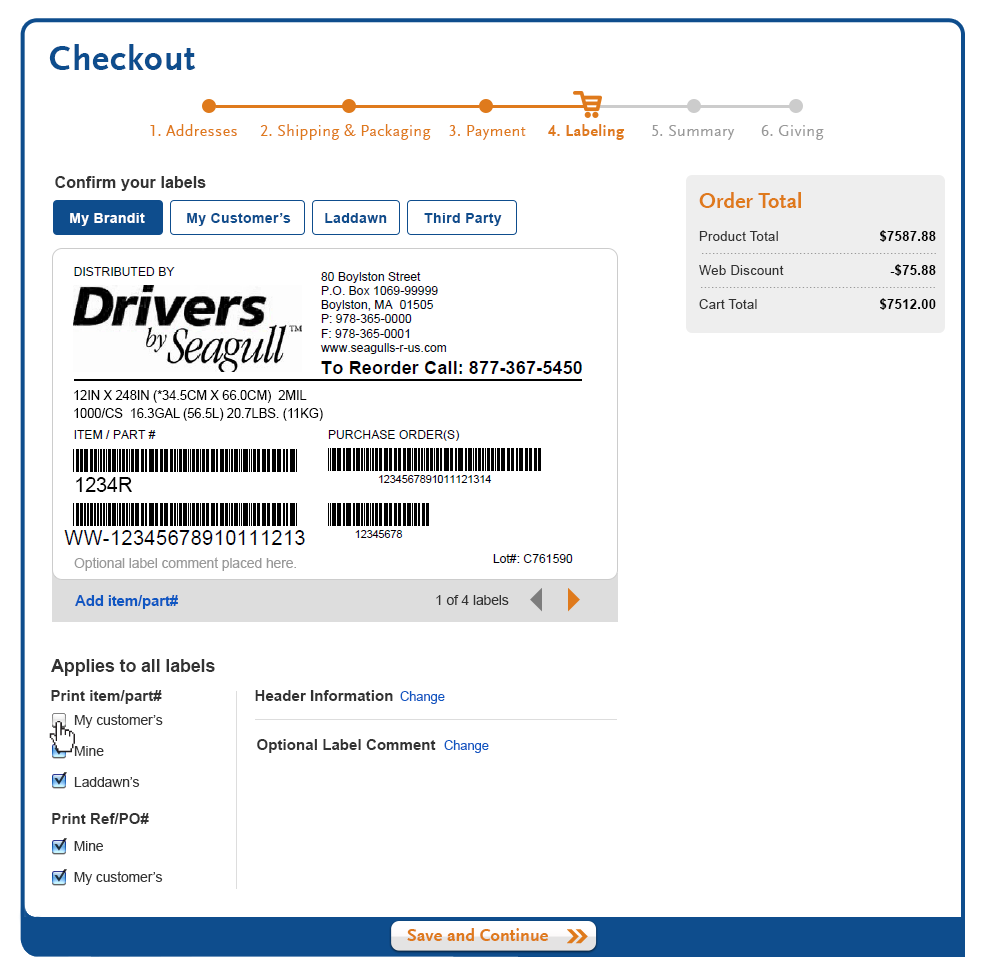
Part Numbers
You can decide which 2 part numbers displayed. The hierarchy for displaying will always be the available label closest to the customer. The hierarchy will be displayed:
- Customer's label
- Distributor's label
- Laddawn's label
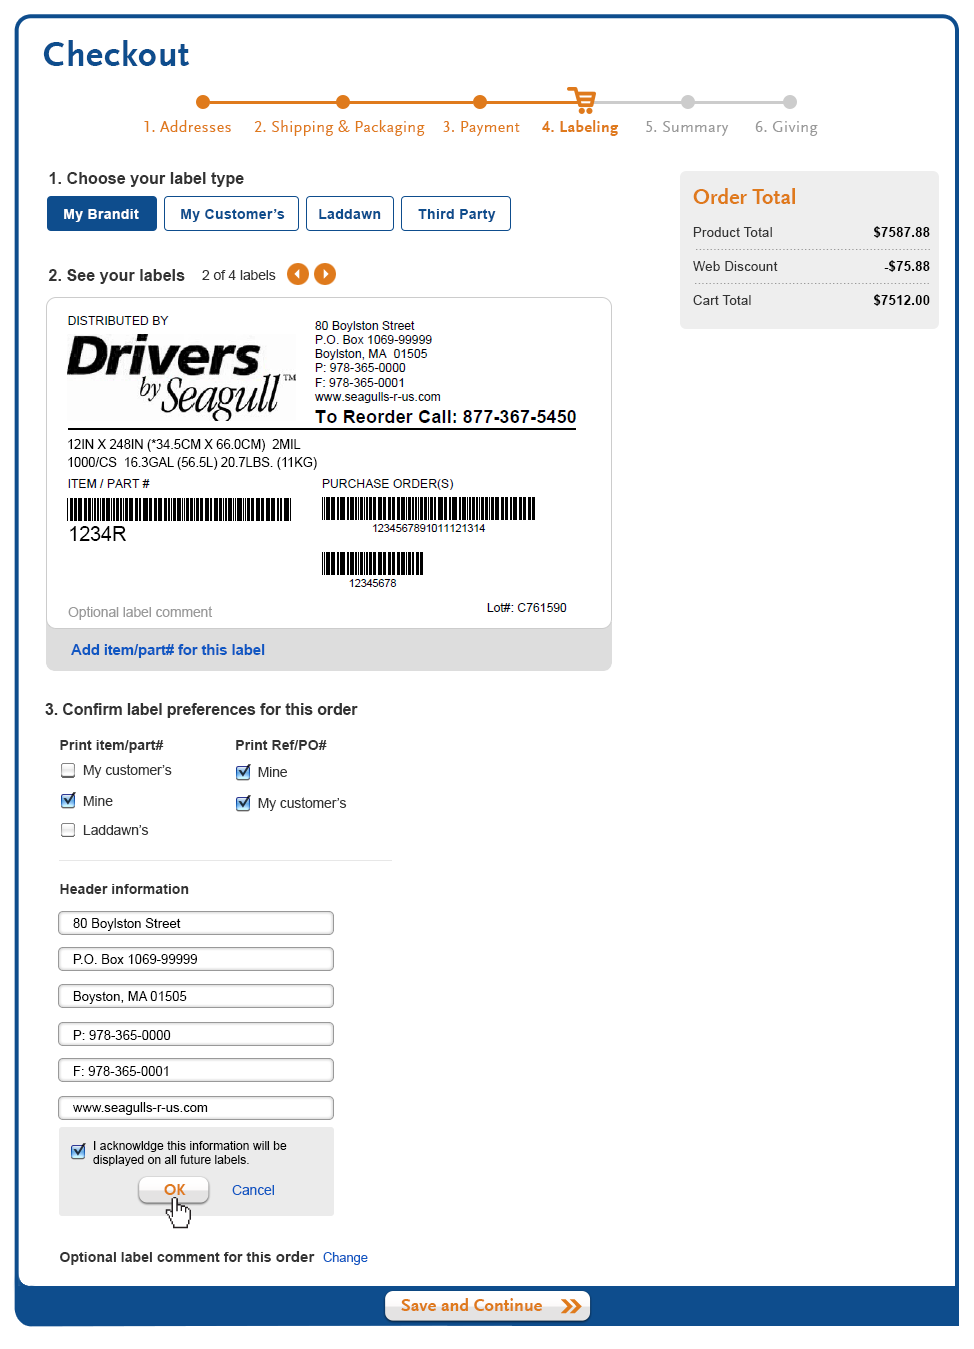
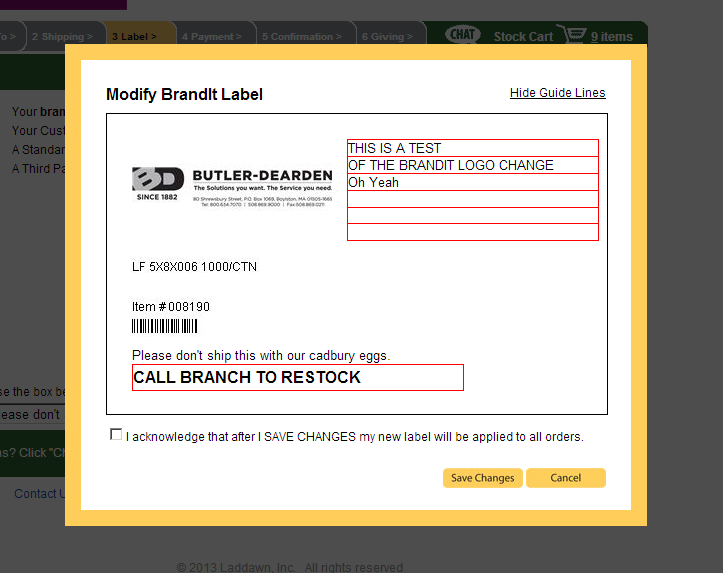
Header Info
Clicking the "Change" link will cause (0-6) form fields to display below the header, along with a unchecked "Acknowledge" check box, a disabled "OK" button and a "Cancel" link. The "OK" button is disabled until the user checks the "Acknowledge" box.. Once "OK" has been clicked, the data will display and the "change" link will display again.
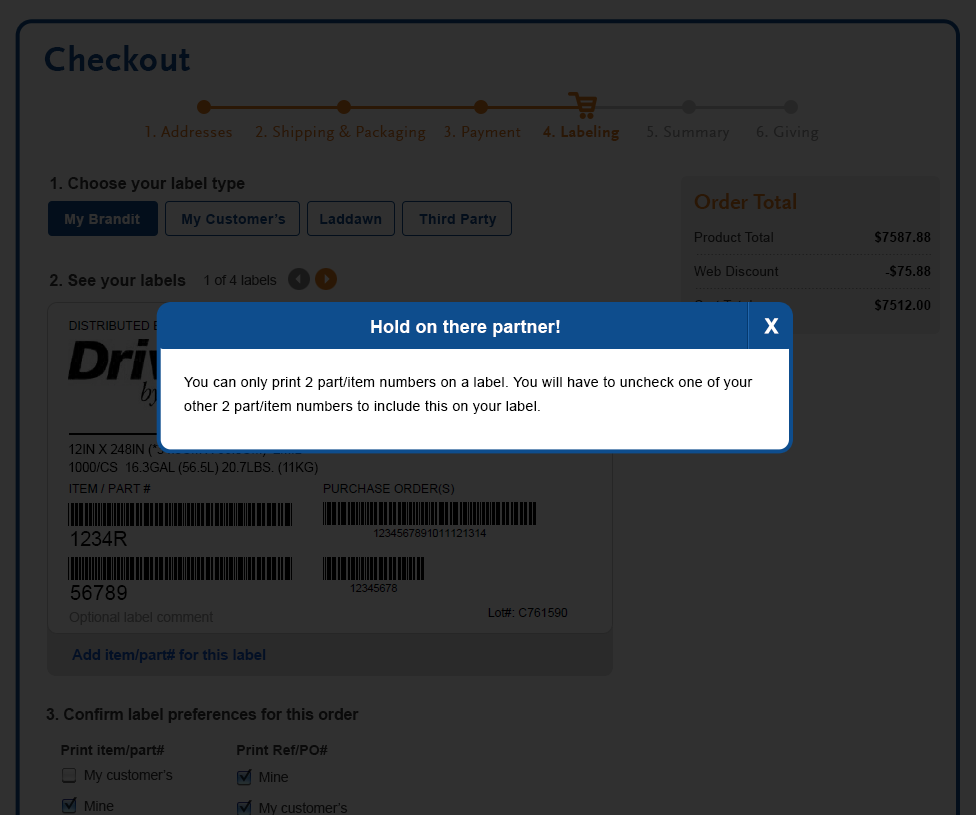
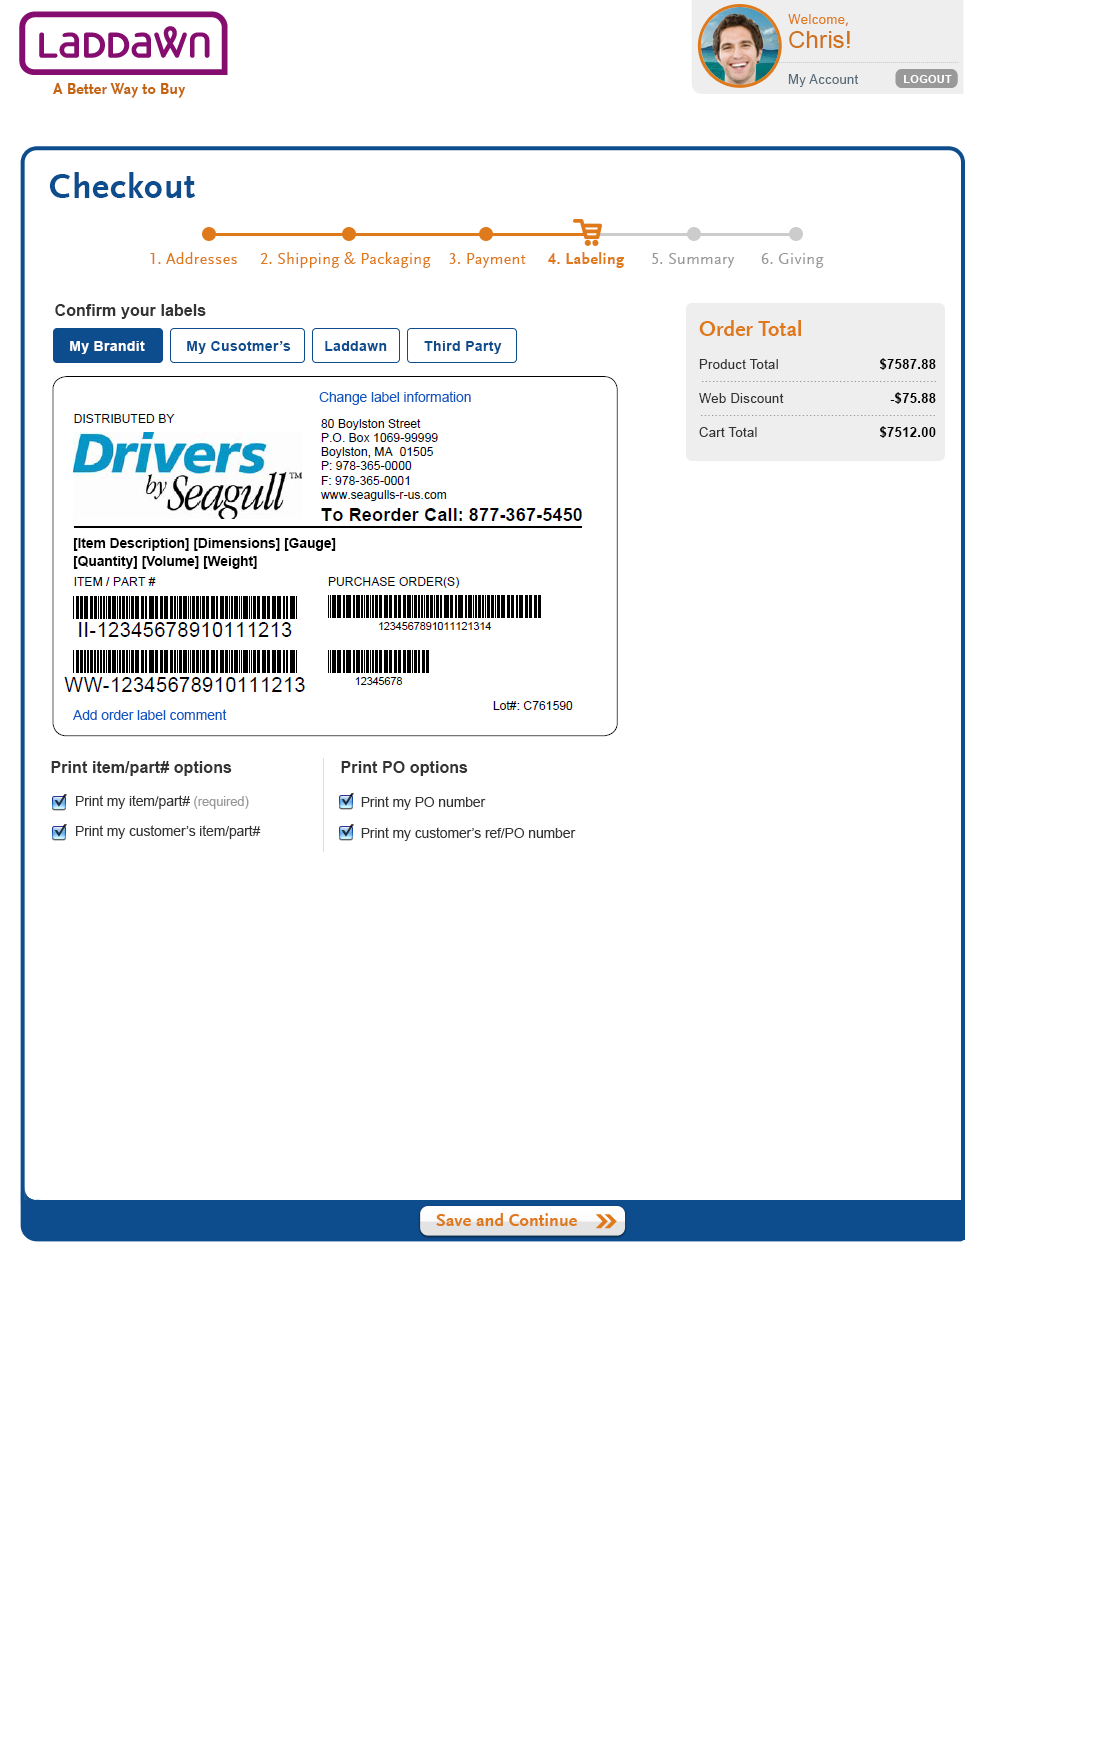
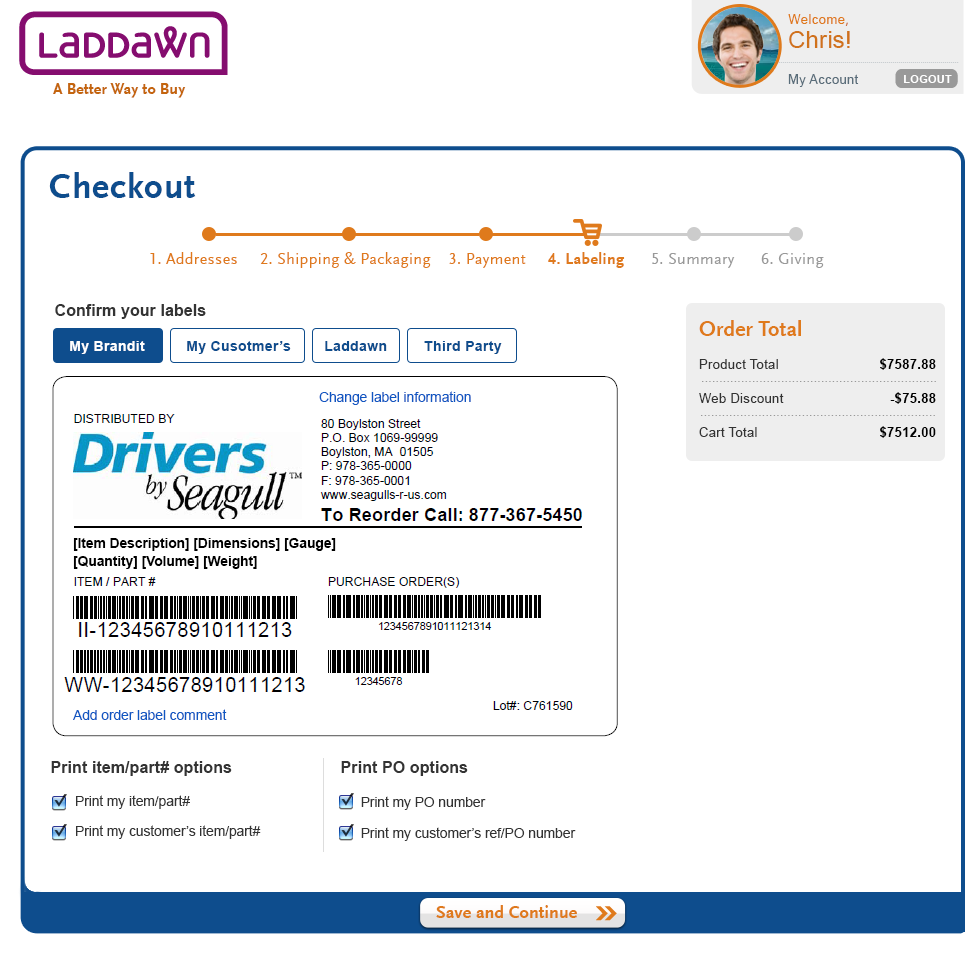
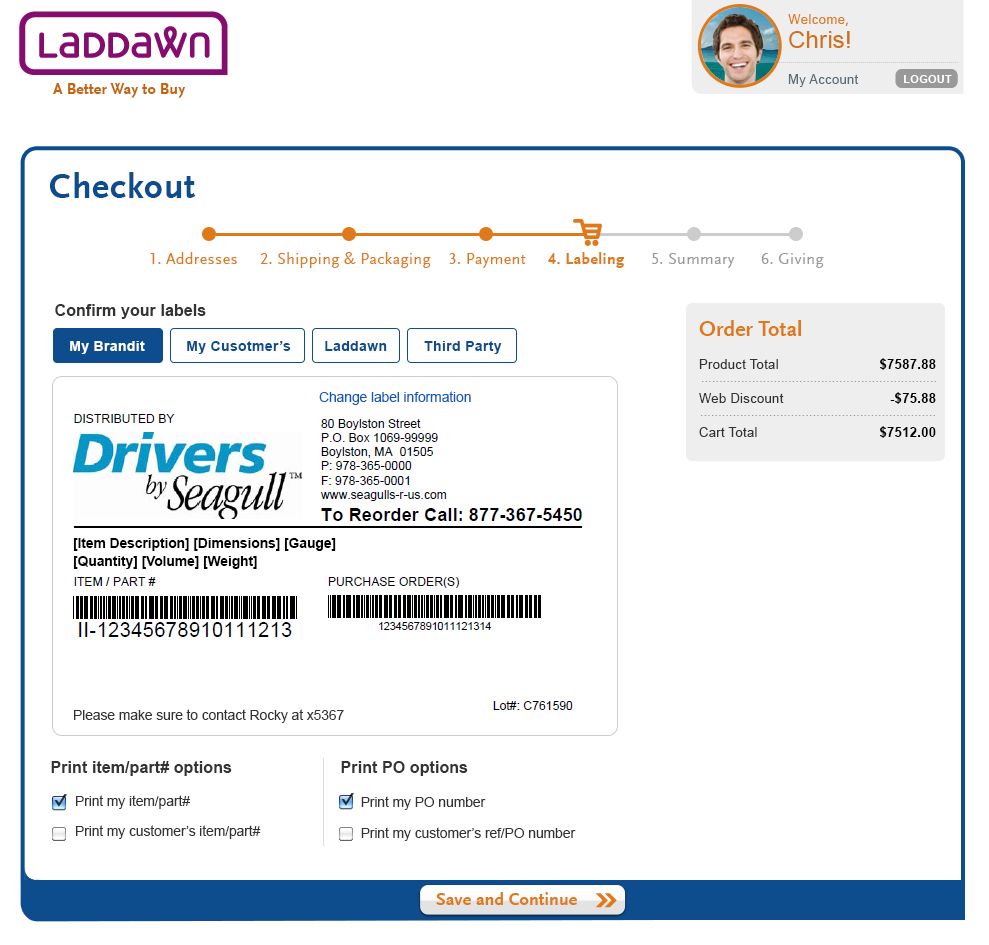
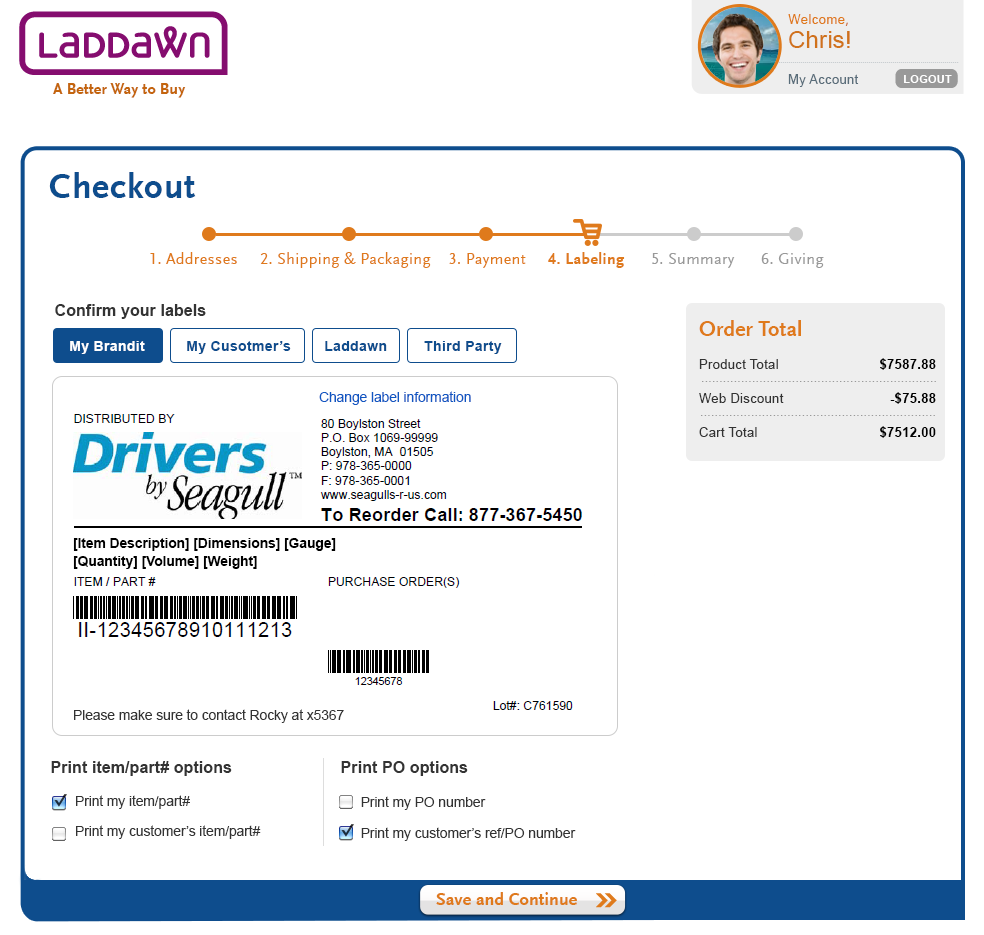
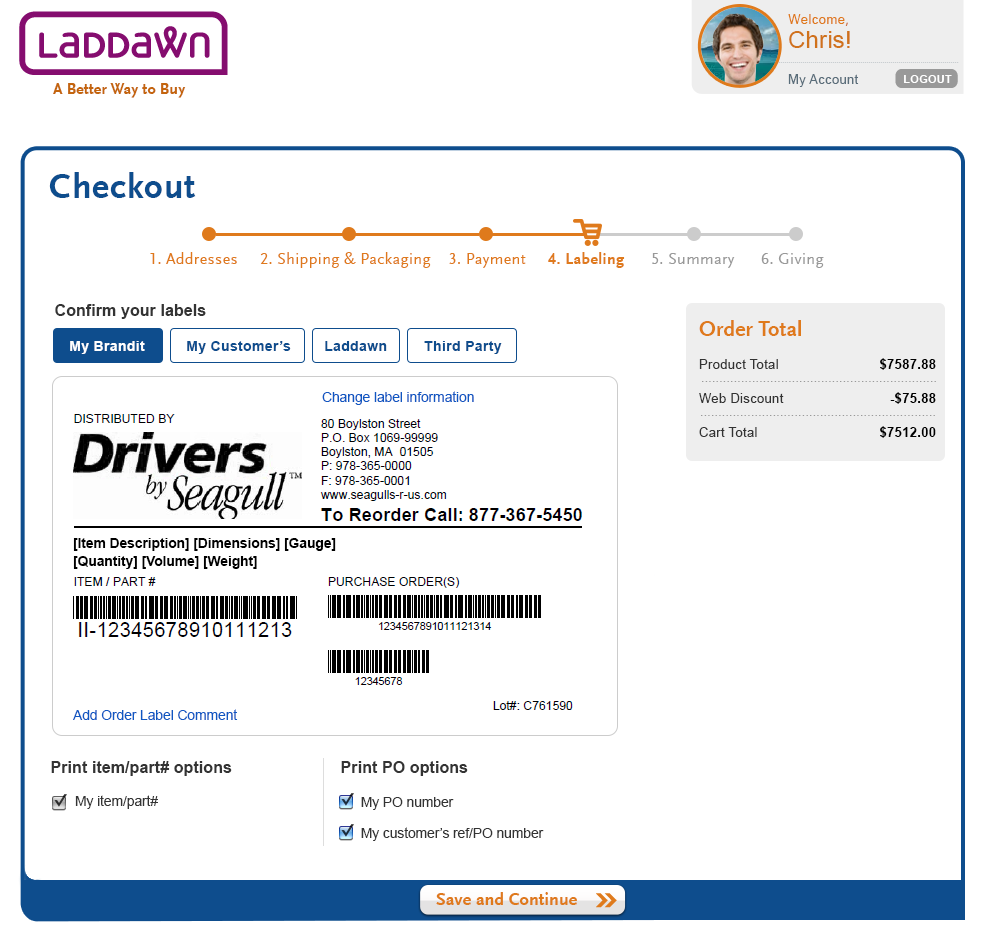
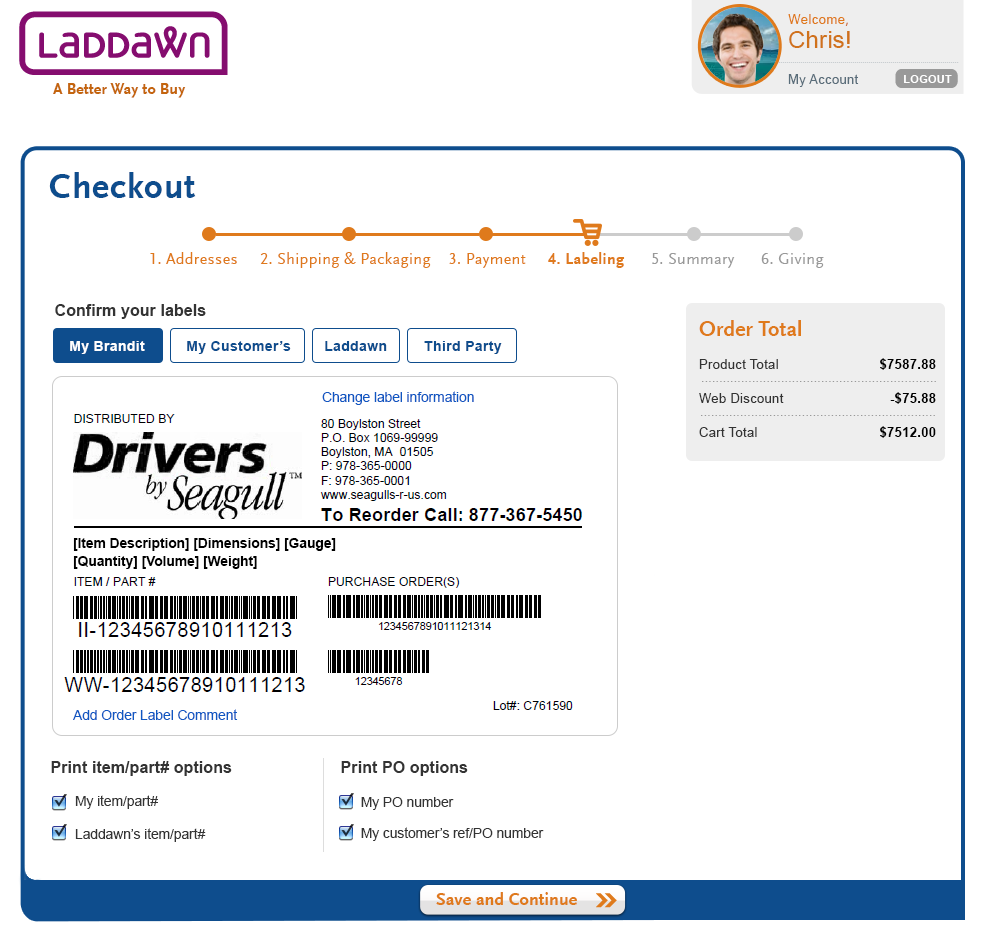
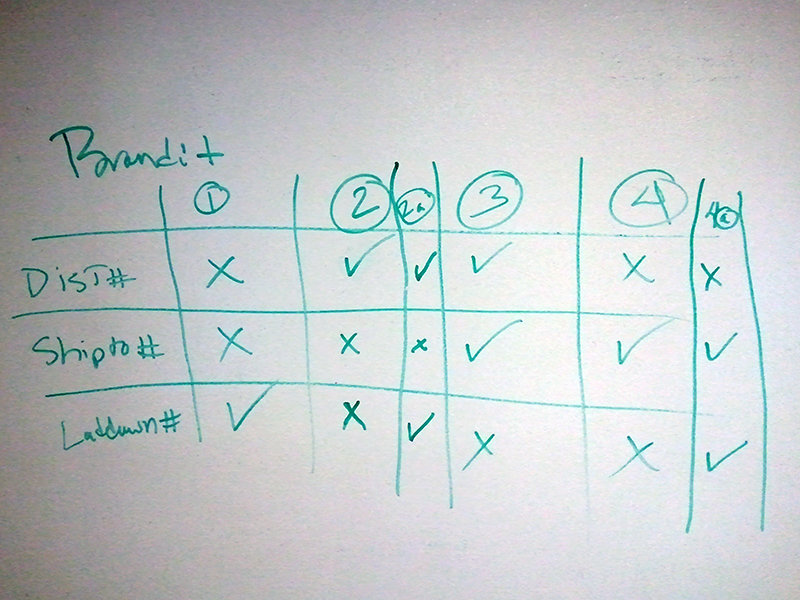
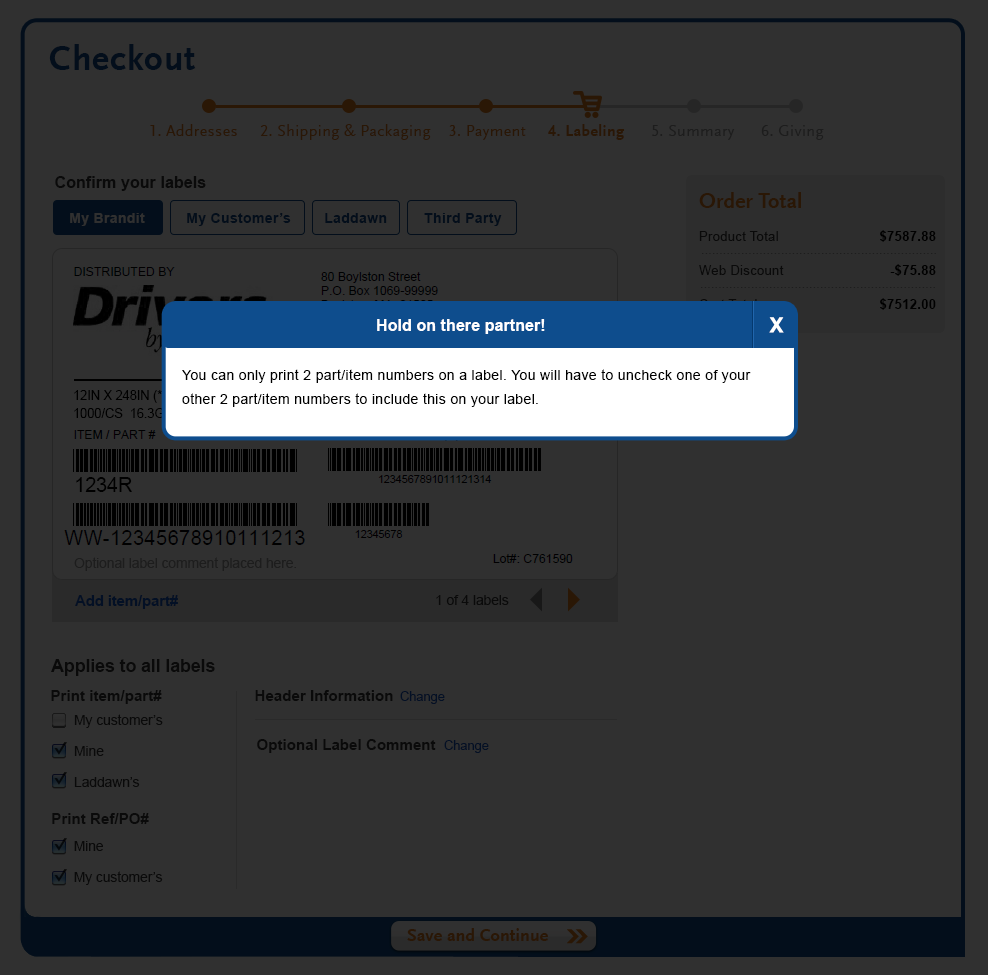
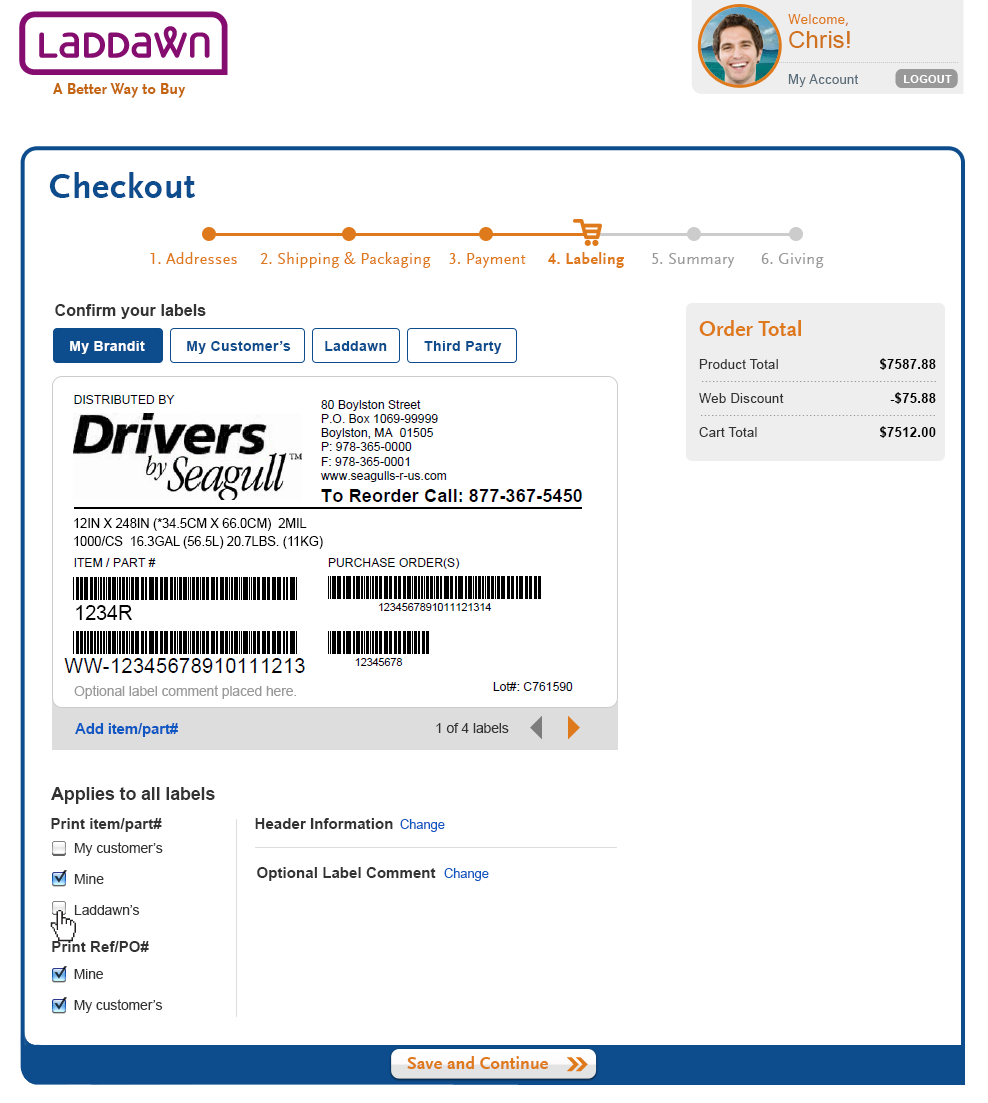
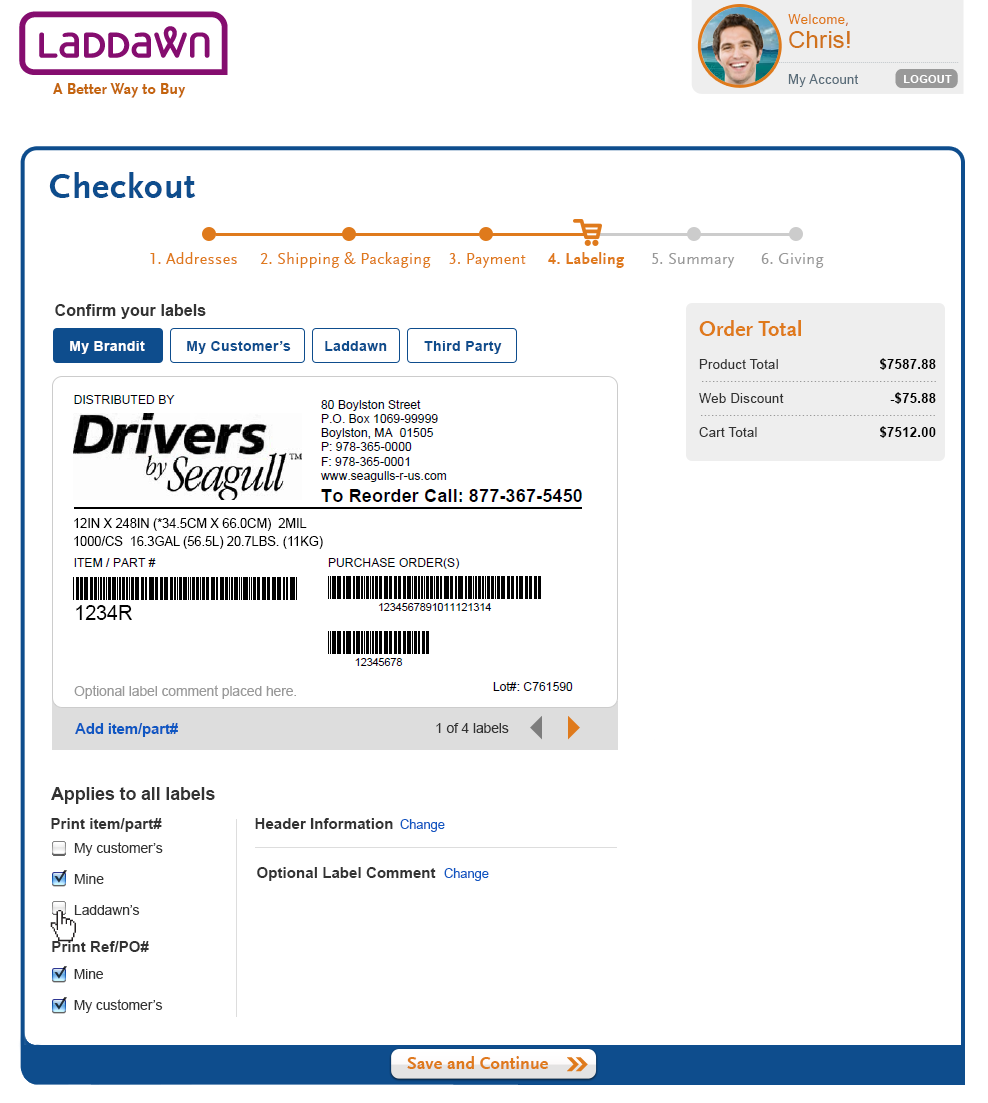
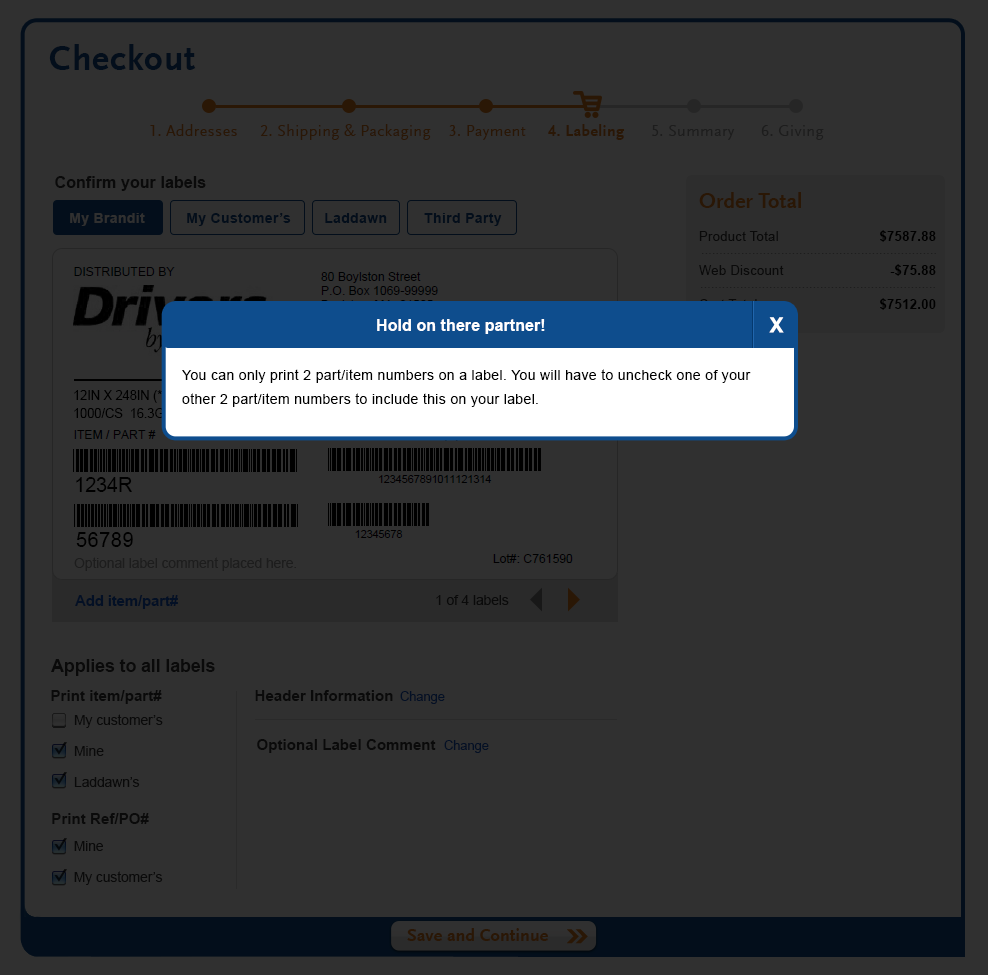
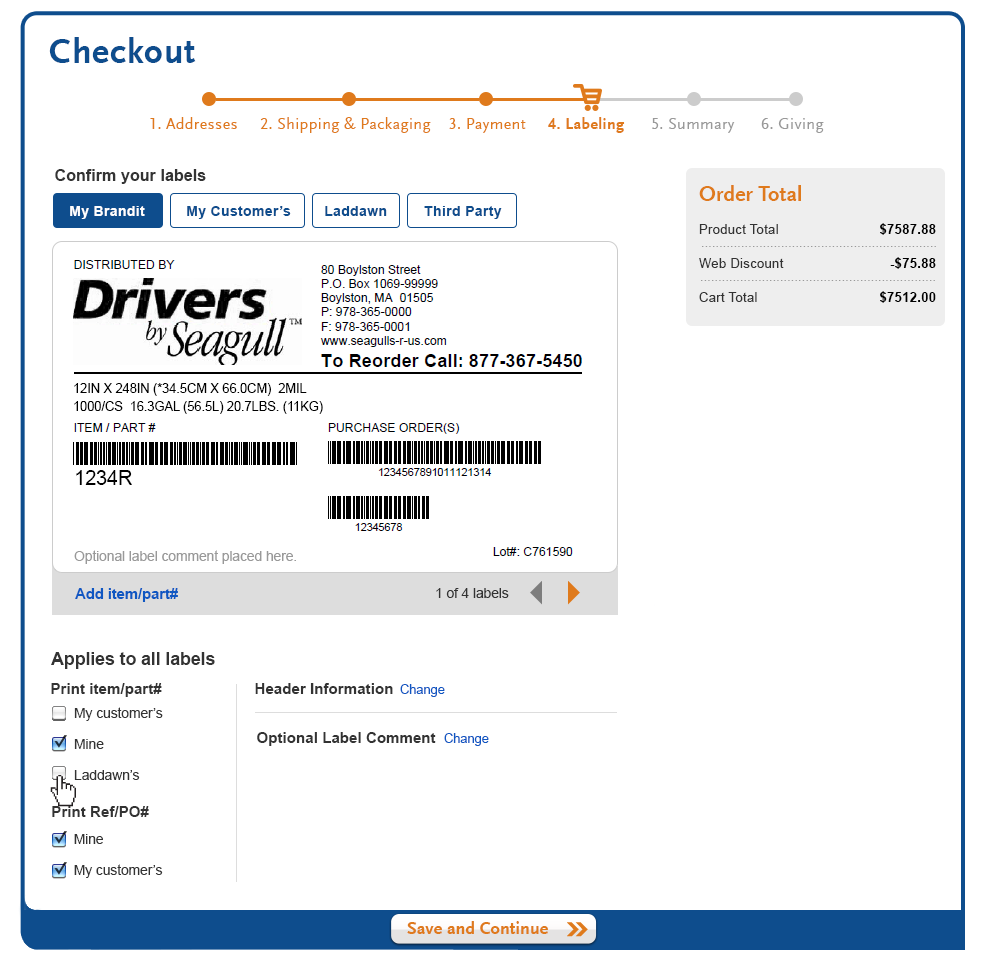
Continuing our existing scenario, the user has Distributor's labels (Drivers by Seagull) and Laddawn's part number's set to print (check boxes selected) for the entire order. The user now has a customer's part number available for this item. The user would like this to print and goes to select the "My customer's" check box (Design 3). He gets a warning (Design 3b) telling him to un-check one of the other 2 (Mine or Laddawn's, Design 3c).
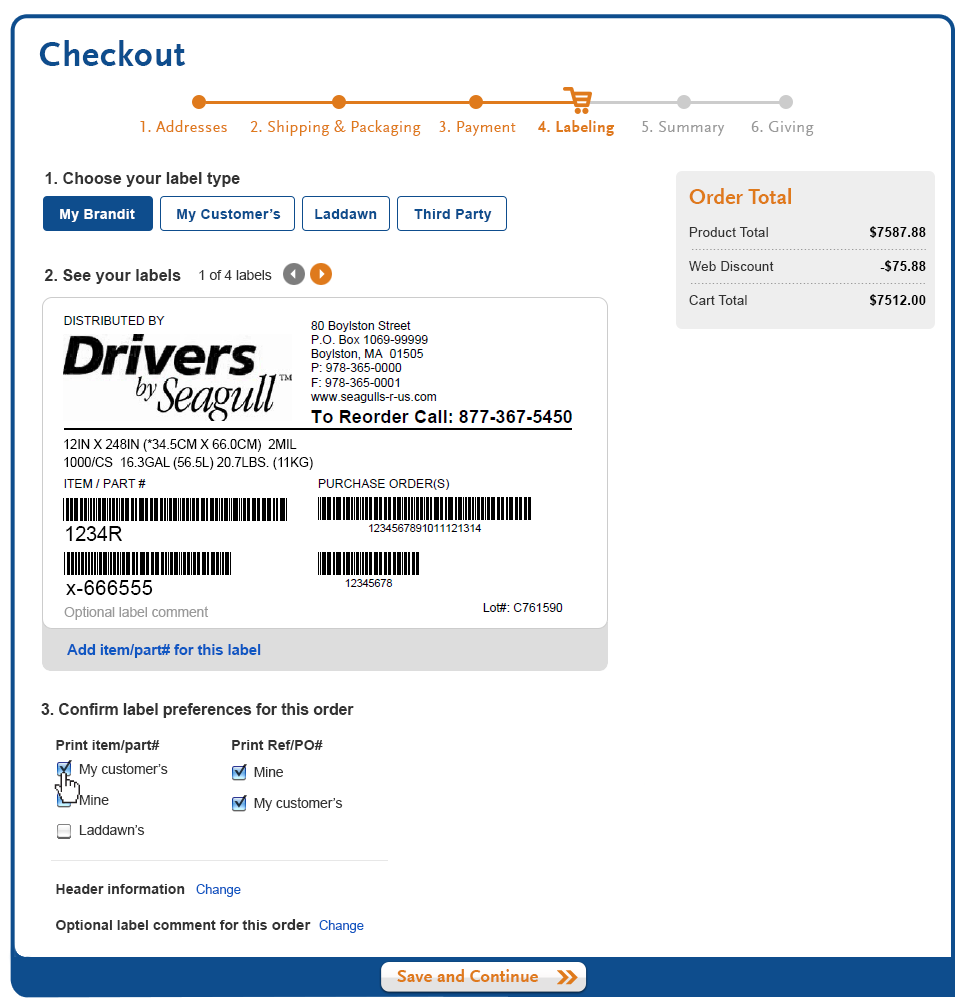
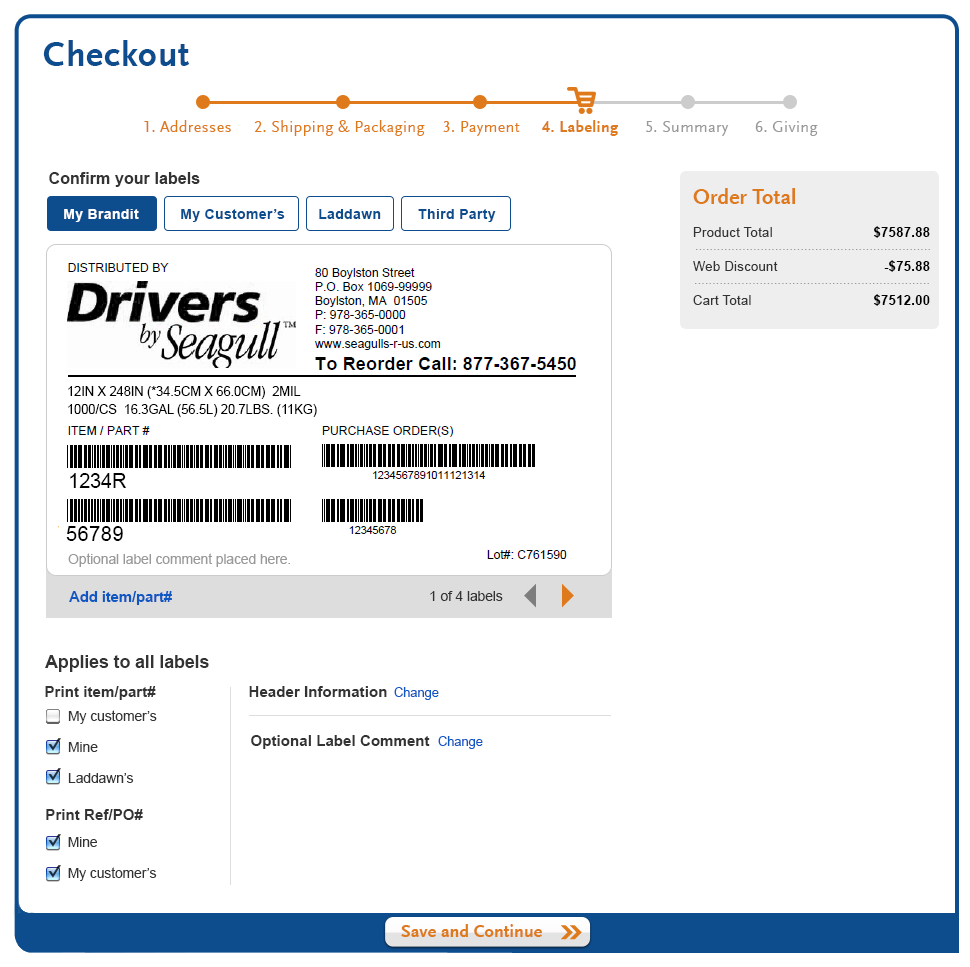
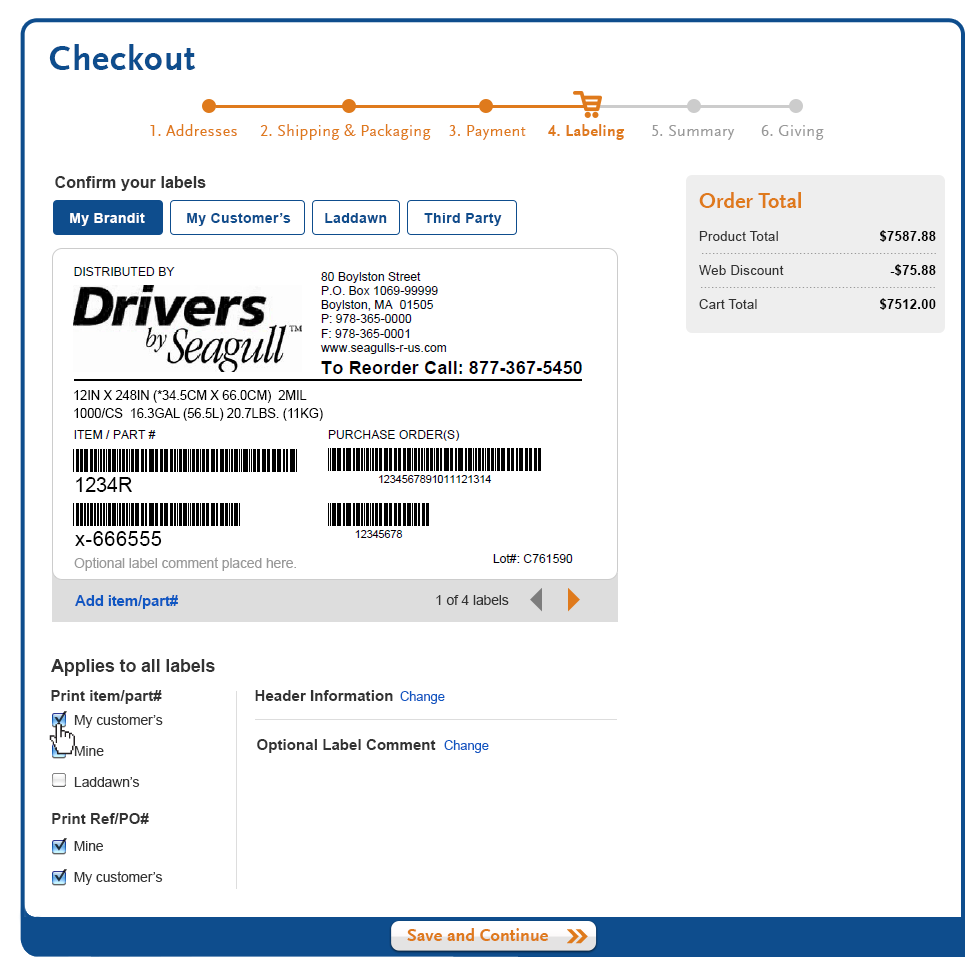
The user now selects "My Customers" and the new part number displays. (Design 3d) Open question? Does the part number/description just appear in the open area of which ever part number gets shut off?
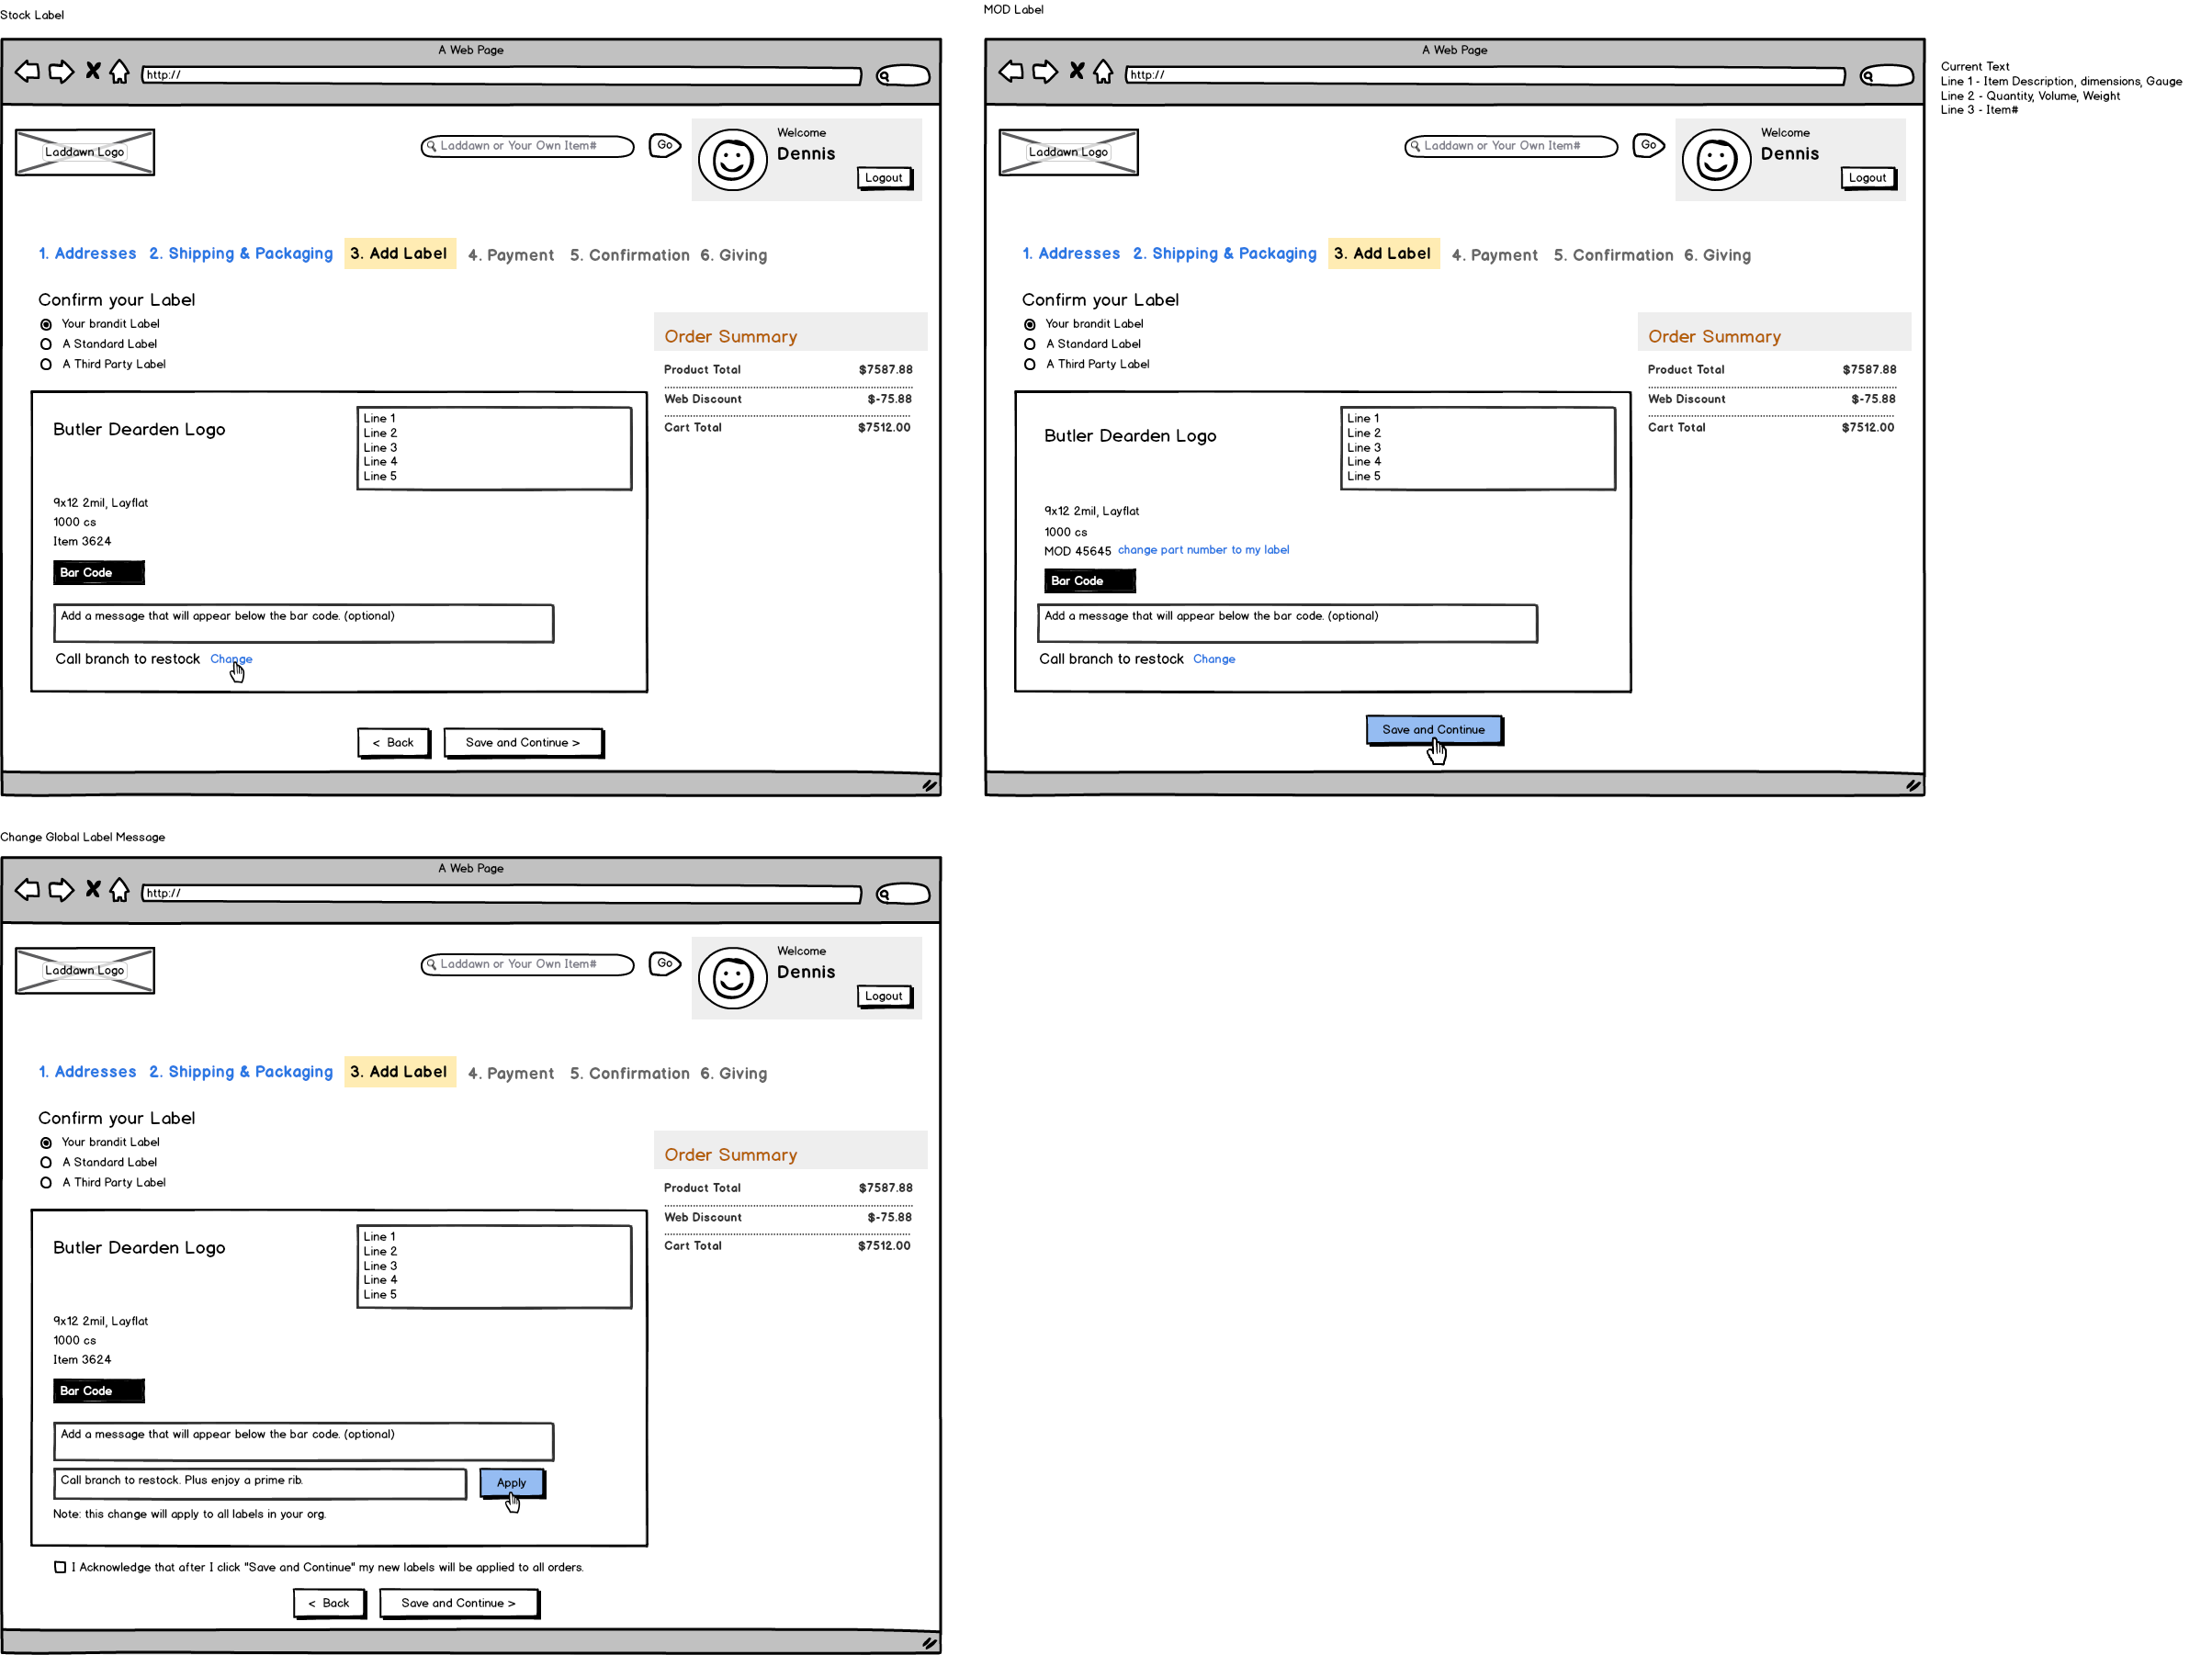
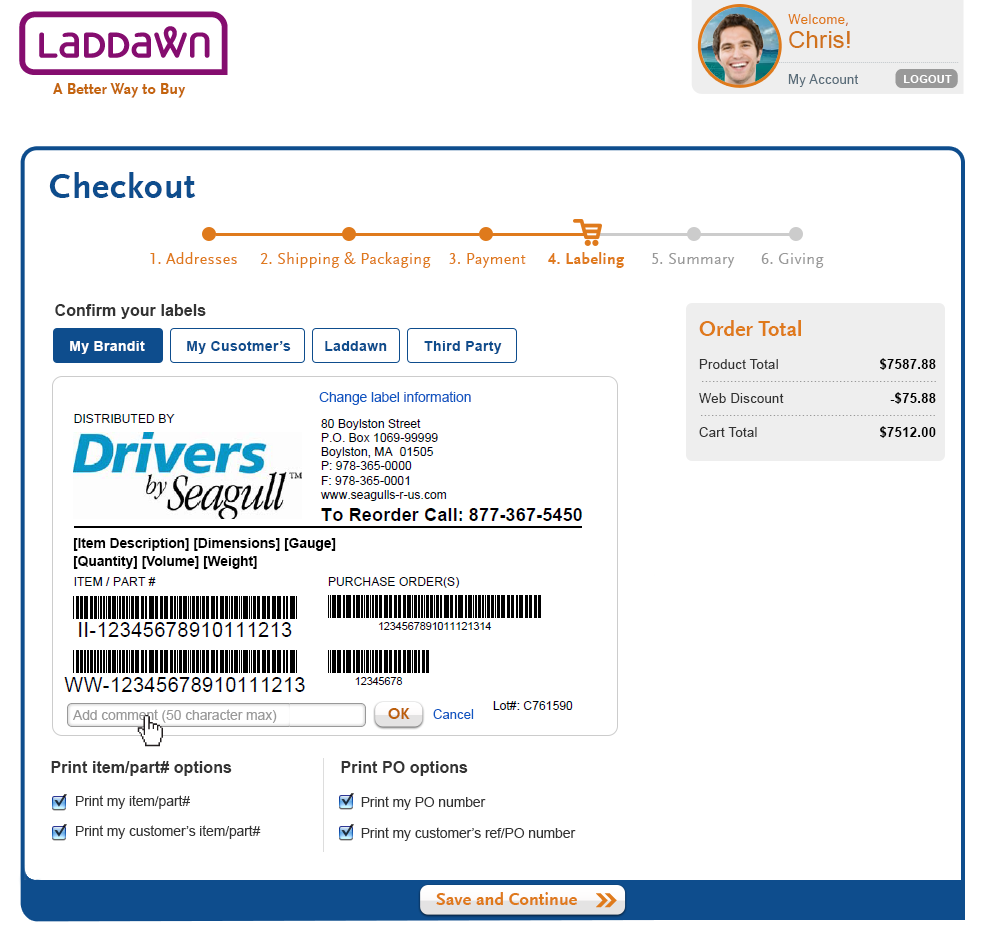
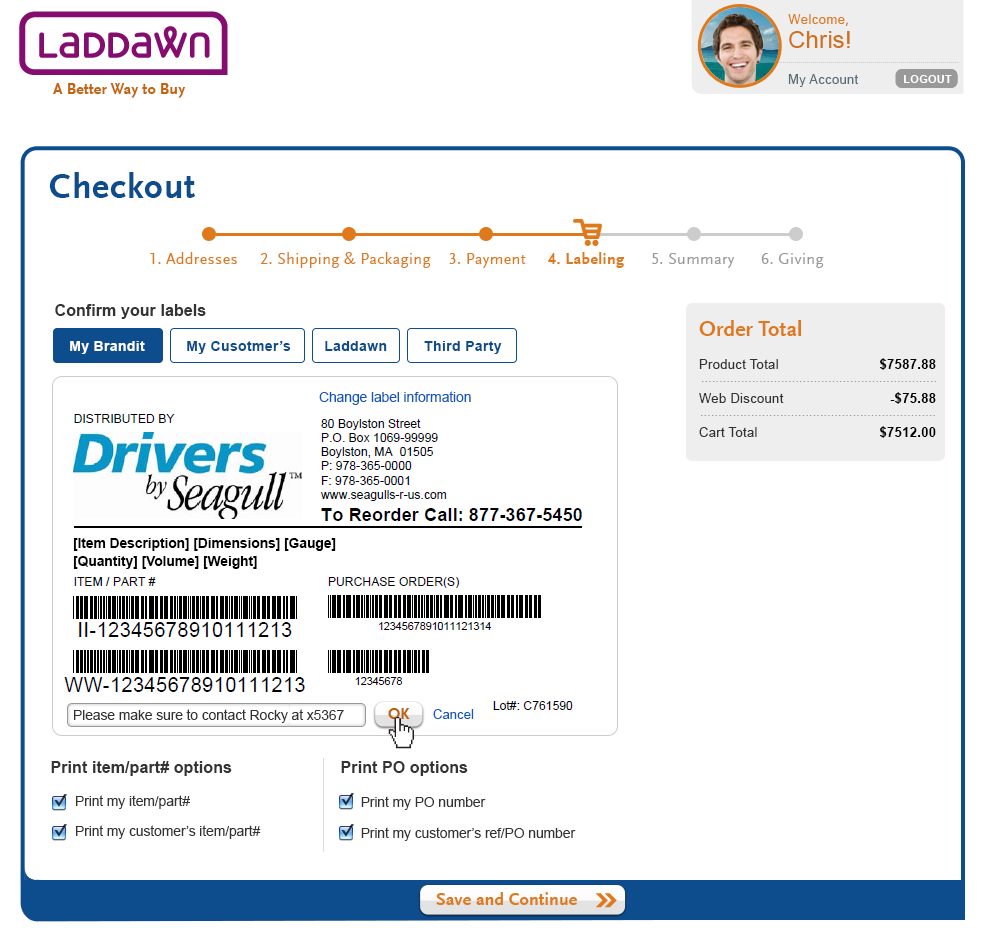
Adding a label comment
Clicking the "change" link next to the "Optional label comment for this order" will cause a form field to display in place of the link (Design 3h) along with a disabled "OK" and a cancel link. Once content has been entered into the entry field the "OK" button becomes active. The user can commit content by clicking "OK.". Once "OK" has been clicked, the data will display and a "Change" link will display to the right side of the content.
Interaction note: a user must complete a single task before being allowed to start a 2nd. Example: a user opens add optional address, then he cannot open "Add a label comment" until user clicks "OK" or cancel link.
| Design 3 - part numbers available | Design 3b | Design 3c |
|---|---|---|
 |  |  |
| Design 3D | Design 3e - Change Header Info | Design 3f - Change header info |
 |  |  |
| Design 3g - Change Header Info | ||
 |